The final version of the plugin code shown in this article is on Github.
You can read the second post in the series here.
What is Gutenberg, the abridged version
“Gutenberg” is the codename of the project that meant to replace the default WordPress post editor, the TinyMCE based one, with a new, more modern and more flexible one.
From a development point of view there are number of changes: a shift toward Javascript, the change of paradigm from an editor and meta-boxes to the unifying concept of “blocks” and other significant changes; find out more about Gutenberg heading to the introductory page dedicated to it or run a quick search on the web.
Many words have been written in support or against the project, that I’m leaving out, to concentrate on the exciting part: can I develop a simple Gutenberg block with behavior-driven development techniques?
The blocks I’m developing
Since I’ve got still to write a single line of code in the context of Gutenberg, I start with something that seems simple enough: an estimated reading time block. Or rather: two blocks.
The first block should allow a post author to drop the block anywhere in the post content to display, the estimated remaining reading time from that point forward. E.g., if a post requires 4 minutes to read the block should display “Reading time about 4 minutes” when placed at the beginning of the post and “Reading time about 2 minutes” when positioned halfway through the post.
The second block should provide the reading time of a post section, attached to a header element it should provide the estimated reading time of that header tree. E.g., a post could have an estimated reading time of 6 minutes and 3 roughly equal sub-sections each starting with an h3 header: attaching the block to one of those h3 headers should display “Reading time about 2 minutes”.
It’s important to note this is what I would like to accomplish: I have no idea if I can do this or if it’s possible at all; I will reconsider my objectives along the way.
What I would like to touch
I’m way more accustomed to PHP testing than I am with Javascript testing and development; I would enjoy writing a bunch of Javascript tests alongside the PHP ones.
My BDD/TDD tool of choice is Codeception and, with it, wp-browser; what I love about Codeception is how it ties and manages all the types of testing in one* API: I would like to see if Javascript testing can be part of that flow.
I also would like to learn to work with Gutenberg the only way I can learn: with tests.
The VVV based development environment
My day-to-day local environment is a mix of Valet, Local by Flywheel, Docker containers and Virtual box managed virtual machines: the perk of being a freelancer is that I get to work with many different technology stacks and approaches.
For repeatability and ease of use I will work, for this project, using VVV: it’s the “official” way of developing on WordPress, the one that gets the Core-team support and pretty much host-machine independent; the installation guide can be found here.
I will detail, in this article and the next ones, any significant change I make to the default machine and try to provide as much information as I can about what I’m doing.
Installing VVV
I’m not going into the details of how to install VVV are detailed in the installation guide.
I’ve made no changes to the default installation, and I’m working, for the plugin, in the www/wordpress-one folder.
These folder contents are served, locally, at http://one.wordpress.test/; that’s the suggested installation to use to develop plugins and themes, and I stick with that.
A quick check at the site address, http://one.wordpress.test/, and at the site admin area, http://one.wordpress.test/wp-admin/ confirm everything is working as intended.
To access the admin area I can use admin as username and password as the password.
Creating the plugin
As listed on the VVV installation welcome and management screen VVV provides a fully-contained and virtualized environment not only to serve WordPress but, especially, to develop on it. From a terminal window, I can change directory, on my host machine, to the ~/vagrant-local folder and log into the VVV virtual machine with the command vagrant ssh to look around and see what commands are available.
My first check is to see if Composer is available system-wide:
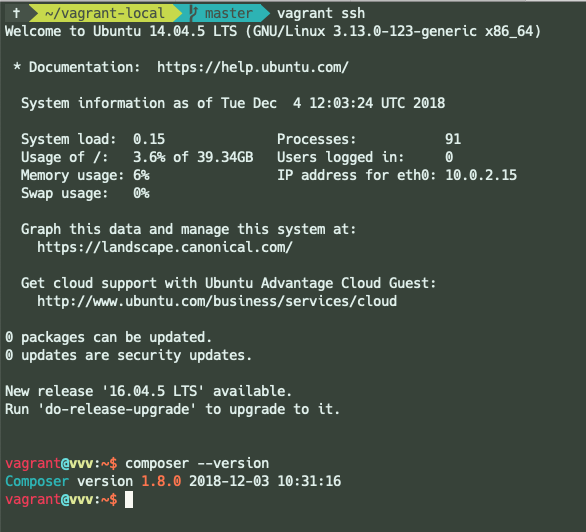
It most definitely is, and it is, furthermore, the latest version as I’m writing.
I use Composer daily and know how detrimental to my flow waiting minutes for it to finish can be; I install the hirak/prestissimo Composer plugin globally immediately to ease the pain:
composer global require hirak/prestissimo
Now that’s done it’s time to set up my plugin in the correct folder.
Since I’m focusing on the creation of a Gutenberg block, I’m using the create-guten-block CLI tool.
I change directory to the WordPress installation plugins folder and run the create-guten-block scaffold command:
cd /srv/www/wordpress-one/public_html/wp-content/plugins
npx create-guten-block readin-time-blocks
The command above downloads, creates and sets up all the files required to develop and register a Gutenberg block.
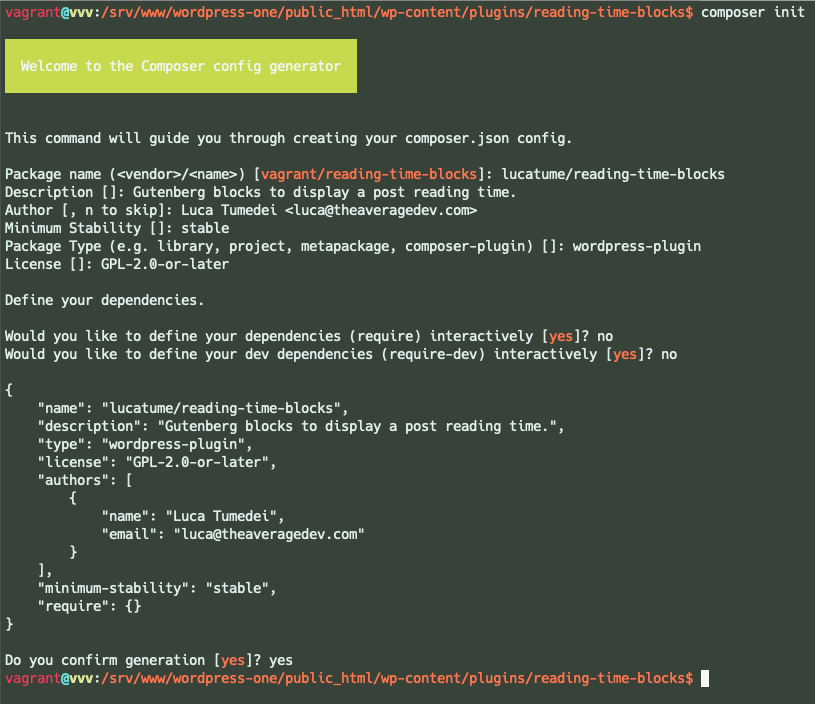
I then change directory to the freshly created plugin folder (reading-time-blocks) and initialize a Composer project in it answering some questions:
cd reading-time-blocks
composer init
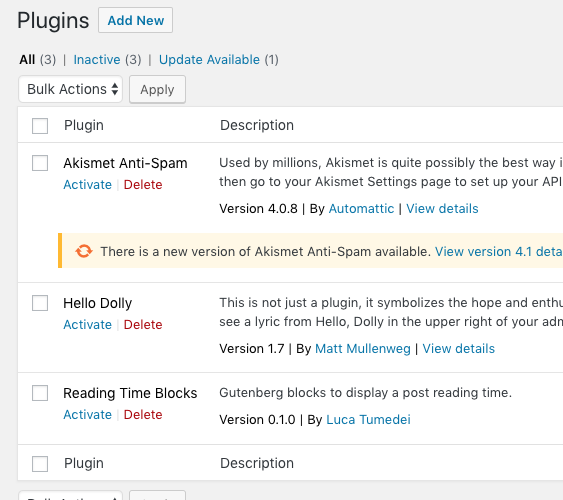
I’ve not immediately installed the plugin development dependencies to do that in a second moment; I’ve slightly modified the main plugin file (reading-time-blocks/plugn.php) and make sure the plugin is showing up as expected in the plugins management screen at http://one.wordpress.test/wp-admin/plugins.php:
The plugin code is accessible, on my host machine, at ~/vagrant-local/www/wordpress-one/public_html/wp-content/plugins/reading-time-blocks; that’s where I’ll work anytime I need to modify the plugin code.
So far these are the main plugin file, reading-time-blocks/plugin.php, contents:
<?php
/*
Plugin Name: Reading Time Blocks
Description: Gutenberg blocks to display a post reading time.
Version: 0.1.0
Author: Luca Tumedei
Author URI: http://theaveragedev.local
Text Domain: reading-blocks
 */

require_once __DIR__ . '/src/init.php';
The final line makes sure to initialize and register the block, with WordPress and Gutenberg.
I build the block code using npm and wait for the Javascript assets to compile correctly:
npm run-script build
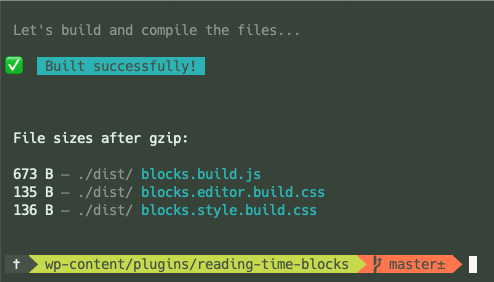
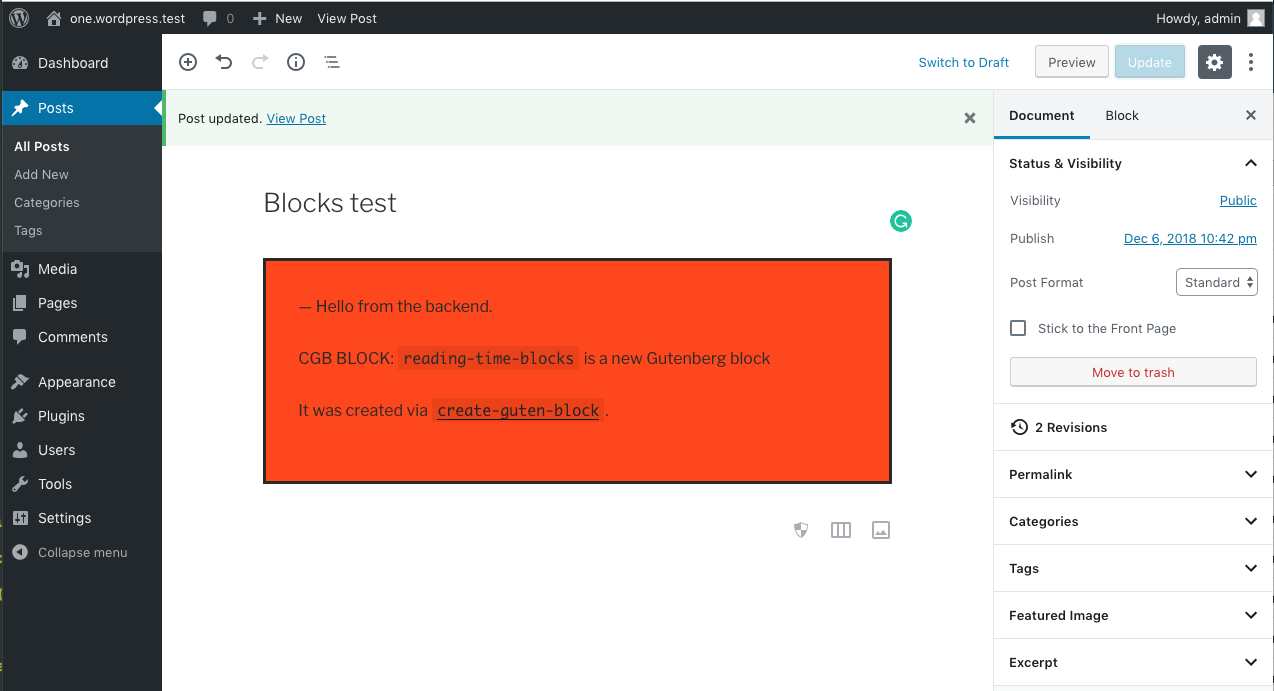
After having activated the plugin, I can add and see the block is displaying correctly, in its initial form, in the post editor:
Time to set up the testing environment.
Installing Codeception and wp-browser
Now that I’ve got a hold of where the plugin lives it’s time to pull the plugin dependencies.
I install wp-browser as a development dependency:
composer require --dev lucatume/wp-browser:^2.2
After a bit, the installation is done, and wp-browser is ready in the vendor folder relatively to the plugin folder.
To ease my flow, I want to make sure I can run any binary installed in the vendor/bin folder without having to prepend vendor/bin every time, e.g. codecept to run Codeception in place of vendor/bin/codecept.
To do that I make a temporary change to the PATH, the list of folders the shell looks up to find commands, and a permanent one:
export PATH=vendor/bin:$PATH
sudo echo 'export PATH=vendor/bin:$PATH' >> ~/.bashrc
While the effect of the first command is reset each time I log out of the virtual machine the second command permanently modifies it, no matter how many times I log out and back in.
To make sure all is working I run codecept --version:

It’s now time to bootstrap the wp-browser installation, from the VVV shell I run the command:
codecept init wpbrowser
And answer the questions about my development setup:
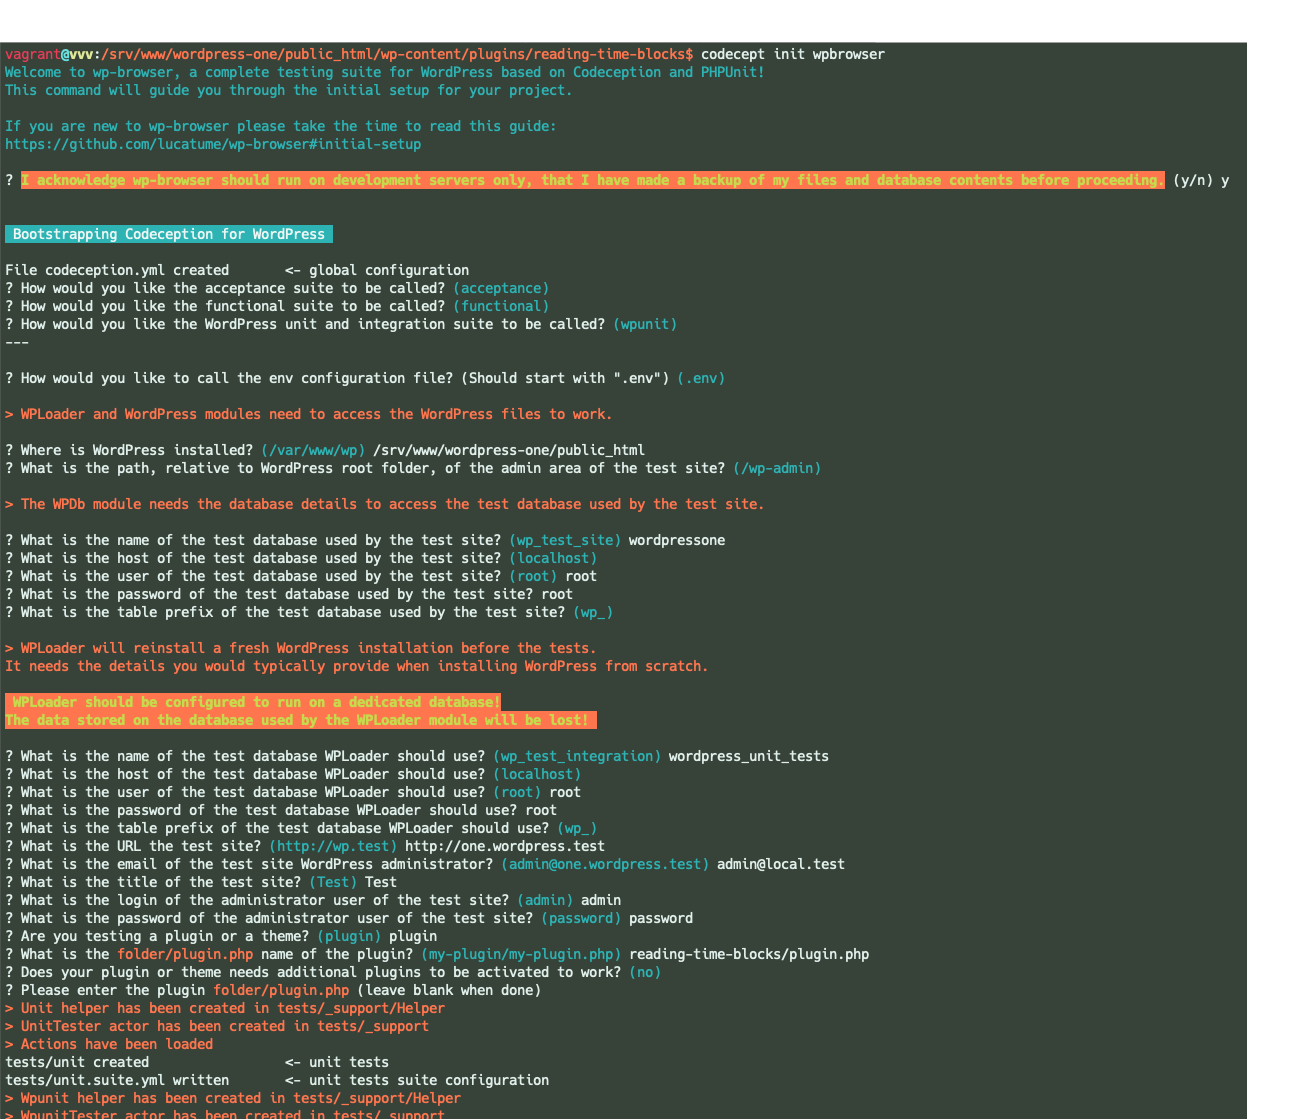
Working from inside VVV offers many advantages, among those:
- uniform WordPress path:
/srv/www/wordpress-one/public_html - localhost database at
localhost, userroot, passwordroot - the databases I need for both the acceptance and functional tests and the integration tests exist already; the first is the same database that’s serving the site at
http://one.wordpress.test,wordpressone; the second is the database that’s pre-installed to run WordPress tests,wordpress_unit_tets.
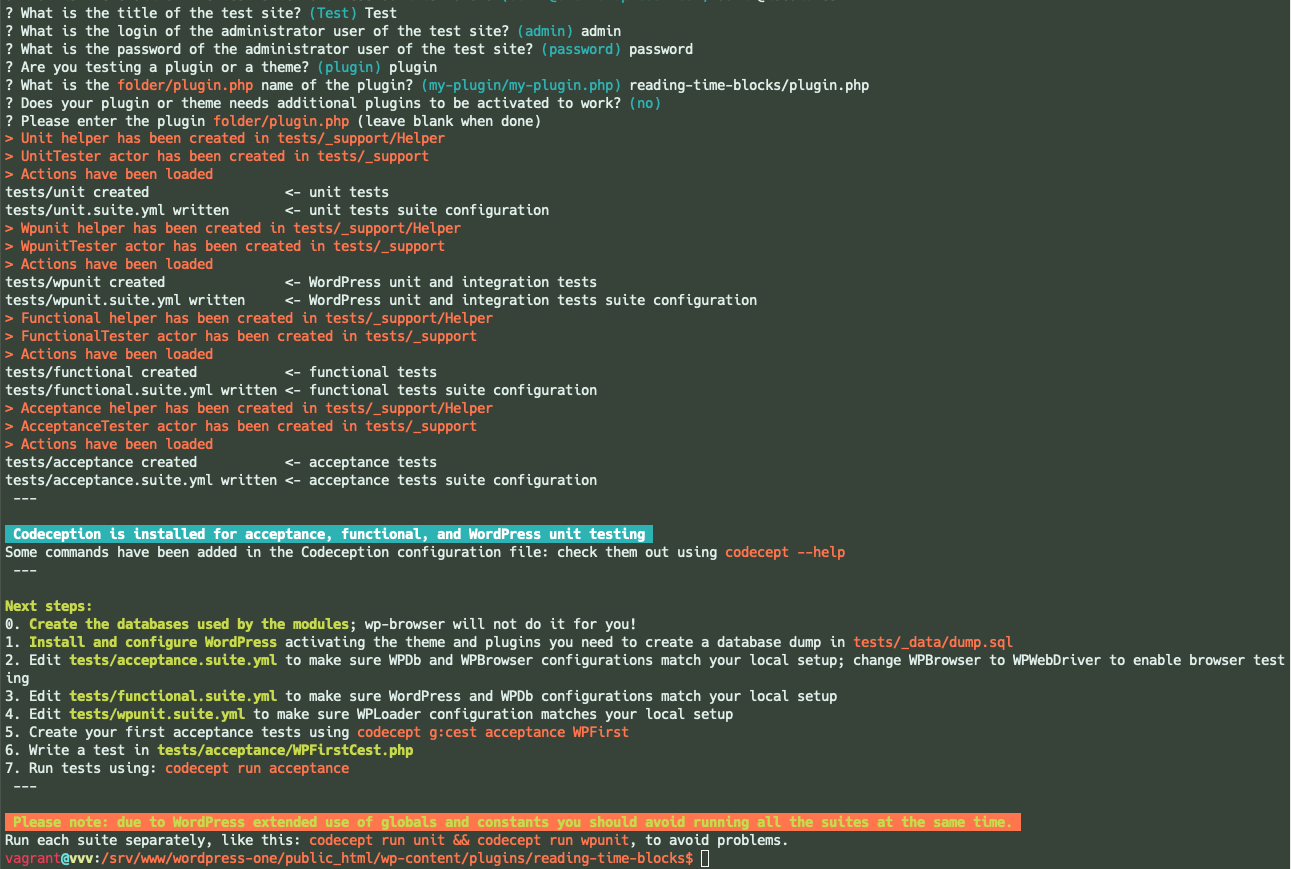
The final step is creating the starting database fixture, a database dump, that will be used in the acceptance and functional tests.
Again using WP-CLI, from the plugin root folder in the VVV shell, I remove all content from the site, activate the reading-time-blocks plugin and export a SQL dump in the plugin tests/_data/ folder:
wp plugin deactivate --all
wp plugin activate reading-time-blocks
wp site empty --yes
wp db export tests/_data/dump.sql

Speeding up the acceptance and functional tests
While wp-browser would be ready to run now, I prefer leveraging VVV built-in mysql binary to import the SQL dump in tests.
The PHP-based solution is portable and flexible but slower; the SQL dump I use as starting fixture in acceptance and functional tests, the one I generated during the previous step before, is so small not to make a real difference but good habits are good.
Furthermore, there is no need for URL replacement, VVV provides the mysql command, and it makes sense to speed up the tests as much as I can.
I’ve updated the tests/acceptance.suite.yml and tests/functional.suite.yml files modules.config.WPDb configuration adding the populator parameter :
populator: 'mysql -u $user $dbname < tests/_data/dump.sql'
This parameter tells Codeception that, when in need of populating the database, it should not use PHP functions but the mysql CLI command as detailed.
The entry is taken straight from Codeception documentation, and VVV environment setup makes it a copy-and-paste well done.
Installing Chrome and Chromedriver
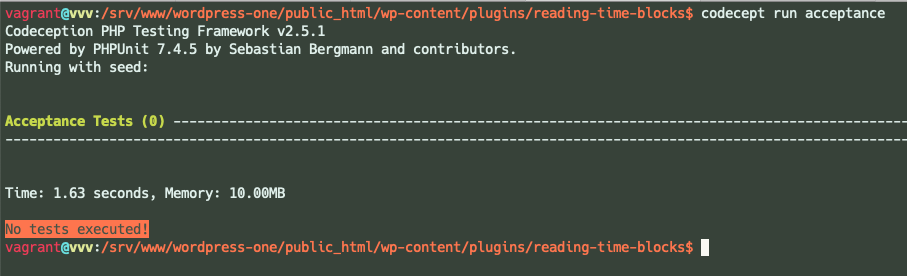
The quick test run confirms that wp-browser is correctly set up.
Since Gutenberg, and with it the blocks my plugin adds, are managed and rendered via Javascript the WPBrowser module that is currently acting a “browser” in acceptance and functional tests does not provide much value in acceptance tests as it does not support Javascript.
To run the tests, I replace it with the WpWebDriver module but that, in turn, requires a “real” browser to be “driven”.
In straightforward terms, the test code I write in Codeception will be translated, by WpWebDriver in commands for a browser driver.
The browser driver will then drive a real browser according to those commands.
In my experience, the Chrome browser and its related driver, Chromedriver, provide a smooth, reliable and fast solution for tests and that’s what I’ll set up the acceptance tests to use.
VVV is built from Ubuntu 14.04 and I’ve followed this blog post instructions with some modifications.
Here is the full list of the commands I ran to have Chrome and Chromedriver correctly installed in VVV.
First, install the required dependencies:
sudo apt-get install libxss1 libappindicator1 libindicator7 xvfb sudo libgconf-2-4 unzip -y
Download and install Chrome:
wget https://dl.google.com/linux/direct/google-chrome-stable_current_amd64.deb
sudo dpkg -i google-chrome*.deb
sudo apt-get install -f
Download, install and make Chromedriver executable:
wget -N https://chromedriver.storage.googleapis.com/2.44/chromedriver_linux64.zip
unzip chromedriver_linux64.zip
chmod +x chromedriver
sudo mv -f chromedriver /usr/local/share/chromedriver
sudo ln -s /usr/local/share/chromedriver /usr/local/bin/chromedriver
sudo ln -s /usr/local/share/chromedriver /usr/bin/chromedriver
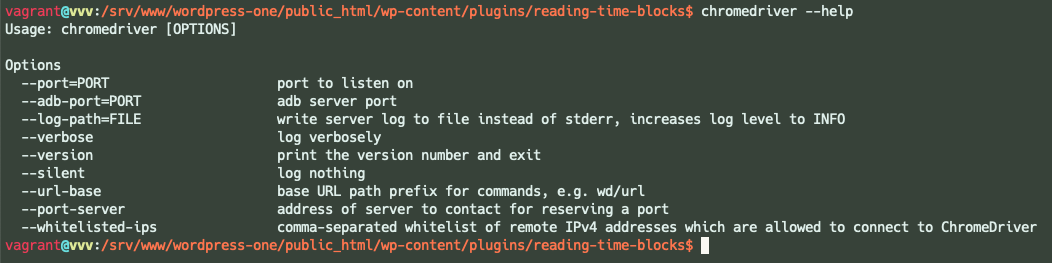
Finally, check the chromedriver command is correctly installed by running:
chromedriver --version
Mind that, in the above commands, I’m downloading the version 2.44 of Chromedriver which is the latest one at the time of this writing; the correct version to run (depending from the installed version of Chrome) might be more recent. Now that I’ve installed Chromedriver I open a new terminal window, from my host machine, and run vagrant ssh to open a new terminal in VVV. I need to do this as the chromedriver binary must run in the foreground to work and will “capture” the terminal window that’s running it.
I start Chromedriver in this new terminal and make sure it’s listening for connections on port 9515 (the default port):
chromedriver --url-base=/wd/hub
Chromedriver waits for “driving instructions” to be sent from the WpWebDriver module and will then, in turn, drive a headless (no UI) instance of Chrome through the test steps.
I’ve updated the tests/acceptance.suite.yml configuration file to use the WpWebDriver module and drive an headless version of Chrome:
actor: AcceptanceTester
modules:
    enabled:
        - WPDb
        - WPWebDriver
        - \Helper\Acceptance
    config:
        WPDb:
            dsn: 'mysql:host=%TEST_SITE_DB_HOST%;dbname=%TEST_SITE_DB_NAME%'
            user: '%TEST_SITE_DB_USER%'
            password: '%TEST_SITE_DB_PASSWORD%'
            dump: 'tests/_data/dump.sql'
            #import the dump before the tests; this means the test site database will be repopulated before the tests.
            populate: true
            # re-import the dump between tests; this means the test site database will be repopulated between the tests.
            cleanup: true
            populator: 'mysql -u $user $dbname < tests/_data/dump.sql'
            waitlock: 0
            url: '%TEST_SITE_WP_URL%'
            urlReplacement: true #replace the hardcoded dump URL with the one above
            tablePrefix: '%TEST_SITE_TABLE_PREFIX%'
        WPWebDriver:
            url: '%TEST_SITE_WP_URL%'
            adminUsername: '%TEST_SITE_ADMIN_USERNAME%'
            adminPassword: '%TEST_SITE_ADMIN_PASSWORD%'
            adminPath: '%TEST_SITE_WP_ADMIN_PATH%'
            browser: chrome
            port: 9515
            window_size: false
            capabilities:
                chromeOptions:
                    args: ["--headless", "--disable-gpu", "--proxy-server='direct://'", "--proxy-bypass-list=*"]
To make sure Chromedriver is working as intended I’ve generated a simple test scenario:
codecept g:cept ChromeDriver
Added some simple steps to it:
<?php
$I = new AcceptanceTester( $scenario );
$I->wantTo( 'use Chrome for acceptance tests' );

$I->havePostInDatabase( [ 'post_title' => 'Test post', 'post_status' => 'publish' ] );

$I->amOnPage( '/' );

$I->see( 'Test post' );
I run it from the terminal to make sure it works correctly (notice the tab dedicated to Chromedriver above):

The test passes and I’m ready to get down to real development.