What follows is my opinion about what being a "developer" means, today.
This post is partly a letter to my developer friend worried (whoever they are) about the future and partly a moment of self-reflection.
Code is not where the value is
The artifact of development is code (adding, removing, updating it), but the value of development is responsibility.
This is not an original idea of mine: I've read it multiple times over the years, but AI is making that concept more relevant than ever.
I'm aware the artifact (code) is often a representation of my responsibility, but I'm valued on the responsibility I'm willing to take for that artifact; whether I did it myself
or I've inherited it from others.
I will be valued and compensated for taking over and supporting a code base I've not created myself (thus no artifact on my side), but
I will not be valued and compensated for the code I've provided without taking responsibility for it.
This distinction of where the value lies helped me navigate my relationship with open-source: I built the code, why am I not being compensated for it?
Because I'm not taking responsibility for it. If it breaks I might assist you, but I might do that in times and modes that do not align with your needs.
The frequent move of open-source developers that offer premium support or make a service out of open-source software boils down to the promise or responsibility.
This is better understood with a metaphor: cooking is open-source by definition.
Recipes are widely known and documented and anyone can potentially reproduce them. There are "secret" recipes here and there, but they rarely stay secret for long. Recipes can be reverse-engineered by the willing, much the same way software can.
What clients pay for in a restaurant is not the secret recipe: it's the responsibility the establishment is willing to take for providing good food, prepared in acceptable conditions with properly sourced ingredients, served in a pleasant and safe environment.
The most common and widely expected form of this responsibility in software is maintenance: supporting, fixing, and evolving code over time.
Responsibility requires ownership
For any developer to feel they can take responsibility for some code, they have to feel a measure of ownership.
Ownership is knowledge but also attachment and experience.
A developer taking on a new piece of code they like will power through their lack of knowledge
and experience because they feel "connected" to the code, they feel they "own" the code even if this sense of ownership is not grounded in deep knowledge.
A developer that knows a piece of code like the back of their hand is more likely to think they "own" the code (ownership need not be exclusive).
AI provides incredible tools to rapidly acquire knowledge about a piece of code, and that might build and increase the sense of ownership in
a developer if that is the end they pursue.
But AI also enables a rhythm of consumption and production of code that risks building confidence ("I'm good", "I fixed the issue", "I added the feature") without building
ownership and, thus, responsibility.
Confidence can be grounded in results, but results might not be grounded in ownership.
"AI did it" is a phrase becoming all too frequent, but it's not new: I think its previous incarnation was "I've found it on Stack Overflow".
Without ownership, there cannot be real responsibility.
Without responsibility, there is no value.
Walking the line
Humans, to this day are the only species that can take responsibility for code in a meaningful way, have a negativity bias.
As developers we share stories about that time the server crashed, a bug killed thousands of sites or we involuntarily introduced a DDOS vulnerability in our code.
Negative experiences weigh on us, thus shape us, more than the positive ones.
Boredom, struggle, breaking one's head on a problem, hours in a debugging session tracking an obscure defect are all tolerable, negative experiences that shape
our confidence and ownership of what we're working on.
When AI paves over that daily collection of smaller, digestible, healthy negative experiences we're trading ownership for time.
My process is to take a moment to think about whether I should be building ownership or not, which translates into whether I'm willing or expected to take responsibility for it.
If the answer is no, then I will happily unleash AI to get to a solution as quickly as I can.
If the answer is yes, then I ask myself in what way the tools I have, including AI but not limited to it, allow me to build ownership.
Then I make a plan and use the tools to build that ownership.
It's not a solved problem; it's a daily choice.
Before AI I had no other option but to build ownership.
Now it takes thinking and intention, but where the value lies has not changed: responsibility.
Suggested reading
"Code Simplicity" by Max Kanat-Alexander is a great book that explores the long-term cost of software and the role maintenance plays in it.
On the purpose of testing
Looking back at my work on wp-browser and my blogging activity, there is an objective I've been chasing for some time: seamless testing of WordPress projects moving across levels of testing without limits.
(In case you're wondering: yes, I've used the word "seamless" in the sentence above to suggest and recall AI, but AI is not writing this post).
What does "moving across levels of testing without limits" mean, for me?
It means I do not care about what level of testing something is supposed to be (unit, integration, functional, end-to-end, you-name-it), I care about testing as many things as I can with as little code as possible with the fastest possible test.
As a freelance helping companies set up and use automated tests, I've come to believe the major obstacle to adoption is dogmatism.
I've seen developers stress more about whether the test they would like to write qualifies as a proper "unit test" than they did about introducing a potential security risk or planning a new feature.
"Which test to write first?", "Is this an integration test or a unit test?", "Can we write integration tests without writing unit tests?", "What should this suite be called?".
In my view, the purpose of testing is shipping with confidence and in time.
Anything that undermines that confidence (or avoids it from forming in the first place, more on that later) is not helpful and should be avoided.
As the author and maintainer of a testing solution for WordPress projects I would like to think I'm part of the solution.
The current documentation mentions testing levels here and there, but for the purpose of explaining what modules go typically together in what type of tests.
The previous documentation contained a detailed break down of testing levels. I think I was part of the problem then, my first step for companies willing to adopt automated testing was a theoretical introduction.
Today my first question is: what is the thing that breaks the most? We'll find the best testing tool for the job.
The best tool for the job
I have to admit that, for some time, it was really difficult to accept that Codeception plus wp-browser could not always be the best tool for the testing job.
As testing and testing technologies became more and more approachable, it became harder and harder to ignore alternative solutions like Playwright and defend the argument that "everything you can do with Playwright, you can do with the WPWebDriver module".
Technically, yes. Efficiently and practically? Not so much.
The API offered by Playwright beats the one provided by the WPWebDriver module. In no small measure because Playwright speaks the same language (JavaScript or TypeScript) of the thing under test: a website.
And I'm not even talking about how good the code-generation feature is.
But (preparing the ground for the big idea here), there is still something missing.
Playwright is a browser automation tool. While advanced and powerful, in the context of testing WordPress projects (or PHP projects for that matter) the fine-grained control of state is missing.
How to load a database dump between tests? So far I've done it using page objects or hooks using WP-CLI or other home-brew scripts. It works, but it's clunky and requires knowledge of the project and the testing harness.
And things get even more complicated when trying to manipulate files like uploads.
I think the convenience of using a testing solution like wp-browser or Playwright is that I have to learn a moderately complex setup once, and then can just port that knowledge over to other projects without having to re-learn the project specific solution again.
Furthermore documenting a standard solution is easier; the dissemination and sharing of knowledge helped by mere numbers.
What advantage does the WPWebDriver module have over Playwright, then?
Its friends.
I've rarely seen a testing project setup that would not use, together with the WPWebDriver module the WPDb and the WPFilesystem one.
Those modules, together with the WPWebDriver one, collaborate in the building of a suite that allows writing test code like this:
// Method provided by the WPDb module.
$postId = $I->havePostInDatabase([
    'post_title' => 'Hello world!',
    'post_status' => 'publish'
]);

$this->amOnPage('/index.php?p=' . $postId);

$I->waitForText('Hello world!');
Adding Playwright to the team
I guess I gave it away with the post title, but the big idea here is giving Playwright friends.
Specifically, the suite wp-browser modules.
I want to be able to write this Playwright spec file:
// Import a `test` function that will use the `teamplay` fixture.
// The `expect` function is re-exported from @playwright/test.
import { test, expect } from '../teamplay';

// Write a test that will use the `teamplay` fixture.
// Aliased to `I` for show-off value.
test('view published post', async ({ page, teamplay: I }) => {
    // Create post in database via the WPDb module.
    const postId = await I.havePostInDatabase({
      post_title: 'Hello world!',
      post_status: 'publish'
    });

    // The rest of the test uses standard Playwright functions.

    await page.goto(`/index.php?p=${postId}`);

    await expect(page.getByText('Hello world!')).toBeVisible();
});
I think the example contains all the interesting components of the solution I'm envisioning: Playwright can invoke PHP methods provided by the Codeception and wp-browser modules.
How? Requests to a server that will execute them and return their value.
The use of the teamplay fixture makes it possible to add hooks to the test execution life-cycle and invoke the suite before/after methods correctly.
The concept is pretty simple, but I'm sure it will be a valley of tears down the road.
Building with AI
The first piece of code I've written for the Teamplay feature is not code, is a specification file.
I use AI (Claude Code specifically) in my day-to-day work but have never used it to build a full feature.
My hesitation is not about AI capability, it's about my personal knowledge and understanding of what is being done and why.
I think, as many, that writing is a thinking tool and code-writing is not different in my opinion.
If AI writes all the code, then it will be no different from what I have to do when dropping into a new client codebase: look around and understand approaches and, more generally, the theory of it.
I can still get that theory building phase by being the architect and "orchestrator" of the solution, I think.
So, what is a specification file?
It's a file that contains the "what" and "why" of the feature, not the "how".
Tools like Claude Code have a "plan mode" that signals to the tool and model powering it that it's not the time to write or update code, it's the time to think about what to write.
Still, plan mode is about how the code to accomplish a task should be written.
Claude Code will ask questions about glaringly missing information ("You talk about a server, what is the server URL?"), but will take most implementation decisions based on common practice (emphasis on "common" not "best", it's a statistical model after all).
In plan mode, the "what" and "why" are relegated to the prompt, too easily confused in the case of larger features, with the "how".
It's common to find sentences like these in the same prompt:
- "Add support for XYZ feature" - what
- "End all comments in a full-stop and run code sniffer on the generated files" - how
A specification file can be reviewed by another AI instance to find further issues.
A specification file is a better way to recover information when working with AI across sessions and possible failures.
Claude Code, as many other similar tools, provide prompt history, but to me it's akin to searching my bash history looking for that command I did run at a point. I prefer having a script.
A specification file can be used later, much later, to better infer differences between iterations.
Finally, based on the specification file multiple implementation plans can be written.
How do I write a specification file?
Manually, at first.
Then I will use AI to review it and ask questions about it until we agree all the required information is there.
This phase takes a lot of research and experimentation (not exclusively done by AI) to converge on a document detailing purpose and "ergonomics" of the thing to build.
By "ergonomics" I mean the kind of code or tool I want to end up with.
I use Claude Code without any MCPs or plugins to keep star-gazing at a minimum.
Writing a specification is deep work and the more time passes between my thinking phases (i.e. when I need to answer the AI questions, review and approve changes or research something) the higher the chance to "get out of the zone".
I use a prompt like this one to write a specification file and be able to resume between sessions:
{description of idea or reference to a brainstorm file}

Start by creating a spec file called `spec-<feature_name>.md` in the current working directory if it doesn’t exist already.
If a spec file already exists, then read it before asking any question.
Your objective is not to write an implementation plan (the “how”), but to write a specification file (the “what” and “why").
Your task is to spot potential issues and missing information in my idea and ask me questions until you think not a single piece of information is missing and the spec file is complete.
When you spot an issue or missing information, ask me a single question, evaluate the answer, and keep asking me questions until you think no information is missing.
Always follow this procedure:
- ask me a single question
- evaluate the answer
- ask the next question if required
Every time you have new information, update the spec file with the new information.
The prompt is saved as keyboard shortcut so I can use the prompt everywhere I can type, not just in Claude Code.
I know about Claude Code slash commands and plugins, but they still concur in the building of a prompt at the end; my preference is to be extremely deterministic about what that prompt contains instead of relying on the model to use the right tool at the right time.
Also, I like building my own tools and prompts are tools in this new, wild age of AI.
Building in public and next steps
For my learning and accountability, I will build this new feature in public; documenting my work and findings through posts.
As anything I chronicle here, it might crash and burn.
You can find the first commit of this new feature here and it is, of course, just a specification file.
Over the last few posts (first post, last post) I've been trying to port features from the llama.vim to an IntelliJ plugin called "completamente" (a word-play on the Italian translation of "completely" that, literally, means "complete mind").
It was not as easy as I had expected.
As the saying goes: "third time is the charm". Well: it took me four rewrites to get it right enough to have something working as expected.
Theory building and disposable code
Amazed, as many others are, at the powers of LLMs, I've first tried a vim/neovim to Kotlin (the language used in the Intellij platform) translation. The code was building correctly and running, but there would always be another issue making it, in practice, unusable.
The second and third rewrite (the supposedly charmed one) did not go much better. What went wrong?
The better answer I can provide is from this article that will then link to this paper. In essence, at least this is my takeaway, programming is about "building a theory" of the program under construction; a knowledge of the desired behaviour, constraints and boundaries.
Any translation I attempted was a "mechanical" act of sorts where the LLM (Claude Code in my case) would write a correct translation of the original plugin with little to no understanding of the starting and ending constraints and boundaries.
Until I took the time to understand those in the context of the starting code (the llama.vim plugin) and the destination code (my IntelliJ plugin), any further attempt was bound to fail.
In this phase of understanding and theory building I've used what I think is one of the most powerful features of LLMs: the ability to create a theory in my mind about something and then create some disposable code, a testing harness, to check out whether my theory is correct or wrong.
While the temptation would be to ask the LLM to explain the code, my experience is that it will provide incorrect credible answers even when getting it completely wrong. The "you're absolutely right" meme exists for a reason and it happens frequently enough to undermine my confidence in that system for anything more complex than function bodies.
In a concurrent and asynchronous context like that of the plugin I'm building, I prefer spending my time testing my wrong theories with exact tools rather than reviewing maybe incorrect theories with no tools.
An example tool is one I've created to help me understand how the original context-building function works (fim_ctx_local) and what its outputs are given some inputs.
The tool is composed of a bash script that will run a vim script that will make requests to a python mock server that will log the results in a json file.
The files used in the vim script tests (an empty one and a large one) are the same that will be used by the plugin tests to ensure the kotlin translation of the code is correct and works correctly.
The files make for a moderately interesting read, but the part that is valuable for me is how quickly I could validate theories about what the original plugin was doing without getting bogged down in the vim plugin syntax.
Coroutines and their cancellations
The first part of the theory I was missing was about how the IntelliJ platform uses a suggestion provider like the plugin I've developed:
- it calls the
InlineCompletionProvider::getSuggestion() method in a coroutine
- if the user waits for the completion provider to come up with a suggestion the coroutine will complete
- else the coroutine will be canceled when the user types a new character
Understanding this, again using epochs of disposable code and the mock server, allowed me to understand what is cancelled and when.
I will stop here since my understanding of Kotlin and the IntelliJ platform is limited and I do not want to pretend to know more.
The takeaway is that coroutines have scopes and any task started in a coroutine scope would be canceled when, and if, the coroutine is canceled.
The need for a different scope to run the background jobs into (extra input processing, fim requests, caching et cetera) required understanding a second part of how the IntelliJ platform works.
Services everywhere
Most of the platform hooks and extension points require the registration of a "service".
The main service of my plugin is a InlineCompletionProvider service:
package com.github.lucatume.completamente.services

class Completion() : InlineCompletionProvider {}
That is registered in the plugin configuration file:
<!-- Plugin Configuration File. Read more: https://plugins.jetbrains.com/docs/intellij/plugin-configuration-file.html -->
<idea-plugin>
    <id>com.github.lucatume.completamente</id>
    <name>completamente</name>
    <vendor>lucatume</vendor>

    <depends>com.intellij.modules.platform</depends>

    <extensions defaultExtensionNs="com.intellij">
        <inline.completion.provider implementation="com.github.lucatume.completamente.services.Completion"/>
        <postStartupActivity implementation="com.github.lucatume.completamente.startup.CompletamenteStartupActivity"/>
    </extensions>
</idea-plugin>
As a PHP developer I'm reminded of the contribution of the Java ecosystem (Kotlin is based on Java) to the PHP one anytime I use a "service locator" or a "service provider".
The second service, the CompletamenteStartupActivity one, is the one that will bootstrap all the other services that need to connect to other entry points for the plugin operations (monitor cursor movement, file operations et cetera).
Notable is the BackgroundJobs one:
package com.github.lucatume.completamente.services

@Service(Service.Level.PROJECT)
class BackgroundJobs : CoroutineScope, Disposable {}
Its only responsibility is providing and managing a coroutine scope to other services.
An example use in the getSuggestionPure() function implementation:
suspend fun getSuggestionPure(
    services: Services,
    request: InlineCompletionRequest,
    prev: List<String>?,
    indentLast: Int,
    lastFile: String?,
    lastLine: Int?
): SuggestionResult {
    val currentFile = request.editor.virtualFile.canonicalPath
    val currentLine = request.editor.caretModel.logicalPosition.line
    val extraContext = services.chunksRingBuffer.getRingChunks()

    // [...]

    // Create a channel for coroutines to communicate with the cache
    val channel = Channel<String>()
    services.backgroundJobs.runWithDebounce({
        val llmSuggestion = fim(
            localContext,
            extraContext,
            services.settings,
            services.cache,
            services.httpClient
        )

        // Send the completion back to the main thread.
        channel.send(llmSuggestion ?: "")
    }, 100)

    val suggestion: String = channel.receive()

    val rendered = fimRender(localContext, suggestion, request)

    // [...]

    // This is the closest we can get to the llama.vim code:
    //  if s:hint_shown
    //      call llama#fim(l:pos_x, l:pos_y, v:true, s:fim_data['content'], v:true)
    //  endif
    // The suggestion is going to be shown to the user: start a speculative request for the code as if the user
    // had accepted the suggestion.
    services.backgroundJobs.runWithDebounce({
        val speculativeContext = buildLocalContext(
            request = request,
            settings = services.settings,
            prev = updatedPrev,
            indentLast = localContext.indent
        )

        // Start a speculative request to get the completion as if the user had accepted the suggestion.
        fim(
            speculativeContext,
            extraContext,
            services.settings,
            services.cache,
            services.httpClient
        )
    }, 100)

    return SuggestionResult(
        StringSuggestion(rendered ?: ""),
        updatedPrev,
        updatedIndentLast
    )
}
Functional(ish) core, imperative shell
I was inspired by this article to try and write the plugin using a "functional core, imperative shell".
I had to make concessions to the service-based architecture of the IntelliJ platform, but am pretty satisfied with how the code turned out.
An example of the imperative shell is the main completion service:
package com.github.lucatume.completamente.services

class Completion() : InlineCompletionProvider {
    override suspend fun getSuggestion(request: InlineCompletionRequest): InlineCompletionSuggestion {
        val project: Project = request.editor.project ?: return StringSuggestion("")

        val services = Services(
            settings = ApplicationManager.getApplication().getService(Settings::class.java),
            cache = project.service<SuggestionCache>(),
            chunksRingBuffer = project.service<ChunksRingBuffer>(),
            backgroundJobs = project.service<BackgroundJobs>(),
            httpClient = project.service<HttpClient>().getHttpClient()
        )

        val suggestionResult: SuggestionResult = getSuggestionPure(
            services,
            request,
            prev,
            indentLast,
            lastFile,
            lastLine
        )

        lastFile = request.editor.virtualFile.canonicalPath
        lastLine = request.editor.caretModel.logicalPosition.line

        prev = suggestionResult.prev
        indentLast = suggestionResult.indentLast

        return suggestionResult.suggestion
    }
}
The service will then call the getSuggestionPure function passing it the required services.
Is the getSuggestionPure() function "pure", then? Hell, no.
There are file reads, cache lookups and request to the LLM server, but all its dependencies are injected and they can be easily mocked in tests. Personally that is all I care about: a function is "pure enough" to be tested easily.
Closing thoughts
This was a fun and useful project.
I knew nothing about Kotlin before and I know little now, but at least have a better understanding of how I can extend the family of IDEs I work with everyday (the IntelliJ ones).
I now have a copilot solution that runs locally and that, on my pretty beefy Mac, can provide inline suggestions based on the Qwen 30b model with very low latency. For someone using "airplane mode" all too often, this is a boon.
Finally, it was a good lesson in architecture understanding and planning and how an LLM can help in that phase.
The need to write pure (in the functional sense of the word) code in ecosystems more and more integrated with non-deterministic LLMs (same input, different output) has forced a number of architectural decisions it was fun to make and reflect on.
I've pushed the code online in all its imperfect glory, no support for it and no plan to release it on the IntelliJ marketplace yet, but who knows.
Once I'm confident I've squashed all the major issues I will give it some thought.
Last time I added debouncing and request avoidance to the plugin. It's not firing a request on every keystroke anymore, but I've been noticing something odd when using it for real work.
The completions work, technically. The LLM responds, the plugin receives the response, and it shows up in the editor. But the formatting is often off. Extra newlines where they shouldn't be. Weird spacing. Sometimes the completion just stops mid-word.
I've been treating the response from llama.cpp as a simple string: just grab the content field from the JSON and show it. That worked for basic "hello world" testing, but now that I'm using it for real code, the cracks are showing.
Of course, llama.vim plugin handling of the response is way more refined than my current naïve approach.
How llama.vim processes responses
Looking at the llama.vim code, I found the s:fim_render function where the completion response is processed.
Here's the relevant part:
" get the generated suggestion
if l:can_accept
    let l:response = json_decode(l:raw)

    for l:part in split(get(l:response, 'content', ''), "\n", 1)
        call add(l:content, l:part)
    endfor

    " remove trailing new lines
    while len(l:content) > 0 && l:content[-1] == ""
        call remove(l:content, -1)
    endwhile
The third parameter 1 in split() means "keep empty strings". So if the content is "foo\n\nbar", it becomes ["foo", "", "bar"] instead of ["foo", "bar"].
So llama.vim splits on newlines (keeping empty lines), then removes trailing empty lines. I'm just taking the raw string and showing it directly.
Implementing the parsing logic
I added a parseContent function to handle this in Service.kt:
/**
 * Parse the content from the LLM response.
 * Splits on newlines and removes trailing empty lines, matching llama.vim behavior.
 */
private fun parseContent(rawContent: String): String {
    if (rawContent.isEmpty()) {
        return ""
    }

    // Split on newlines, keeping empty strings (matching llama.vim's split with keepempty=1)
    val lines = rawContent.split("\n")

    // Remove trailing empty lines
    val trimmedLines = lines.dropLastWhile { it.isEmpty() }

    return trimmedLines.joinToString("\n")
}
Kotlin's split() already keeps empty strings by default, so that part was simpler than Vim. The dropLastWhile { it.isEmpty() } removes trailing empty lines, matching llama.vim's while loop.
Then I updated the response handling to use this function:
is HttpResponse.Success -> {
    val jsonResponse = JSONObject(response.body)
    val rawContent = jsonResponse.optString("content", "")
    logger.info("Got completion: $rawContent")

    // Parse the content: split on newlines and remove trailing empty lines
    parseContent(rawContent)
}
Testing the parsing
I wrote four tests to cover the different edge cases:
fun testContentParsingRemovesTrailingNewlines() {
    // Configure server to return content with trailing newlines
    server.respondWith(200, """{"content": "function hello() {\n    return 'world';\n}\n\n\n"}""")

    val request = makeInlineCompletionRequest("text-file.txt", 0, 0)
    val service = Service()

    val suggestion: InlineCompletionSuggestion = runBlocking { service.getSuggestion(request) }
    val variants: List<InlineCompletionVariant> = runBlocking { suggestion.getVariants() }

    // Should remove trailing newlines
    assertEquals("function hello() {\n    return 'world';\n}", runBlocking { variants.first().elements.first().text })
}
The other tests cover: preserving empty lines in the middle, handling empty strings, and handling content that's only newlines.
Once all tests pass, I can move to the next part of the work.
How llama.vim caches completions
With the parsing fixed, I'm curious about the caching system I saw mentioned earlier. My plugin fires a lot of requests, even with debouncing. Finding out how the llama.vim plugin avoids re-requesting completions for the the same context and porting that logic over to my plugins would be a big win.
llama.vim uses two global variables for caching:
let g:cache_data = {}
let g:cache_lru_order = []
cache_data is a dictionary mapping hash keys to raw JSON responses. cache_lru_order is an array tracking which keys were used most recently, for eviction when the cache fills up. The cache has a configurable size limit (max_cache_keys, default 250). When it's full, the least recently used entry gets evicted.
The interesting part is how llama.vim generates cache keys. In the llama#fim function it computes multiple hashes for the same request:
let l:hashes = []

call add(l:hashes, sha256(l:prefix . l:middle . 'Î' . l:suffix))

let l:prefix_trim = l:prefix
for i in range(3)
    let l:prefix_trim = substitute(l:prefix_trim, '^[^\n]*\n', '', '')
    if empty(l:prefix_trim)
        break
    endif

    call add(l:hashes, sha256(l:prefix_trim . l:middle . 'Î' . l:suffix))
endfor
The primary hash is sha256(prefix + middle + 'Î' + suffix). The 'Î' character is just a separator. But then it creates up to 3 additional hashes by progressively removing the first line from the prefix. The comment explains why: "this happens when we have scrolled down a bit from where the original generation was done". So if I get a completion at line 100, then scroll down to line 103, the plugin can still use that cached completion by trimming the first 3 lines.
Before making an HTTP request, llama.vim checks if any of the computed hashes are already cached:
if a:use_cache
    for l:hash in l:hashes
        if s:cache_get(l:hash) != v:null
            return
        endif
    endfor
endif
If there's a cache hit, it returns immediately without making a request. When a response comes back from the server, it's stored in the cache with all the computed hashes:
" put the response in the cache
for l:hash in a:hashes
    call s:cache_insert(l:hash, l:raw)
endfor
So one response gets stored under multiple keys. This increases cache hit rates when scrolling through code.
The most interesting code is in s:fim_try_hint. If there's no exact cache hit, it searches backwards through the last 128 characters to find a "nearby" cached completion:
for i in range(128)
    let l:removed = l:pm[-(1 + i):]
    let l:ctx_new = l:pm[:-(2 + i)] . 'Î' . l:suffix

    let l:hash_new = sha256(l:ctx_new)
    let l:response_cached = s:cache_get(l:hash_new)
    if l:response_cached != v:null
        if l:response_cached == ""
            continue
        endif

        let l:response = json_decode(l:response_cached)
        if l:response['content'][0:i] !=# l:removed
            continue
        endif

        let l:response['content'] = l:response['content'][i + 1:]
        if len(l:response['content']) > 0
            " ... use this cached response
        endif
    endif
endfor
This loops through positions 1-128 characters back. For each position, it generates the hash for that earlier context, checks if there's a cached response, verifies that the first i characters of the cached response match what was typed since then, trims those characters off, and uses the remaining text as the completion.
Example: Say I'm at "function hello" and the cache has a completion for "function h" that returns "ello() { ... }". When I check position 4 back, I find that cached response, verify "ello" matches what I typed, trim it off, and show "() { ... }" as the completion. This is very efficient (and what really surprised me in the plugin when I used it): I get instant completions while typing, even though the LLM hasn't seen my latest keystrokes yet.
Implementing the cache
I created a ResponseCache class to handle the caching logic:
class ResponseCache(private val maxSize: Int = 250) {
    private val cacheData = mutableMapOf<String, String>()
    private val lruOrder = mutableListOf<String>()

    fun generateHash(prefix: String, middle: String, suffix: String): String {
        val combined = prefix + middle + "Î" + suffix
        val digest = MessageDigest.getInstance("SHA-256")
        val hashBytes = digest.digest(combined.toByteArray())
        return hashBytes.joinToString("") { "%02x".format(it) }
    }

    fun generateHashes(prefix: String, middle: String, suffix: String): List<String> {
        val hashes = mutableListOf<String>()

        // Primary hash
        hashes.add(generateHash(prefix, middle, suffix))

        // Additional hashes with trimmed prefix (up to 3 lines removed)
        var prefixTrim = prefix
        for (i in 0 until 3) {
            val newlineIndex = prefixTrim.indexOf('\n')
            if (newlineIndex == -1) break

            prefixTrim = prefixTrim.substring(newlineIndex + 1)
            if (prefixTrim.isEmpty()) break

            hashes.add(generateHash(prefixTrim, middle, suffix))
        }

        return hashes
    }
}
I realized something important while implementing this. The llama.vim plugin stores full JSON responses in its cache because it needs to manipulate the JSON structure: it decodes cached responses, modifies the content field, and re-encodes them as JSON for rendering purposes (metrics, times et cetera). This makes sense for vim's rendering system.
In the context of my IntelliJ plugin implementation, though, I'm not doing any of that JSON manipulation. When I find a cache hit (exact or partial), I work directly with the content string. I never need to re-encode anything as JSON.
This means I can store only the parsed content string, not the full JSON response. When I cache a completion, I extract the content field from the JSON response, parse it (remove trailing newlines), and store only that final string. This is more memory-efficient and simpler: no need to store and parse JSON on every cache hit.
In Service.getSuggestion(), I check the cache before making a request:
// Check cache for exact match (including trimmed prefix variations)
val hashes = cache.generateHashes(prefix, middle, suffix)
for (hash in hashes) {
    val cachedContent = cache.get(hash)
    if (cachedContent != null) {
        logger.info("Cache hit for hash: $hash")
        return StringSuggestion(cachedContent)
    }
}
And when a response comes back from the server, I store it with all the generated hashes:
is HttpResponse.Success -> {
    // Parse the JSON response and extract the content
    val jsonResponse = JSONObject(response.body)
    val rawContent = jsonResponse.optString("content", "")
    logger.info("Got completion: $rawContent")

    // Parse the content: split on newlines and remove trailing empty lines
    val parsedContent = parseContent(rawContent)

    // Store only the parsed content string in cache with all hashes
    for (hash in hashes) {
        cache.put(hash, parsedContent)
    }

    parsedContent
}
I wrote three tests to verify the caching works:
/**
 * This test verifies that the cache prevents duplicate HTTP requests
 * when the same context is requested twice.
 */
fun testCachingAvoidsSecondRequest() {
    var requestCount = 0

    server.captureRequestAndRespond(200, """{"content": "cached completion"}""") { _, _, _ ->
        requestCount++
    }

    val request = makeInlineCompletionRequest("text-file.txt", 0, 0)
    val service = Service()

    // First request - should hit the server
    runBlocking { service.getSuggestion(request) }
    assertEquals(1, requestCount)

    // Second request with same context - should use cache
    runBlocking { service.getSuggestion(request) }
    assertEquals(1, requestCount) // Still 1
}
Implementing partial cache hits
With exact caching working, there's still one more optimization from llama.vim I want to implement: partial cache hits.
The idea is simple but clever. And not mine!
Say I'm at "function h" and the LLM returns "ello() { }". I accept the suggestion and keep typing.
Now I'm at "function hello": instead of making a new request, I can look back in my recent keystrokes, find that I have a cached response for "function h" that starts with "ello", trim off the "ello" I already typed, and show "() { }" as the completion.
Looking at llama.vim's s:fim_try_hint function, it searches backwards through the last 128 characters.
For each position, it checks if there's a cached response for that earlier context and whether the first N characters of that response match what was typed since then. If so, it trims those characters off and uses the rest.
Once implemented into the Service.kt file, the findPartialCacheHit function is ready to be used:
// Check for partial cache hit by searching backwards through recent keystrokes
val partialHit = findPartialCacheHit(prefix, middle, suffix)
if (partialHit != null) {
    logger.info("Partial cache hit found")
    return StringSuggestion(partialHit)
}
I added this right after the exact cache check fails and before making an HTTP request. This way the plugin tries exact matches first (fastest), then partial matches (fast), then falls back to the LLM (slow).
Testing partial cache hits
I updated the tests to properly simulate the typing scenario and test the partial cache hit logic:
fun testPartialCacheHit() {
    var requestCount = 0
    val service = Service()

    // First request at "function h" - this will be cached
    myFixture.configureByText("test.txt", "function h")
    myFixture.editor.caretModel.moveToOffset(10)

    server.captureRequestAndRespond(200, """{"content": "ello() { }"}""") { _, _, _ ->
        requestCount++
    }

    val request1 = makeInlineCompletionRequest("test.txt", 10, 10)
    val suggestion1 = runBlocking { service.getSuggestion(request1) }
    val variants1 = runBlocking { suggestion1.getVariants() }
    assertEquals("ello() { }", runBlocking { variants1.first().elements.first().text })
    assertEquals(1, requestCount)

    // Now simulate typing "ello" by reconfiguring with the full text
    myFixture.configureByText("test.txt", "function hello")
    myFixture.editor.caretModel.moveToOffset(14)

    // This should NOT make a new HTTP request - it should use partial cache hit
    val request2 = makeInlineCompletionRequest("test.txt", 14, 14)
    val suggestion2 = runBlocking { service.getSuggestion(request2) }
    val variants2 = runBlocking { suggestion2.getVariants() }

    // Should return "() { }" (the cached "ello() { }" with "ello" trimmed off)
    assertEquals("() { }", runBlocking { variants2.first().elements.first().text })
    assertEquals(1, requestCount) // Still only 1 request - proves partial hit worked
}
I'm using configureByText() to set up the complete document state for each request, rather than trying to simulate typing with type(), for the simple reason that I could not make it work reliably.
The test verifies that only one HTTP request is made, proving the second completion came from the partial cache hit.
What's next
The plugin now has all the core features: debouncing, request avoidance, response parsing, full caching with LRU eviction, and partial cache hits. It's starting to feel responsive when coding.
Next time I'll tackle the extra input, i.e. the next bright idea of the llama.vim plugin, that provides context for the completions.
Last time I got request cancellation working with Ktor. The plugin no longer hangs when I type quickly, which is good. But there's a more fundamental problem: the plugin is still firing a request on every single keystroke.
That's wasteful. If I type "function hello" quickly, I don't need eight separate requests - I need one request after I pause. And sometimes I don't need a request at all.
Time to add debouncing and request avoidance, following what llama.vim does.
Digging into llama.vim's logic
I opened up the llama.vim file to see how the original plugin handles this. There are two main strategies:
Debouncing: When a request is already in flight and a new one comes in, don't send it immediately.
Instead, start a 100ms timer. If another request comes in before the timer fires, restart the timer. This means requests only go out after a brief pause in typing.
Here's the relevant code from llama.vim (lines 555-563):
" avoid sending repeated requests too fast
if s:current_job != v:null
    if s:timer_fim != -1
        call timer_stop(s:timer_fim)
        let s:timer_fim = -1
    endif

    let s:timer_fim = timer_start(100, {-> llama#fim(a:pos_x, a:pos_y, v:true, a:prev, a:use_cache)})
    return
endif
Request avoidance: Don't send requests in certain situations where completions are unlikely to be useful. The main one is max_line_suffix - if the cursor has too much text to the right of it, skip the request. The default is 8 characters.
From llama.vim lines 579-581:
if a:is_auto && len(l:ctx_local['line_cur_suffix']) > g:llama_config.max_line_suffix
    return
endif
Makes sense. If I'm in the middle of a line with "function hello(name) {" and my cursor is after "hello", I probably don't want a completion suggestion. I'm editing existing code, not writing new code.
Let's start with the easier piece: adding the maxLineSuffix setting.
Using maxLineSuffix to skip requests
After adding a new setting to set the maxLineSuffix value (I'm not showing that anymore since it's boring and looks like 1995 table-based HTML).
Now I need to implement the actual logic that checks the line suffix length and skips the request if it's too long.
I added this check in Service.getSuggestion() right after calculating currentLine, before any of the expensive prefix/suffix extraction or HTTP request logic:
// Skip request if line suffix is too long
val currentLineEndOffset = document.getLineEndOffset(currentLine)
if (currentLineEndOffset - offset > state.maxLineSuffix) {
    return StringSuggestion("")
}
Simple calculation: the number of characters from the cursor to the end of the line. If it exceeds maxLineSuffix, return an empty suggestion without making a request.
This broke one of the existing tests because it was positioned at the start of a line with 23 characters - way over the default limit of 8. I updated the test setup to set maxLineSuffix = 1000 so existing tests aren't affected by this new behavior.
Then I added a specific test to verify the logic works:
fun testMaxLineSuffixSkipsRequest() {
    // Set maxLineSuffix to 5 characters
    val settings = Settings.getInstance()
    settings.state.maxLineSuffix = 5

    // Configure server - but we expect NO request to be made
    var requestMade = false
    server.captureRequestAndRespond(200, """{"content": "should not see this"}""") { _, _, _ ->
        requestMade = true
    }

    // Position cursor at offset 0 of "text-file.txt"
    // The line is "This is a test file." - 23 characters to the right
    // This exceeds maxLineSuffix of 5, so request should be skipped
    val request = makeInlineCompletionRequest("text-file.txt", 0, 0)
    val service = Service()

    val suggestion = runBlocking { service.getSuggestion(request) }

    // Should return empty suggestion without making a request
    assertFalse(requestMade)
}
The key assertion is assertFalse(requestMade) - verifying the HTTP request is never sent when the line suffix is too long.
So now the plugin has basic request avoidance: if I'm editing in the middle of a line with too much text to the right, it won't bother asking the LLM for a completion. That should cut down on unnecessary requests.
Implementing debouncing
The bigger problem remains: the plugin still fires a request on every keystroke when conditions allow it. I need the debouncing logic: the 100ms delay that waits for a pause in typing.
Looking at llama.vim's debouncing code, the delay only happens when a request is already in flight:
if s:current_job != v:null
    if s:timer_fim != -1
        call timer_stop(s:timer_fim)
        let s:timer_fim = -1
    endif

    let s:timer_fim = timer_start(100, {-> llama#fim(...)})
    return
endif
In plain English:
If there's a job running, schedule a timer and return.
So the logic is: don't immediately cancel the in-flight request. Give it 100ms to finish. If I'm still typing after 100ms, then start a new request (which will cancel the old one).
But does llama.vim even have request cancellation? Looking further down in the code:
if s:current_job != v:null
    if s:ghost_text_nvim
        call jobstop(s:current_job)
    elseif s:ghost_text_vim
        call job_stop(s:current_job)
    endif
endif
Yes, it does. It cancels the previous job before sending a new request. So the 100ms delay is not a workaround for lack of cancellation: it's a strategy to avoid cancelling too aggressively. Fast requests get a chance to finish naturally instead of being cancelled immediately.
The complete strategy is:
- If request is in flight then wait 100ms (give current request a chance to finish).
- If still need to send request then cancel any leftover job, then send new request.
I already have the cancellation part via Ktor's coroutine cancellation. I just need to add the "wait if busy" logic.
First, I added a method to InfillHttpClient to check if a request is in flight:
fun isRequestInFlight(): Boolean {
    return currentJob?.isActive == true
}
Then I added the debouncing check at the start of getCompletion():
private suspend fun getCompletion(prefix: String, suffix: String, prompt: String): String {
    return withContext(Dispatchers.IO) {
        try {
            // Debouncing: if a request is already in flight, wait 100ms.
            // This gives the current request time to finish before we cancel it.
            if (httpClient?.isRequestInFlight() == true) {
                delay(100)
            }

            // ... rest of existing logic ...
        }
    }
}
The plugin now matches llama.vim's debouncing strategy. This should significantly reduce the number of wasted requests when I'm typing quickly.
Handling cancellation gracefully
Testing the plugin in the IDE, I noticed an error notification about the request being cancelled.
The debouncing is working: requests are being cancelled when I type quickly. But the code is treating cancellation as an error and showing notifications. Not great.
The problem is in the error handling. When a coroutine is cancelled, it throws CancellationException. The catch block was catching it as a generic Exception:
} catch (e: Exception) {
    logger.warn("Failed to get completion", e)
    showErrorNotification("Failed to connect to LLM endpoint: ${e.message}")
    ""
}
Cancellation is not an error - it's normal during debouncing. I need to handle it separately.
I added a specific catch block for CancellationException before the generic handler:
} catch (e: CancellationException) {
    // Request was cancelled - this is normal during debouncing, return empty silently
    ""
} catch (e: Exception) {
    logger.warn("Failed to get completion", e)
    showErrorNotification("Failed to connect to LLM endpoint: ${e.message}")
    ""
}
Now when requests get cancelled (which happens frequently when typing), it just returns an empty suggestion silently. Only real connection or server errors show notifications.
I added a test to verify this behavior:
fun testCancellationDoesNotThrowError() {
    // Configure server with a slow response to ensure requests overlap.
    server.respondWithDelay(200, 200, """{"content": "slow completion"}""")

    val service = Service()
    val request = makeInlineCompletionRequest("text-file.txt", 0, 0)

    // Fire multiple rapid requests - later ones should cancel earlier ones.
    // This should NOT throw any exceptions or show error notifications.
    runBlocking {
        val job1 = launch { service.getSuggestion(request) }
        delay(10)
        val job2 = launch { service.getSuggestion(request) }
        delay(10)
        val job3 = launch { service.getSuggestion(request) }

        // Wait for all jobs to complete
        job1.join()
        job2.join()
        job3.join()
    }

    // If we get here without exceptions, cancellation was handled gracefully.
    assertTrue(true)
}
The test fires three rapid requests with a slow server response. The second and third requests should trigger cancellation of earlier ones. If the CancellationException handler works correctly, the test passes without any exceptions.
Much better. The plugin now handles the complete debouncing flow without annoying the user with false error messages.
What's next
The plugin now has basic efficiency features: it skips requests when editing in the middle of lines, and it debounces to avoid firing too many requests while typing. But there's still room for improvement.
llama.vim has a caching system that avoids re-requesting completions for contexts it's already seen I will tackle and reproduce in my next post.
Previously
Previously, in post 4, I worked on getting the plugin to send properly formatted completion requests to the llama.cpp server. The requests now include the prompt field, context window settings (nPrefix and nSuffix), and all the parameters that llama.vim uses.
But there's a problem: the plugin fires a completion request on every single keystroke. Type "hello" and you've just sent five HTTP requests to the server. This is wasteful, slow, and not how good completion plugins work.
Here's what needs to happen:
- Debouncing - Wait for the user to pause typing before sending a request
- Cancellation - Cancel in-flight requests when new ones come in
- Request avoidance - Skip requests entirely in certain contexts (whitespace, comments, etc.)
The InfillHttpClient already has a cancelPreviousRequest() method that I built in post 3, but I'm not actually using it anywhere. Time to fix that.
Five requests for five characters
Let me add some logging to see what's actually happening. I'll modify the getCompletion method to log every request:
private suspend fun getCompletion(prefix: String, suffix: String, prompt: String): String {
    return withContext(Dispatchers.IO) {
        try {
            logger.info("Making completion request for prompt: '$prompt'")
            // ... rest of the method
Now when I type "func" in a PHP file, the logs show:
Making completion request for prompt: 'f'
Making completion request for prompt: 'fu'
Making completion request for prompt: 'fun'
Making completion request for prompt: 'func'
Four requests. For four characters. And if the server is slow, the completions might arrive out of order - the completion for "f" might show up after I've already typed "func". Not ideal.
Cancelling requests that will never be used
The current implementation of the InfillHttpClient already calls cancelPreviousRequest() at the start of every post() call! So this should already be working, right?
But before I pat myself on the back, let me think about how this actually works. In JavaScript, I'd write something like:
const controller = new AbortController();
const response = await fetch(url, { signal: controller.signal });

// To cancel from another context:
controller.abort();
This works because fetch() is non-blocking - the await doesn't freeze the thread, it just suspends the coroutine. And AbortController provides a clean, thread-safe way to signal cancellation.
But in my Kotlin code, I'm using HttpURLConnection. Let me look at the critical line in InfillHttpClient.kt:
val responseCode = connection.responseCode
This looks innocent, but connection.responseCode is a blocking call. Even though I'm using withContext(Dispatchers.IO) to run on a background thread, that thread is blocked, waiting for the server to respond.
So when I call cancelPreviousRequest() from InfillHttpClient.kt:38-41:
fun cancelPreviousRequest() {
    currentConnection?.disconnect()
    currentConnection = null
}
I'm calling disconnect() on a connection that might be blocked in another thread. Let me research whether this is even safe.
The disconnect() problem
A bit of search showed a Stack Overflow discussion about calling disconnect() from another thread. The answer is not encouraging:
"Instances of this class are not thread safe." - HttpURLConnection documentation
So calling disconnect() while another thread is blocked on getResponseCode() is undefined behavior. It might work, it might not, it might crash.
Even worse, disconnect() often doesn't help when the thread is waiting for a response. It only works once data starts flowing from the server.
So my "working" cancellation code is actually a race condition waiting to happen based on undefined behavior.
What should I use instead?
HttpURLConnection is ancient (it's been around since Java 1.1, released in 1997). It predates modern async I/O patterns, has no clean cancellation support, and isn't thread-safe.
I need a modern HTTP client that supports:
- Proper async/non-blocking requests
- Clean cancellation from any thread
- Thread-safe operations
Since I'm building an IntelliJ plugin, I'm going to use Ktor - JetBrains' own HTTP client library. It's built specifically for Kotlin coroutines with proper suspend function support and automatic cancellation when coroutines are cancelled. Using JetBrains' tools for a JetBrains plugin just makes sense.
Installing Ktor
My plan for this post was ambitious: implement request cancellation, add debouncing, and maybe even tackle request avoidance logic. But as often happens, reality had other plans.
Let me add Ktor to the build.gradle.kts file. I need several dependencies:
dependencies {
    implementation("org.json:json:20240303")

    // Ktor client for HTTP requests
    implementation("io.ktor:ktor-client-core:3.0.2")
    implementation("io.ktor:ktor-client-cio:3.0.2")
    implementation("io.ktor:ktor-client-content-negotiation:3.0.2")
    implementation("io.ktor:ktor-serialization-kotlinx-json:3.0.2")

    // ... rest of dependencies
}
What each one does:
- ktor-client-core: The core client API with suspend functions
- ktor-client-cio: The CIO (Coroutine I/O) engine - the actual HTTP implementation
- ktor-client-content-negotiation: For automatic JSON serialization/deserialization
- ktor-serialization-kotlinx-json: The JSON serializer implementation
I've added the JSON functionality here as I'm handling JSON in my code for an IntelliJ plugin and using what the IDE makers use should not hurt.
I run ./gradlew test to see if everything compiles... and the tests hang. They never finish.
The coroutines conflict
A long digging and debugging time later, I found the problem.
I almost feel unappreciative of the debuggin sessions I've done by saying "I found the problem". AI does help with reading the output of the gradlew dependencies command, but still it's been some time.
IntelliJ Platform bundles its own patched fork of kotlinx-coroutines. This fork includes internal methods that the testing framework needs, like runBlockingWithParallelismCompensation.
When Ktor brings in the standard kotlinx-coroutines library, it conflicts with IntelliJ's patched version, causing tests to hang.
The fix is to exclude the coroutines dependencies from Ktor and let it use IntelliJ's version:
dependencies {
    implementation("org.json:json:20240303")

    // Ktor client for HTTP requests
    // Note: Exclude kotlinx-coroutines from Ktor dependencies to avoid version conflicts.
    // IntelliJ Platform bundles a patched fork of kotlinx-coroutines that includes internal
    // methods required by the testing framework. Using the standard version causes
    // NoSuchMethodError for methods like runBlockingWithParallelismCompensation.
    implementation("io.ktor:ktor-client-core:3.0.2") {
        exclude(group = "org.jetbrains.kotlinx", module = "kotlinx-coroutines-core")
        exclude(group = "org.jetbrains.kotlinx", module = "kotlinx-coroutines-core-jvm")
    }
    implementation("io.ktor:ktor-client-cio:3.0.2") {
        exclude(group = "org.jetbrains.kotlinx", module = "kotlinx-coroutines-core")
        exclude(group = "org.jetbrains.kotlinx", module = "kotlinx-coroutines-core-jvm")
    }
    implementation("io.ktor:ktor-client-content-negotiation:3.0.2") {
        exclude(group = "org.jetbrains.kotlinx", module = "kotlinx-coroutines-core")
        exclude(group = "org.jetbrains.kotlinx", module = "kotlinx-coroutines-core-jvm")
    }
    implementation("io.ktor:ktor-serialization-kotlinx-json:3.0.2") {
        exclude(group = "org.jetbrains.kotlinx", module = "kotlinx-coroutines-core")
        exclude(group = "org.jetbrains.kotlinx", module = "kotlinx-coroutines-core-jvm")
    }

    // ... rest of dependencies
}
In simple terms this tells Gradle, the Composer of Java (I'm a PHP guy after all), that when the ktor package wants the kotlinx-coroutines-core and kotlinx-coroutines-core-jvm package it should not be pulled following the ktor dependency tree, but it should us the one that comes from JetBrains and is embedded in the IDE.
After this change, ./gradlew test completes successfully. The tests pass.
Refactoring InfillHttpClient to use Ktor
Now that Ktor is installed, let me refactor the InfillHttpClient class to use it instead of HttpURLConnection.
The current implementation uses HttpURLConnection with blocking I/O:
fun post(headers: Map<String, String>, body: String): HttpResponse {
    val uri = URI(url).toURL()
    val connection = uri.openConnection() as HttpURLConnection

    // Blocking call: thread freezes here waiting for response.
    val responseCode = connection.responseCode
}
With Ktor, I can make post() a suspend function:
suspend fun post(headers: Map<String, String>, body: String): HttpResponse {
    val response = client.post(url) {
        headers.forEach { (key, value) ->
            header(key, value)
        }
        setBody(body)
    }

    // Non-blocking: coroutine suspends, thread can do other work.
}
This follows the same async pattern I showed earlier with AbortController - suspend functions in Kotlin work like async functions in JavaScript. The execution suspends without blocking the thread, and cancellation is built-in.
After updating the InfillHttpClient to use Ktor, the tests fail because post() is now a suspend function. I need to wrap test calls in runBlocking (which is like making async code run synchronously in tests):
fun testSuccessfulPostRequest() {
    server.respondWith(200, """{"content": "hello world"}""")

    val response = runBlocking {  // Like await for async code run synchronously in JS tests.
        client.post(
            headers = mapOf("Content-Type" to "application/json"),
            body = """{"input_prefix": "test"}"""
        )
    }

    assertTrue(response is HttpResponse.Success)
}
After updating all the tests, ./gradlew test passes. The refactoring is complete.
Capturing the coroutine Job
In Kotlin coroutines, every suspend function runs in a coroutine, and every coroutine has a Job. I can access it through coroutineContext:
suspend fun post(headers: Map<String, String>, body: String): HttpResponse {
    cancelPreviousRequest()

    // Capture the current coroutine's Job
    currentJob = coroutineContext[Job]

    val response = client.post(url) {
        // ...
    }
}
Now when post() is called, it:
- Cancels the previous request (if any)
- Captures its own Job in
currentJob
- Makes the HTTP request
If another post() call happens before the first one finishes, it will cancel the first request by calling currentJob?.cancel().
The pattern is similar to the AbortController approach I described earlier. The difference is that in Kotlin coroutines, cancellation is built into the Job - I don't need a separate controller object.
Testing that cancellation works
Now comes the critical part: does it actually work? I updated the test to verify cancellation:
fun testCancelPreviousRequest() {
    // Configure server to respond slowly (2 seconds).
    server.respondWithDelay(2000, 200, """{"content": "slow response"}""")

    // Start a request in a background thread.
    Thread {
        try {
            runBlocking {
                client.post(
                    headers = mapOf("Content-Type" to "application/json"),
                    body = """{"test": "data"}"""
                )
            }
        } catch (e: Exception) {
            // Expected - request was cancelled.
        }
    }.start()

    // Give it time to start.
    Thread.sleep(100)

    // Cancel the request.
    client.cancelPreviousRequest()

    // Test passes if we don't hang waiting for the slow response.
    assertTrue(true)
}
The test works. But it does not look great. If this was PHP code I would look at this trying to find a way to run this test that does not require a hard-coded sleep call, but I'm not (yet) good enough at Kotlin to have the solution. It's good enough.
Running ./gradlew test - the test passes! The request was cancelled without waiting for the 2-second response.
Next steps
With proper cancellation in place, I now have the foundation for implementing debouncing. Instead of firing a request on every keystroke and cancelling the previous ones, I can add a small delay before making the request at all. That's for the next post.
Another thing I've noticed is how the cancellation of a request, even done in the context of a "legitimate" use flow, will throw an exception (the one I'm catching in the tests). Since I'm creating the client to abstract that concern away, I will update the InfillHttpClient::post method to wrap and handle that removing the requirement for the client code to be aware of, and having to handle that.
Previously
These posts document my attempt at replicating the functionality of the llama.vim vim/nvim plugin to work in the context of my IDE of choice: PHPStorm and, by extension, other IntelliJ IDEs.
The name of the plugin I'm developing is "completamente"; "completely" in English, and a word-play that in Italian breaks down ot "complete" and "mind". So, something about intelligence and completion.
Naming things is hard.
In the first post, I managed to get a basic "Hello World!" inline completion working in the IDE. The completion was hardcoded, but the foundation was there - I could tap into the IDE's completion API and show suggestions to the user.
In the second post, I connected the plugin to a real llama.cpp server, implementing settings for endpoint configuration, making HTTP requests to the infill endpoint, and adding error handling with user notifications. The plugin started providing actual LLM-powered completions. But the implementation was messy and disorganized.
In the third post, I cleaned up that mess. I extracted the HTTP logic into a dedicated InfillHttpClient class, created proper response types with sealed classes, and wrote tests using an HTTP test server.
It's time to delve into the completion logic and request to try and replicate some of the unbelievably good suggestion mechanic I get while using the llama.vim plugin.
The problem with the current approach
Right now, when the user triggers a completion, the plugin does this:
val prefix = text.take(offset)
val suffix = text.substring(offset)
That's it. It sends the entire file before the cursor as the prefix, and the entire file after the cursor as the suffix.
This approach has two main issues:
- size - LLMs have context windows. Sending entire files runs the risk of overloading the context window. Depending on the model and request setting this could cause the context to be cut to fit in a manner that is beyond the user control.
- performance - more tokens means more time to process, a critical factor in the quality-of-life of a completion plugin. Getting the best result with as little tokens as possible would be ideal.
The first remedy to this approach lies in allowing the user (i.e. me) to set a context window of lines around the cursor position.
The idea of using lines is not mine, it comes from the llama.vim plugin I'm using as my implementation guide.
Putting the window logic into place
I added two new settings to the Settings.State class: nPrefix (default 256) and nSuffix (default 64), representing the number of lines to include before and after the cursor. I then updated the settings UI to expose these values with text fields and a description label.
The interesting part is how to use these settings. The challenge is that the IntelliJ API gives me a character offset (the cursor position as a count of characters from the start of the file), but I need to work with line numbers to implement the window logic.
Here's what the code looks like in the Service class:
override suspend fun getSuggestion(request: InlineCompletionRequest): InlineCompletionSuggestion {
    val document = request.document
    val offset = request.startOffset
    val settings = Settings.getInstance()
    val state = settings.state

    // Handle empty documents
    if (document.lineCount == 0 || document.textLength == 0) {
        return StringSuggestion("")
    }

    // Get the current line number from the offset
    val currentLine = document.getLineNumber(offset)

    // Calculate the line range for prefix and suffix
    val prefixStartLine = maxOf(0, currentLine - state.nPrefix)
    val suffixEndLine = minOf(document.lineCount - 1, currentLine + state.nSuffix)

    // Get the start offset for the prefix window
    val prefixStartOffset = document.getLineStartOffset(prefixStartLine)

    // Get the end offset for the suffix window
    val suffixEndOffset = document.getLineEndOffset(suffixEndLine)

    // Extract prefix: from the start of the window to the cursor
    val prefix = document.text.substring(prefixStartOffset, offset)

    // Extract suffix: from the cursor to the end of the window
    val suffix = document.text.substring(offset, suffixEndOffset)

    // Get the completion from the LLM
    val completion = getCompletion(prefix, suffix)

    return StringSuggestion(completion)
}
The offset parameter is a character offset - the position of the cursor counting every character from the start of the file. If I have a PHP file that starts like this:
|<?php
function hello() {
    echo "world";
}
Then offset 0 is before the < (cursor position shown with |). Offset 3 would be:
<?p|hp
function hello() {
    echo "world";
}
And offset 10 would be at the start of the second line, after the newline:
<?php
|function hello() {
    echo "world";
}
The code converts this character offset to a line number using document.getLineNumber(offset), then calculates which lines to include based on nPrefix and nSuffix.
For example, with a TypeScript file like this where the cursor is at offset 45:
interface User {
    name: string;
    email: string;
}

function greet(user: User) {
    console.log(`Hello, ${user.n|ame}`);
}
If nPrefix is 256 and nSuffix is 64, the code would:
- Determine the cursor is on line 6 (counting from 0)
- Calculate
prefixStartLine = max(0, 6 - 256) = 0
- Calculate
suffixEndLine = min(7, 6 + 64) = 7 (the document only has 8 lines)
- Get the character offset for the start of line 0
- Get the character offset for the end of line 7
- Extract prefix from the start of line 0 to offset 45
- Extract suffix from offset 45 to the end of line 7
The empty document check at the beginning is there because the IntelliJ API throws IndexOutOfBoundsException when you try to get line offsets from an empty document. I discovered this when the tests failed with "Wrong line: -1. Available lines count: 0". When document.lineCount is 0, the expression document.lineCount - 1 evaluates to -1, which is invalid.
What does llama.vim actually send?
Before moving forward, I wanted to verify that the request sent by my implementation matches the one sent by the llama.vim plugin.
I started the llama.cpp server in verbose mode:
llama-server --fim-qwen-3b-default --port 8012 --verbose
Then I opened the TypeScript example file in nvim, positioned the cursor after the "n" in user.n|ame, and triggered a completion. The server logged this JSON payload (I've removed fields that aren't relevant for now):
{
  "input_suffix": "ame}`);\n}\n",
  "input_prefix": "interface User {\n    name: string;\n    email: string;\n}\n\nfunction greet(user: User) {\n",
  "prompt": "    console.log(`Hello, ${user.n"
}
Three fields:
input_prefix: Everything before the cursorinput_suffix: Everything after the cursorprompt: The current line up to the cursor position
My plugin sends only input_prefix and input_suffix. It's missing the prompt field.
The llama.cpp server documentation mentions the prompt field and provides this explanations:
prompt: Added after the FIM_MID token
With reference to the Qwen 2.5 Coder paper it should and the following fill-in-the-middle structure:
<|fim_prefix|>{code_pre}<|fim_suffix|>{code_suf}<|fim_middle|>{code_mid}<|endoftext|>
the prompt will map to the {code_mid} section of the template.
At this stage, I trust the implementation of the llama.vim plugin to be the best one; I will tinker with this in later iterations.
Adding the prompt field
In the getSuggestion method, I need to extract the current line up to the cursor:
// Extract prompt: the current line up to the cursor
val currentLineStartOffset = document.getLineStartOffset(currentLine)
val prompt = document.text.substring(currentLineStartOffset, offset)
Then update the getCompletion method to accept the prompt parameter:
private suspend fun getCompletion(prefix: String, suffix: String, prompt: String): String {
And include it in the request body:
val requestBody = JSONObject()
requestBody.put("input_prefix", prefix)
requestBody.put("input_suffix", suffix)
requestBody.put("prompt", prompt)
I added a test using the TypeScript example file, positioning the cursor at offset 118 (after user.n on line 6). But this time, instead of making real HTTP requests, I updated the tests to use the TestHttpServer mock that I had created for testing the HTTP client.
The test now captures the actual request payload and verifies that all three fields are sent correctly:
var capturedRequestBody: String? = null

// Respond with a completion content of "ame" to the request.
server.captureRequestAndRespond(200, """{"content": "ame"}""") { _, _, body ->
    capturedRequestBody = body
}

val request = makeInlineCompletionRequest("example.ts", 118, 118)
val service = Service()

val suggestion: InlineCompletionSuggestion = runBlocking { service.getSuggestion(request) }

// Verify the request payload using triple-quoted strings
val requestJson = JSONObject(capturedRequestBody!!)

val expectedPrefix = """interface User {
    name: string;
    email: string;
}

function greet(user: User) {
    console.log(`Hello, ${'$'}{user.n"""

val expectedSuffix = """ame}`);
}
"""

val expectedPrompt = "    console.log(`Hello, \${user.n"

assertEquals(expectedPrefix, requestJson.getString("input_prefix"))
assertEquals(expectedSuffix, requestJson.getString("input_suffix"))
assertEquals(expectedPrompt, requestJson.getString("prompt"))
Matching the complete request format
After verifying the prompt field was being sent correctly, I wanted to see what else the llama.vim plugin includes in its requests. I've captured a complete request from llama.vim before:
{
  "input_suffix": "ame}`);\n}\n",
  "input_prefix": "interface User {\n    name: string;\n    email: string;\n}\n\nfunction greet(user: User) {\n",
  "top_p": 0.99,
  "input_extra": [],
  "t_max_prompt_ms": 500,
  "samplers": ["top_k", "top_p", "infill"],
  "n_predict": 128,
  "n_indent": 4,
  "t_max_predict_ms": 3000,
  "stream": false,
  "top_k": 40,
  "prompt": "    console.log(`Hello, ${user.n",
  "cache_prompt": true
}
My plugin was only sending three fields.
The rest of the fields control sampling behavior, performance limits, and other aspects of the completion request. I decided to add the most important ones as configurable settings:
tMaxPromptMs (default 500): Max alloted time for the prompt processingtMaxPredictMs (default 1000): Max alloted time for the predictionnPredict (default 128): Max number of tokens to predict
I added these to the Settings.State class and updated the UI to include them, each with a description. The rest of the fields (top_p, top_k, samplers, n_indent, stream, cache_prompt, input_extra) I've hard-coded to match llama.vim's values.
I will likely revisit this decision in the future, but it's good enough for now.
The request building code now looks like this:
val requestBody = JSONObject()
requestBody.put("input_prefix", prefix)
requestBody.put("input_suffix", suffix)
requestBody.put("prompt", prompt)
requestBody.put("input_extra", emptyList<String>())
requestBody.put("top_p", 0.99)
requestBody.put("top_k", 40)
requestBody.put("t_max_prompt_ms", state.tMaxPromptMs)
requestBody.put("t_max_predict_ms", state.tMaxPredictMs)
requestBody.put("n_predict", state.nPredict)
requestBody.put("n_indent", 4)
requestBody.put("stream", false)
requestBody.put("cache_prompt", true)
requestBody.put("samplers", listOf("top_k", "top_p", "infill"))
I updated the tests to verify all the request parameters are being sent correctly. The testGetSuggestionWithTypeScriptFile test now checks not just the three main fields, but also all the additional parameters:
// Verify the additional request parameters
assertTrue(requestJson.has("input_extra"))
assertEquals(0, requestJson.getJSONArray("input_extra").length())

assertTrue(requestJson.has("top_p"))
assertEquals(0.99, requestJson.getDouble("top_p"), 0.001)

assertTrue(requestJson.has("top_k"))
assertEquals(40, requestJson.getInt("top_k"))

assertTrue(requestJson.has("t_max_prompt_ms"))
assertEquals(500, requestJson.getInt("t_max_prompt_ms"))

// ... and so on for all fields
I also added a test to verify that changing settings affects the request parameters:
fun testSettingsAffectRequestParameters() {
    val settings = Settings.getInstance()
    settings.state.tMaxPromptMs = 1000
    settings.state.tMaxPredictMs = 2000
    settings.state.nPredict = 256

    // ... make request and capture body ...

    val requestJson = JSONObject(capturedRequestBody!!)
    assertEquals(1000, requestJson.getInt("t_max_prompt_ms"))
    assertEquals(2000, requestJson.getInt("t_max_predict_ms"))
    assertEquals(256, requestJson.getInt("n_predict"))
}
The test setup now saves and restores all settings using state.copy() in setUp() and loadState() in tearDown(), ensuring tests don't affect each other.
After these updates, ./gradlew build succeeded with all tests passing.
Next
While there are a number of features missing to approach parity with the llama.vim plugin, in my next post I will concentrate on request optimization: debounce requests, cancel the inflight ones and avoid them entirely in some instances.
Previously
In the previous post, I got the plugin to make real HTTP requests to a llama.cpp server and receiving completions. The code worked, but it was all crammed into the Service class: HTTP connection management, JSON parsing, error handling, notifications, everything.
Time to clean up the mess.
The problem with the current code
Let me look at what I had in Service.kt:
private suspend fun getCompletion(prefix: String, suffix: String): String {
    return withContext(Dispatchers.IO) {
        try {
            val settings = Settings.getInstance()
            val state = settings.state
            val endpointUrl = state.endpointUrl

            // Create the HTTP connection
            val url = URI(endpointUrl).toURL()
            val connection = url.openConnection() as HttpURLConnection
            connection.requestMethod = "POST"
            connection.setRequestProperty("Content-Type", "application/json")
            connection.doOutput = true

            // Add API key if configured
            if (state.apiKey.isNotEmpty()) {
                connection.setRequestProperty("Authorization", "Bearer ${state.apiKey}")
            }

            // Build the request body
            val requestBody = JSONObject()
            requestBody.put("input_prefix", prefix)
            requestBody.put("input_suffix", suffix)

            // Send the request
            val writer = OutputStreamWriter(connection.outputStream)
            writer.write(requestBody.toString())
            writer.flush()
            writer.close()

            // Read the response
            val responseCode = connection.responseCode
            if (responseCode == HttpURLConnection.HTTP_OK) {
                val response = connection.inputStream.bufferedReader().use { it.readText() }
                val jsonResponse = JSONObject(response)
                val content = jsonResponse.optString("content", "")

                logger.info("Got completion: $content")
                content
            } else {
                logger.warn("HTTP request failed with code: $responseCode")
                showErrorNotification("Failed to get completion: HTTP $responseCode")
                ""
            }
        } catch (e: Exception) {
            logger.warn("Failed to get completion", e)
            showErrorNotification("Failed to connect to LLM endpoint: ${e.message}")
            ""
        }
    }
}
This function does everything: HTTP, JSON, error handling, logging, notifications. And what if I want to reuse this HTTP logic elsewhere? Copy-paste? No thanks.
The plan
I asked myself: what should this refactoring look like?
After some thinking, I settled on:
- Extract HTTP logic to a dedicated class (
InfillHttpClient) that only handles raw HTTP requests
- Create a result type (
HttpResponse) that represents success vs. error responses
- Keep JSON parsing in Service - that's application logic, not HTTP logic
- Let HTTP exceptions bubble up - connection failures are exceptional, not normal flow
- Test the HTTP client thoroughly using a real test HTTP server
The HTTP client should know nothing about JSON, completions, or IntelliJ. It just sends bytes over the wire and tells you what came back.
Here's what the refactoring looks like (credit to AI for this piece of ASCII art, I would not have done it manually):
Before:
┌─────────────────────────────────────┐
│          Service.kt                 │
│                                     │
│  ┌───────────────────────────────┐  │
│  │ HTTP connection management    │  │
│  │ JSON parsing                  │  │
│  │ Error handling                │  │
│  │ Notifications                 │  │
│  │ Logging                       │  │
│  │ Settings access               │  │
│  │ ... everything mixed ...      │  │
│  └───────────────────────────────┘  │
└─────────────────────────────────────┘

After:
┌─────────────────────────────────────┐
│          Service.kt                 │
│  (Application Logic)                │
│                                     │
│  • JSON parsing                     │
│  • Notifications                    │
│  • Logging                          │
│  • Settings access                  │
│                                     │
│         │                           │
│         ▼                           │
│  ┌─────────────────────┐            │
│  │ InfillHttpClient    │            │
│  │ (HTTP Only)         │            │
│  │                     │            │
│  │ • POST requests     │            │
│  │ • Headers           │            │
│  │ • Timeouts          │            │
│  │ • Cancellation      │            │
│  └─────────────────────┘            │
│         │                           │
│         ▼                           │
│  ┌─────────────────────┐            │
│  │   HttpResponse      │            │
│  │  (Result Types)     │            │
│  │                     │            │
│  │ • Success (2xx)     │            │
│  │ • Error (others)    │            │
│  └─────────────────────┘            │
└─────────────────────────────────────┘
An aside: among all the good things one can do with AI, custom ASCII art is still the one that amazes me the most.
Building a response type
First, I needed a way to represent HTTP responses. I wanted to distinguish between successful responses (2xx status codes) and error responses (everything else).
In Kotlin, sealed classes are perfect for this:
sealed class HttpResponse(
    open val statusCode: Int,
    open val body: String,
    open val headers: Map<String, List<String>>
) {
    data class Success(
        override val statusCode: Int,
        override val body: String,
        override val headers: Map<String, List<String>>
    ) : HttpResponse(statusCode, body, headers)

    data class Error(
        override val statusCode: Int,
        override val body: String,
        override val headers: Map<String, List<String>>
    ) : HttpResponse(statusCode, body, headers)
}
What are "sealed classes"? They do not really have a corresponding in PHP.
They are like abstract in the sense that they must be extended; they are like final classes in the sense that they cannot be extended. Differently from PHP the final* comes with a condition that says "it cannot be extended save for X and Y".
Here the HttpResponse class can only be extended by the Success and Error classes.
This gives me type-safe pattern matching when handling responses. The compiler will remind me if I forget to handle one of the cases. I also chose to use a sealed class (not interface) with a base constructor so I could have common properties like statusCode, body, and headers available on all responses without duplicating them (although the kotlin grammar immediately makes it more verbose than required...).
Here's how the sealed class hierarchy works:
                    ┌──────────────────────────────┐
                    │      HttpResponse            │
                    │    (Sealed Base Class)       │
                    │                              │
                    │  • statusCode: Int           │
                    │  • body: String              │
                    │  • headers: Map<String, ...> │
                    └──────────────┬───────────────┘
                                   │
                   ┌───────────────┴───────────────┐
                   │                               │
                   ▼                               ▼
    ┌──────────────────────────┐   ┌──────────────────────────┐
    │   HttpResponse.Success   │   │   HttpResponse.Error     │
    │                          │   │                          │
    │  When statusCode is 2xx  │   │  When statusCode is not  │
    │  (200, 201, 204, etc.)   │   │  2xx (404, 500, etc.)    │
    │                          │   │                          │
    │  Inherits all properties │   │  Inherits all properties │
    │  from HttpResponse       │   │  from HttpResponse       │
    └──────────────────────────┘   └──────────────────────────┘

When you pattern match:
  when (response) {
    is HttpResponse.Success -> // Compiler knows it's 2xx
    is HttpResponse.Error   -> // Compiler knows it's error
    // Compiler error if you forget a case!
  }
Did I mention AI does ASCII art really well?
Putting the HTTP client together
Now for the HTTP client itself. I wanted:
- Constructor takes the URL (can be changed later with
setUrl())
post() method for making POST requests- Returns
HttpResponse.Success for 2xx, HttpResponse.Error for other status codes
- Throws exceptions for connection failures
- Automatically cancels previous request. This is important as completion requests will come in bursts as I type and there's no use in getting a completion for a request that will never be used.
Here's what I came up with:
class InfillHttpClient(
    private var url: String,
    private val connectTimeoutMs: Int = 5000,
    private val readTimeoutMs: Int = 30000
) {
    private var currentConnection: HttpURLConnection? = null

    fun getUrl(): String = url
    fun setUrl(newUrl: String) { url = newUrl }

    fun cancelPreviousRequest() {
        currentConnection?.disconnect()
        currentConnection = null
    }

    fun post(headers: Map<String, String>, body: String): HttpResponse {
        // Cancel any previous request
        cancelPreviousRequest()

        val uri = URI(url).toURL()
        val connection = uri.openConnection() as HttpURLConnection
        currentConnection = connection

        try {
            connection.requestMethod = "POST"
            connection.connectTimeout = connectTimeoutMs
            connection.readTimeout = readTimeoutMs
            connection.doOutput = true

            // Set headers
            headers.forEach { (key, value) ->
                connection.setRequestProperty(key, value)
            }

            // Write request body
            val writer = OutputStreamWriter(connection.outputStream)
            writer.write(body)
            writer.flush()
            writer.close()

            // Get response
            val responseCode = connection.responseCode
            val responseHeaders = connection.headerFields
                .filterKeys { it != null }
                .mapKeys { it.key!! }

            // Read response body (from either inputStream or errorStream)
            val responseBody = if (responseCode in 200..299) {
                connection.inputStream.bufferedReader().use { it.readText() }
            } else {
                connection.errorStream?.bufferedReader()?.use { it.readText() } ?: ""
            }

            return if (responseCode in 200..299) {
                HttpResponse.Success(responseCode, responseBody, responseHeaders)
            } else {
                HttpResponse.Error(responseCode, responseBody, responseHeaders)
            }
        } finally {
            if (currentConnection == connection) {
                currentConnection = null
            }
            connection.disconnect()
        }
    }
}
The key decisions:
- Store the current connection: This lets me cancel it if a new request comes in while the old one is still running. Critical for inline completions where the user might type quickly.
- Read from errorStream for non-2xx responses: HTTP servers should put error details in the error stream, not the output stream.
- Return result types, throw for real failures: If I get a 404, that's an
HttpResponse.Error. If the network is down, that's an exception.
Testing with an actual server
Here's where it got interesting. I wanted to test this HTTP client properly, which meant I needed... an HTTP server. Not a mock, but an actual server that accepts connections and sends responses.
Turns out the JDK ships with com.sun.net.httpserver.HttpServer - a simple HTTP server perfect for testing. I wrapped it in a helper class:
class TestHttpServer(private val port: Int = 0) {
    private var server: HttpServer? = null
    private var responseHandler: ((HttpExchange) -> Unit)? = null

    fun start() {
        server = HttpServer.create(InetSocketAddress(port), 0)
        server?.createContext("/") { exchange ->
            responseHandler?.invoke(exchange) ?: run {
                exchange.sendResponseHeaders(200, 0)
                exchange.close()
            }
        }
        server?.executor = null
        server?.start()
    }

    fun stop() {
        server?.stop(0)
        server = null
    }

    fun getUrl(): String {
        val actualPort = server?.address?.port
            ?: throw IllegalStateException("Server not started")
        return "http://localhost:$actualPort"
    }

    fun respondWith(statusCode: Int, body: String, headers: Map<String, String> = emptyMap()) {
        responseHandler = { exchange ->
            headers.forEach { (key, value) ->
                exchange.responseHeaders.set(key, value)
            }
            val responseBytes = body.toByteArray()
            exchange.sendResponseHeaders(statusCode, responseBytes.size.toLong())
            exchange.responseBody.write(responseBytes)
            exchange.close()
        }
    }

    // ... more helper methods
}
Using port = 0 tells the OS to pick any available port, which is perfect for tests - no conflicts.
Now I could write real tests:
class InfillHttpClientTest : BasePlatformTestCase() {
    private lateinit var server: TestHttpServer
    private lateinit var client: InfillHttpClient

    override fun setUp() {
        super.setUp()
        server = TestHttpServer()
        server.start()
        client = InfillHttpClient(server.getUrl())
    }

    override fun tearDown() {
        try {
            server.stop()
        } finally {
            super.tearDown()
        }
    }

    fun testSuccessfulPostRequest() {
        server.respondWith(200, """{"content": "hello world"}""",
            mapOf("Content-Type" to "application/json"))

        val response = client.post(
            headers = mapOf("Content-Type" to "application/json"),
            body = """{"input_prefix": "test", "input_suffix": ""}"""
        )

        assertTrue(response is HttpResponse.Success)
        assertEquals(200, response.statusCode)
        assertEquals("""{"content": "hello world"}""", response.body)
        assertTrue(response.headers.isNotEmpty())
    }

    fun testErrorResponse() {
        server.respondWith(404, """{"error": "Not found"}""")

        val response = client.post(
            headers = mapOf("Content-Type" to "application/json"),
            body = """{"input_prefix": "test"}"""
        )

        assertTrue(response is HttpResponse.Error)
        assertEquals(404, response.statusCode)
    }

    fun testConnectionFailure() {
        server.stop()

        try {
            client.post(
                headers = mapOf("Content-Type" to "application/json"),
                body = """{"test": "data"}"""
            )
            fail("Expected an exception to be thrown")
        } catch (e: Exception) {
            // Expected - connection failed
        }
    }
}
The BasePlatformTestCase class is the PHPUnit\Framework\TestCase equivalent of testing things in the context of an IntelliJ plugin.
The header bug
Of course, the first time I ran these tests, they failed. Naturally. The testSuccessfulPostRequest was failing because response.headers didn't contain "Content-Type".
I spent a few minutes debugging before realizing: I was calling exchange.responseHeaders.add(key, value) after exchange.sendResponseHeaders(). HTTP doesn't work that way - headers have to be set before you start sending the body. It's literally in the name. Headers. First. Body. Second.
Fun fact: that is how headers and body work in PHP as well.
You'd think after all these years of web development I'd know better, but here we are.
Changed it to:
headers.forEach { (key, value) ->
    exchange.responseHeaders.set(key, value)  // BEFORE sendResponseHeaders!
}
val responseBytes = body.toByteArray()
exchange.sendResponseHeaders(statusCode, responseBytes.size.toLong())
And the tests passed. This is exactly why you write tests - you catch these silly mistakes before they become production bugs.
Progress.
Refactoring Service to use InfillHttpClient
With the HTTP client tested and working, I could refactor Service:
class Service : InlineCompletionProvider {
    private val logger = Logger.getInstance(Service::class.java)
    private var httpClient: InfillHttpClient? = null

    // ... other methods ...

    private suspend fun getCompletion(prefix: String, suffix: String): String {
        return withContext(Dispatchers.IO) {
            try {
                val settings = Settings.getInstance()
                val state = settings.state
                val endpointUrl = state.endpointUrl

                // Initialize or update HTTP client
                if (httpClient == null) {
                    httpClient = InfillHttpClient(endpointUrl)
                } else if (httpClient!!.getUrl() != endpointUrl) {
                    // Udpate the URL if it changed in the settings.
                    httpClient!!.setUrl(endpointUrl)
                }

                // Build headers
                val headers = mutableMapOf("Content-Type" to "application/json")
                if (state.apiKey.isNotEmpty()) {
                    headers["Authorization"] = "Bearer ${state.apiKey}"
                }

                // Build the request body
                val requestBody = JSONObject()
                requestBody.put("input_prefix", prefix)
                requestBody.put("input_suffix", suffix)

                // Make the HTTP request
                val response = httpClient!!.post(headers, requestBody.toString())

                // Handle the response
                when (response) {
                    is HttpResponse.Success -> {
                        val jsonResponse = JSONObject(response.body)
                        val content = jsonResponse.optString("content", "")
                        logger.info("Got completion: $content")
                        content
                    }
                    is HttpResponse.Error -> {
                        logger.warn("HTTP request failed with code: ${response.statusCode}")
                        showErrorNotification("Failed to get completion: HTTP ${response.statusCode}")
                        ""
                    }
                }
            } catch (e: Exception) {
                logger.warn("Failed to get completion", e)
                showErrorNotification("Failed to connect to LLM endpoint: ${e.message}")
                ""
            }
        }
    }
}
Much cleaner! The HTTP logic is gone. The when expression for handling HttpResponse is type-safe and explicit. And the best part? All existing tests still pass - I didn't break anything.
Next steps
The plugin now has a solid HTTP foundation. But there's more to do:
- The completion logic is still naive - I'm sending the entire file as prefix/suffix
- The request is not properly configured
- There is no context to the request if not for the surrounding lines
But those are problems for future posts. For now, the code is cleaner, tested, and ready to build on.
Introduction
In the previous post, I managed to get a "Hello World!" completion working in my IntelliJ plugin, "completamente". The completion was hardcoded, always returning the same string, but it worked. Progress.
The next logical step is connecting to an actual LLM to get real completions. I'm following the llama.vim approach, which uses the llama.cpp server's infill endpoint. The idea is simple: send the code before the cursor (prefix) and after the cursor (suffix) to the endpoint, and it returns a completion suggestion.
This post documents my attempt at implementing settings, HTTP integration, and error handling for the plugin. I'm sure someone with more experience would develop a better solution, but I'm stuck with my knowledge of the subject, and I'm doing this to learn.
Understanding the llama.cpp infill endpoint
Before writing any Kotlin code, I need to understand what the llama.cpp infill endpoint expects and returns. The llama.vim plugin source code shows it uses a POST request to /infill with input_prefix and input_suffix parameters.
I'm running a llama.cpp server locally on port 8012 with a small model (Qwen2.5-Coder-3B).
The command to start the server locally is llama-server --fim-qwen-3b-default --port 8012.
First, a simple test with just a prefix:
curl -X POST http://127.0.0.1:8012/infill \
  -H "Content-Type: application/json" \
  -d '{"input_prefix": "<?php\nfunction hello(", "input_suffix": ""}' \
  -s | jq '.content'
The response comes back quickly enough on my laptop:
")\n{\n echo \"hello world\";\n}\n?>\n"
All fine and dandy. The key field here is content - that's the completion text I need to extract and show to the user. The response also includes a bunch of metadata about the generation settings, which I might use later for debugging and customization of the request, but for now I just need the content field.
Let me test with both prefix and suffix to see how the model handles Fill In the Middle (FIM):
curl -X POST http://127.0.0.1:8012/infill \
  -H "Content-Type: application/json" \
  -d '{"input_prefix": "<?php\nfunction calculateSum($a, $b) {", "input_suffix": "}"}' \
  -s | jq '.content'
The response:
"\n return $a + $b;\n"
Perfect! The model understands that it needs to fill in the middle between the opening brace and the closing brace and that the code is PHP. This is exactly what I need for inline completions in the IDE.
Or rather: this is what I need to start my completion work. I will customize the request and the context later.
One more test - what happens when the endpoint is unreachable?
curl -X POST http://127.0.0.1:9999/infill \
  -H "Content-Type: application/json" \
  -d '{"input_prefix": "<?php\nfunction greet(", "input_suffix": ""}' \
  -v
As expected, curl fails with:
*   Trying 127.0.0.1:9999...
* connect to 127.0.0.1 port 9999 from 127.0.0.1 port 56266 failed: Connection refused
* Failed to connect to 127.0.0.1 port 9999 after 0 ms: Couldn't connect to server
* Closing connection
This means my plugin needs to handle connection failures gracefully - I don't want the whole thing to crash just because the server isn't running.
Implementing Settings
Before I can make HTTP requests, I need a way to configure the endpoint URL. I could hardcode it to http://127.0.0.1:8012/infill, but that would make the plugin less flexible. Different users (which I currently do not care about: scratching an itch here) might run their llama.cpp server on different ports, or even on different machines.
I need to implement a settings page where users can configure:
- The endpoint URL (default:
http://127.0.0.1:8012/infill)
- An optional API key (for when the server requires authentication, I do not need it yet, but I might someday)
Let me start by looking at how IntelliJ handles settings.
The Settings class
In IntelliJ, settings are typically implemented using the PersistentStateComponent interface. This interface provides automatic persistence - the IDE takes care of loading and saving the settings to disk. I just need to define what data to store.
Here's my Settings class:
package com.github.lucatume.completamente.settings

import com.intellij.openapi.components.PersistentStateComponent
import com.intellij.openapi.components.State
import com.intellij.openapi.components.Storage
import com.intellij.openapi.components.Service
import com.intellij.openapi.application.ApplicationManager

@State(
    name = "com.github.lucatume.completamente.settings.Settings",
    storages = [Storage("CompletamenteSettings.xml")]
)
@Service
class Settings : PersistentStateComponent<Settings.State> {

    // The state class holds the actual settings values
    data class State(
        var endpointUrl: String = "http://127.0.0.1:8012/infill",
        var apiKey: String = ""
    )

    private var myState = State()

    override fun getState(): State {
        return myState
    }

    override fun loadState(state: State) {
        myState = state
    }

    companion object {
        // Get the application-level instance of Settings
        fun getInstance(): Settings {
            return ApplicationManager.getApplication().getService(Settings::class.java)
        }
    }
}
The @State annotation tells IntelliJ where to store the settings (in an XML file called CompletamenteSettings.xml). The @Service annotation makes this a service that can be retrieved using Settings.getInstance().
The State data class is what gets serialized to disk. It's a simple data class with two fields: endpointUrl and apiKey, both with sensible defaults.
The SettingsConfigurable class
Now I need a UI for users to edit these settings. IntelliJ provides the Configurable interface for this:
package com.github.lucatume.completamente.settings

import com.intellij.openapi.options.Configurable
import javax.swing.JComponent
import javax.swing.JPanel
import javax.swing.JLabel
import javax.swing.JTextField
import java.awt.GridBagLayout
import java.awt.GridBagConstraints
import java.awt.Insets

class SettingsConfigurable : Configurable {

    private var endpointUrlField: JTextField? = null
    private var apiKeyField: JTextField? = null

    override fun getDisplayName(): String {
        return "Completamente"
    }

    override fun createComponent(): JComponent {
        val panel = JPanel(GridBagLayout())
        val constraints = GridBagConstraints()

        // Endpoint URL label and field
        constraints.gridx = 0
        constraints.gridy = 0
        constraints.anchor = GridBagConstraints.WEST
        constraints.insets = Insets(0, 0, 5, 10)
        panel.add(JLabel("Endpoint URL:"), constraints)

        endpointUrlField = JTextField(40)
        constraints.gridx = 1
        constraints.gridy = 0
        constraints.fill = GridBagConstraints.HORIZONTAL
        constraints.weightx = 1.0
        panel.add(endpointUrlField, constraints)

        // API Key label and field
        constraints.gridx = 0
        constraints.gridy = 1
        constraints.fill = GridBagConstraints.NONE
        constraints.weightx = 0.0
        panel.add(JLabel("API Key:"), constraints)

        apiKeyField = JTextField(40)
        constraints.gridx = 1
        constraints.gridy = 1
        constraints.fill = GridBagConstraints.HORIZONTAL
        constraints.weightx = 1.0
        panel.add(apiKeyField, constraints)

        return panel
    }

    override fun isModified(): Boolean {
        val settings = Settings.getInstance()
        val state = settings.state ?: return false

        return endpointUrlField?.text != state.endpointUrl ||
               apiKeyField?.text != state.apiKey
    }

    override fun apply() {
        val settings = Settings.getInstance()
        val state = settings.state ?: Settings.State()

        state.endpointUrl = endpointUrlField?.text ?: state.endpointUrl
        state.apiKey = apiKeyField?.text ?: state.apiKey

        settings.loadState(state)
    }

    override fun reset() {
        val settings = Settings.getInstance()
        val state = settings.state ?: return

        endpointUrlField?.text = state.endpointUrl
        apiKeyField?.text = state.apiKey
    }
}
I'm not a Swing expert (or even a Swing beginner, really), so this code is... functional. It uses GridBagLayout to arrange the labels and text fields. The best way I can explain it is: it's like CSS grid, but more verbose and from the 1990s.
The key methods are:
createComponent(): Creates the UIisModified(): Checks if the user changed anythingapply(): Saves the changesreset(): Reverts to the saved values
Registering the settings
Finally, I need to register both the service and the configurable in plugin.xml:
<extensions defaultExtensionNs="com.intellij">
    <inline.completion.provider implementation="com.github.lucatume.completamente.completion.Service"/>
    <applicationService serviceImplementation="com.github.lucatume.completamente.settings.Settings"/>
    <applicationConfigurable
            parentId="tools"
            instance="com.github.lucatume.completamente.settings.SettingsConfigurable"
            id="com.github.lucatume.completamente.settings.SettingsConfigurable"
            displayName="Completamente"/>
</extensions>
The applicationService entry makes the Settings service available, and the applicationConfigurable entry adds a "Completamente" page under "Tools" in the IDE settings dialog.
I ran ./gradlew build and it compiled successfully and the plugin settings section appears in all its brutalistic glory:
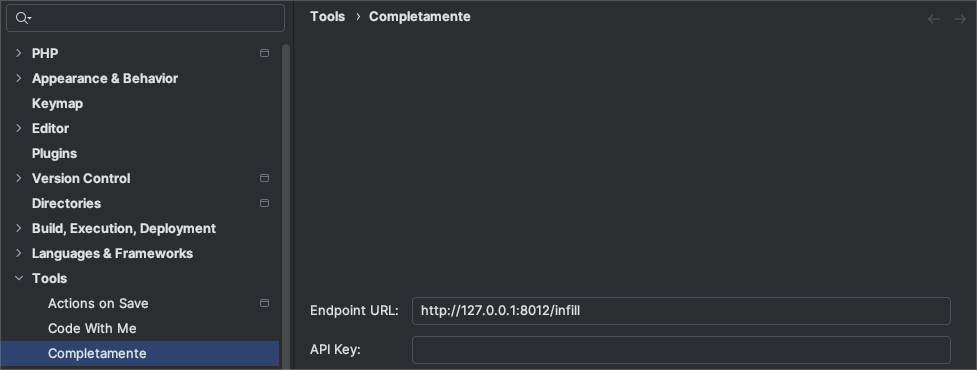
Implementing HTTP Client Integration
Now that I have settings configured, I need to update the Service class to actually use them.
Instead of returning "Hello World!" every time, the service should:
- Extract the text before and after the cursor (prefix and suffix)
- Make an HTTP POST request to the configured endpoint
- Parse the JSON response and extract the
content field
- Return the completion to the user
The JDK provides HttpURLConnection which should work. Let me update the Service class:
package com.github.lucatume.completamente.completion

import com.intellij.codeInsight.inline.completion.InlineCompletionEvent
import com.intellij.codeInsight.inline.completion.InlineCompletionProvider
import com.intellij.codeInsight.inline.completion.InlineCompletionProviderID
import com.intellij.codeInsight.inline.completion.InlineCompletionRequest
import com.intellij.codeInsight.inline.completion.suggestion.InlineCompletionSuggestion
import com.intellij.notification.NotificationGroupManager
import com.intellij.notification.NotificationType
import com.intellij.openapi.diagnostic.Logger
import com.github.lucatume.completamente.settings.Settings
import kotlinx.coroutines.Dispatchers
import kotlinx.coroutines.withContext
import org.json.JSONObject
import java.io.OutputStreamWriter
import java.net.HttpURLConnection
import java.net.URI

class Service : InlineCompletionProvider {
    private val logger = Logger.getInstance(Service::class.java)

    override val id: InlineCompletionProviderID
        get() = InlineCompletionProviderID("completamente")

    override suspend fun getSuggestion(request: InlineCompletionRequest): InlineCompletionSuggestion {
        // Get the text before and after the cursor
        val document = request.document
        val offset = request.startOffset
        val text = document.text

        val prefix = text.take(offset)
        val suffix = text.substring(offset)

        // Get the completion from the LLM
        val completion = getCompletion(prefix, suffix)

        return StringSuggestion(completion)
    }

    override fun isEnabled(event: InlineCompletionEvent): Boolean {
        return true
    }

    /**
     * Make an HTTP POST request to the llama.cpp infill endpoint.
     * Returns the completion text, or an empty string if the request fails.
     */
    private suspend fun getCompletion(prefix: String, suffix: String): String {
        return withContext(Dispatchers.IO) {
            try {
                val settings = Settings.getInstance()
                val state = settings.state
                val endpointUrl = state.endpointUrl

                // Create the HTTP connection
                val url = URI(endpointUrl).toURL()
                val connection = url.openConnection() as HttpURLConnection
                connection.requestMethod = "POST"
                connection.setRequestProperty("Content-Type", "application/json")
                connection.doOutput = true

                // Add API key if configured
                if (state.apiKey.isNotEmpty()) {
                    connection.setRequestProperty("Authorization", "Bearer ${state.apiKey}")
                }

                // Build the request body
                val requestBody = JSONObject()
                requestBody.put("input_prefix", prefix)
                requestBody.put("input_suffix", suffix)

                // Send the request
                val writer = OutputStreamWriter(connection.outputStream)
                writer.write(requestBody.toString())
                writer.flush()
                writer.close()

                // Read the response
                val responseCode = connection.responseCode
                if (responseCode == HttpURLConnection.HTTP_OK) {
                    val response = connection.inputStream.bufferedReader().use { it.readText() }
                    val jsonResponse = JSONObject(response)
                    val content = jsonResponse.optString("content", "")

                    logger.info("Got completion: $content")
                    content
                } else {
                    logger.warn("HTTP request failed with code: $responseCode")
                    showErrorNotification("Failed to get completion: HTTP $responseCode")
                    ""
                }
            } catch (e: Exception) {
                logger.warn("Failed to get completion", e)
                showErrorNotification("Failed to connect to LLM endpoint: ${e.message}")
                ""
            }
        }
    }

    /**
     * Show an error notification to the user.
     */
    private fun showErrorNotification(message: String) {
        NotificationGroupManager.getInstance()
            .getNotificationGroup("Completamente")
            .createNotification(message, NotificationType.ERROR)
            .notify(null)
    }
}
There's a lot going on here, so let me break it down:
-
Coroutines and Dispatchers: The getCompletion function is wrapped in withContext(Dispatchers.IO) which tells Kotlin to run this code on a background thread suitable for I/O operations. This is important because HTTP requests can be slow and we don't want to block the UI thread. The JavaScript mantra of not blocking the main thread is as fundamental here, especially to keep the snappy IDE experience going.
-
HTTP Request: I'm using the built-in HttpURLConnection class. It's not the most modern HTTP client (there are libraries like OkHttp that are nicer to use), but it works and doesn't require additional dependencies... wait, I already added org.json:json as a dependency because the JDK doesn't include a JSON parser. I guess I'm halfway to using modern libraries anyway. I will eventually refactor this into a dedicated requests object, so this is not as relevant now.
-
JSON Parsing: I'm using org.json.JSONObject to parse the response. The optString method returns an empty string if the field is missing, which is convenient for error handling.
-
Error Handling: I'm catching all exceptions and showing a notification to the user. This is important because if the endpoint is unreachable, I don't want the plugin to crash - I want to show a friendly error message to the user. To me.
Error Handling with Notifications
When the HTTP request fails (either due to a connection error or a non-200 status code), the plugin shows a balloon notification in the IDE.
To make this work, I had to register a notification group in plugin.xml:
<notificationGroup id="Completamente" displayType="BALLOON"/>
This creates a notification group called "Completamente" that displays as a balloon in the bottom-right corner of the IDE (the same place where build notifications appear).
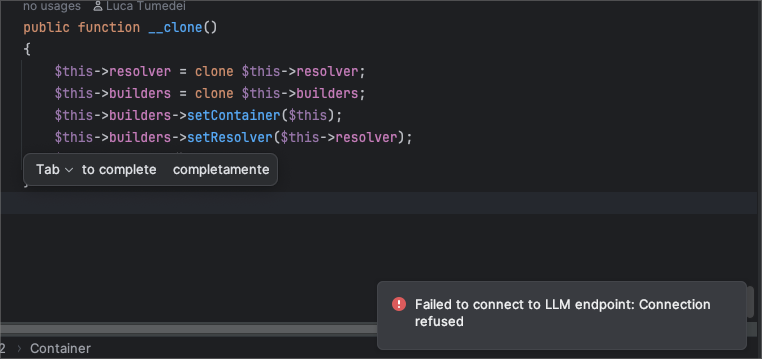
Adding the JSON dependency
When I tried to build, I got compilation errors because the JDK doesn't include a JSON parser. I added the org.json library to build.gradle.kts:
dependencies {
    implementation("org.json:json:20240303")
    // ... other dependencies
}
The number after it, 20240303 is the version number? Or date? It works.
After that, ./gradlew build succeeded. The tests still pass (well, I had to update one test that was checking for "Hello World!" because now the service makes HTTP requests).
I have played around a bit and and it's mostly working.
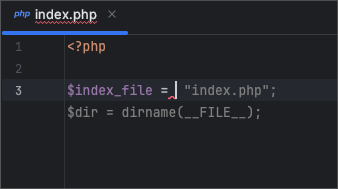
Next
In the next post I will concentrate over the HTTP request part of the code:
- refactoring to an abstracted API
- handling concurrent requests correctly
- testing it
Introduction
I've been using LLMs for code assistance, in the form of completion/copilot suggestions or through a CLI
like Claude Code, for some time now, and while I've got a running list of things I like and do not like, I can see
value in the idea of LLM-assisted code writing.
Some things keep nagging at me:
- the tools do not work on a plane i.e., when there is no internet connection or when I'm not otherwise connected
- I've got a powerful laptop: why do I have to use it like a terminal in the original sense of the word? The compute
power is not local to my machine, it's in a server somewhere I have to connect to, and all my RAM and CPU/GPU is
wasted
- I have only a superficial understanding of how these tools work in the context of the IDE I use for work all-day
long
The last point, in particular, triggers me into wanting to build my own copilot plugin for my IDE of choice: an IntelliJ
one and, more specifically, PHPStorm.
Previous attempts and art
I've tried to switch away from PHPStorm to other Visual-Studio-Code-like forks and variations, but the muscle memory,
the tooling and the code inspection capabilities are not where I would like them to be.
I've tried setting up the VS-Code-likes using all the recommended plugins and tools (including licensed ones), I've
tried other IDEs as well (e.g. Zed or neovim) and all of them are great.
But they are not great for me, my idea of IDE perfection that I get out of the box with PHPStorm always another
plugin/extension away.
The one thing that really surprised me is the llama.vim plugins for vim/neovim.
With a relatively small model (Qwen2.5-Coder-3B) running on my laptop, it provides excellent suggestion with a "
look-around" quality that other tools lack.
The lack of an IntelliJ version is the inspiration for this project of mine.
Can I build an IntelliJ plugin providing auto-completions inspired by the llama.vim plugin?
It should be noted I know nothing of Kotlin, the language I will use to build the plugin.
Level 0
I've done some research, and if I'm building a plugin for an IntelliJ-based IDE, I should use
the plugin template.
Once cloned and configured I can run build the plugin using the gradlew buildPlugin task and install it in my IDE of
choice (PHPStorm) from the Plugins section of the IDE using the Install Plugin from Disk option.
I've customized the project and set its name: "completamente".
It means "completely" in Italian and, again in Italian is a composition of the words "complete" and "mind".
It's meant to be a word play around the concept of completion and mind.
Naming things is hard; I'm not a poet.
Since building the plugin and installing it in my work IDE (i.e. the IDE I work with all-day) is not ideal, I've set up
a run configuration to run the plugin in PHPStorm to debug it.
The CLI command to start a different copy of PHPStorm with my plugin installed in it would be:
./gradlew runIdeForUiTests -PplatformType=PS -PplatformVersion=2025.1.3
This is convenient, but I'm still not getting a step debugging environment with this.
To start a debug version of PHPStorm including my plugin I've added a run configuration to the project in the
.run/Run Plugin in PHPStorm.run.xml file:
<component name="ProjectRunConfigurationManager">
    <configuration default="false" name="Run Plugin in PHPStorm" type="GradleRunConfiguration" factoryName="Gradle">
        <log_file alias="IDE logs" path="$PROJECT_DIR$/build/idea-sandbox/*/log/idea.log" show_all="true"/>
        <ExternalSystemSettings>
            <option name="executionName"/>
            <option name="externalProjectPath" value="$PROJECT_DIR$"/>
            <option name="externalSystemIdString" value="GRADLE"/>
            <option name="scriptParameters" value=""/>
            <option name="taskDescriptions">
                <list/>
            </option>
            <option name="taskNames">
                <list>
                    <option value="runIde"/>
                </list>
            </option>
            <option name="vmOptions" value=""/>
        </ExternalSystemSettings>
        <ExternalSystemDebugServerProcess>false</ExternalSystemDebugServerProcess>
        <ExternalSystemReattachDebugProcess>true</ExternalSystemReattachDebugProcess>
        <DebugAllEnabled>false</DebugAllEnabled>
        <RunAsTest>false</RunAsTest>
        <method v="2"/>
    </configuration>
</component>
Now I can run or debug a copy of PHPStorm with my plugin installed:
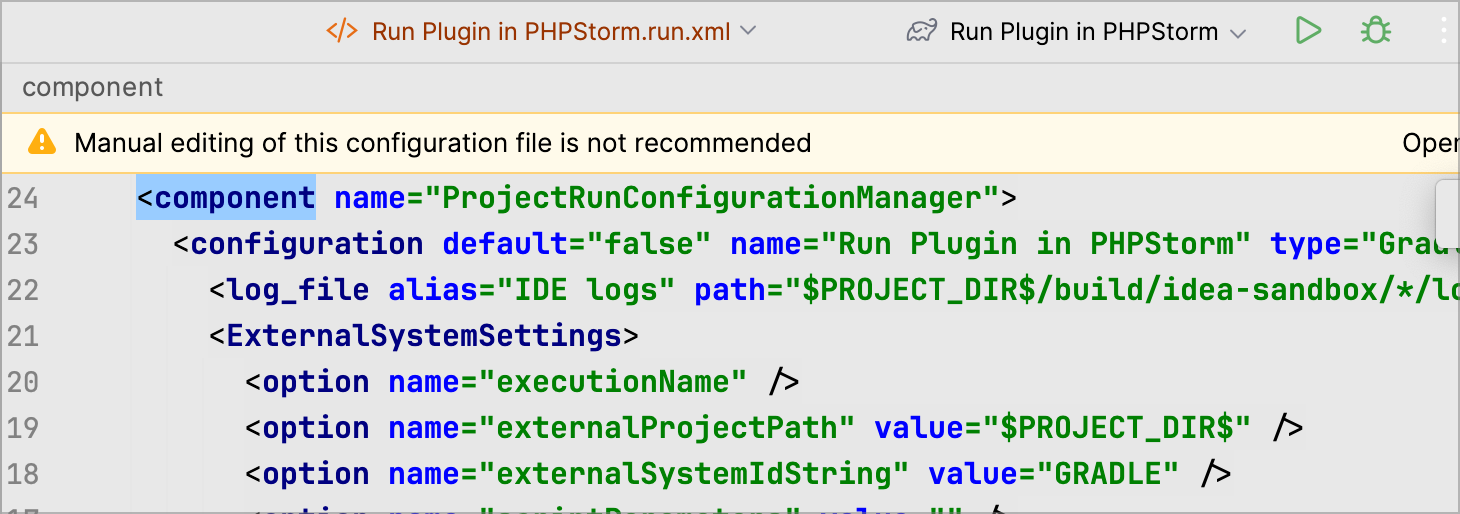
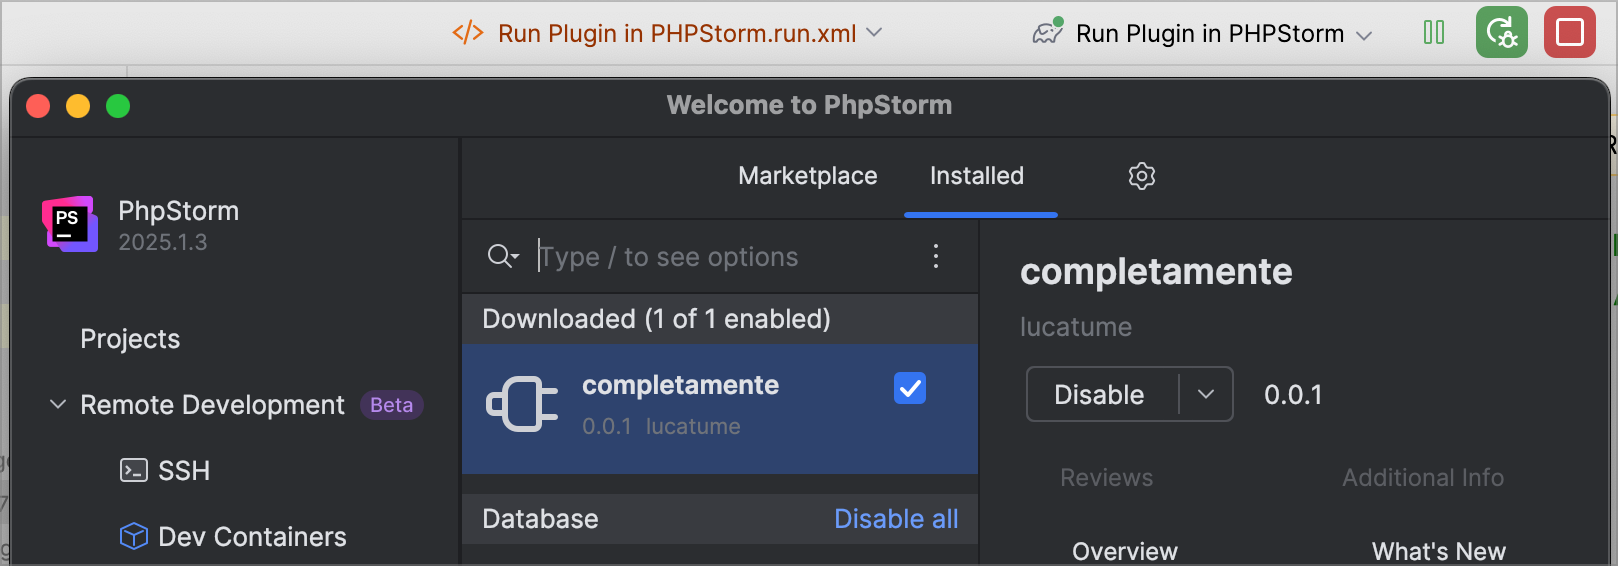
Tapping into the completion API
The first task is connecting my plugin to the reccomended IDE completion API through the plugin configuration file (
src/main/resources/META-INF/plugin.xml):
<!-- Plugin Configuration File. Read more: https://plugins.jetbrains.com/docs/intellij/plugin-configuration-file.html -->
<idea-plugin>
    <id>com.github.lucatume.completamente</id>
    <name>completamente</name>
    <vendor>lucatume</vendor>

    <depends>com.intellij.modules.platform</depends>

    <resource-bundle>messages.MyBundle</resource-bundle>

    <extensions defaultExtensionNs="com.intellij">
        <inline.completion.provider implementation="com.github.lucatume.completamente.completion.Service"/>
    </extensions>
</idea-plugin>
The Service class is, at this stage, not doing much if not providing the same completion, "Hello World!" over and
over:
package com.github.lucatume.completamente.completion

import com.intellij.codeInsight.inline.completion.InlineCompletionEvent
import com.intellij.codeInsight.inline.completion.InlineCompletionProvider
import com.intellij.codeInsight.inline.completion.InlineCompletionProviderID
import com.intellij.codeInsight.inline.completion.InlineCompletionRequest
import com.intellij.codeInsight.inline.completion.elements.InlineCompletionGrayTextElement
import com.intellij.codeInsight.inline.completion.suggestion.InlineCompletionSingleSuggestion
import com.intellij.codeInsight.inline.completion.suggestion.InlineCompletionSuggestion
import com.intellij.codeInsight.inline.completion.suggestion.InlineCompletionVariant

class Service : InlineCompletionProvider {
    // A class to represent a single string suggestion.
    class StringSuggestion(private val suggestion: String) : InlineCompletionSingleSuggestion {
        override suspend fun getVariant() = InlineCompletionVariant.build {
            emit(InlineCompletionGrayTextElement(suggestion))
        }
    }

    override val id: InlineCompletionProviderID
        get() = InlineCompletionProviderID("completamente")

    override suspend fun getSuggestion(request: InlineCompletionRequest): InlineCompletionSuggestion {
        // No computation going on here, the same string every time.
        return StringSuggestion("Hello World!")
    }

    override fun isEnabled(event: InlineCompletionEvent): Boolean {
        // It's always enabled.
        return true
    }
}
I've started the plugin in debug mode and I can see the completion in action in the context of my di52 project:
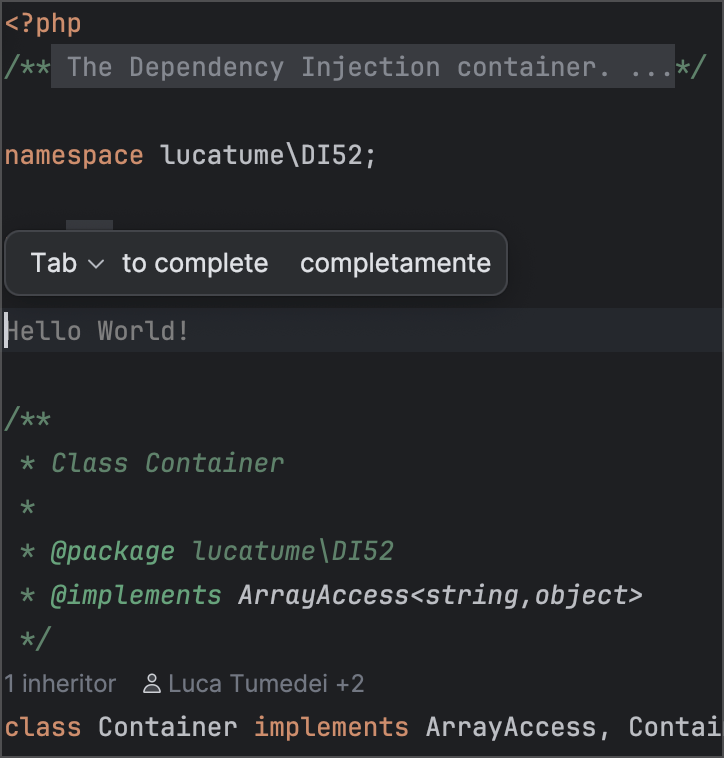
It works. Badly and poorly, but it compiles and it works.
Tests
I'm doing this project to learn.
The easiest way for me to learn things is to test them.
I've started simple with a test to cover the really basic StringSuggestion class:
// src/test/kotlin/com/github/lucatume/completamente/completion/StringSuggestionTest.kt
package com.github.lucatume.completamente.completion

import com.intellij.testFramework.fixtures.BasePlatformTestCase
import kotlinx.coroutines.flow.count
import kotlinx.coroutines.flow.first
import kotlinx.coroutines.runBlocking

class StringSuggestionTest : BasePlatformTestCase() {
    fun testItReturnsTheSameString() {
        val stringSuggestion = StringSuggestion("hello")
        val variant = runBlocking { stringSuggestion.getVariant() }
        val size = runBlocking { variant.elements.count() }
        val suggestedString = runBlocking { variant.elements.first().text }

        assertEquals(1, size)
        assertEquals("hello", suggestedString)
    }
}
Things got complicated as I entered the world of Kotlin and found myself immediately staring down the abyss of async, multiprocess code.
The StringSuggestion::getVariant function is marked with the suspend keyword, which means it's going to be executed
in a different thread; asynchronously, that is.
From my meager understanding of Kotlin coroutines, I've worked out that suspend is like JavaScript async and runBlocking is like await.
If I was to write the code in JavaScript, I'd write something like this:
const variant = await stringSuggestion.getVariant();

// The `count` function is a coroutine that returns the number of elements in the flow.
// That too is asynchronous.
const size = await variant.elements.count();

// The `first` function is a coroutine that returns the first element in the flow.
// That too is ... asynchronous.
const suggestedString = await variant.elements.first().text;
Running the tests with gradlew test shows the test passing.
Testing the service itself required me to dig a bit into the IntelliJ API, but I managed to put together a testing
approach that works using real files and with limited mocking.
In the test below, the file src/test/testData/completion/text-file.txt is a real file that I've created for testing
purposes and the makeInlineeCompletionRequest function provides a convenient API to create a InlineCompletionRequest
object from a file path and offsets:
class ServiceTest : BasePlatformTestCase() {
    // Where I'm getting tests files from, allow me to use relative paths in the tests.
    override fun getTestDataPath() = "src/test/testData/completion"

    // Create an inline completion for tests.
    fun makeInlineCompletionEvent(): InlineCompletionEvent {
        return object : InlineCompletionEvent {
            override fun toRequest(): InlineCompletionRequest {
                throw UnsupportedOperationException("event.toRequest() is not supported in tests")
            }
        }
    }

    // Create an inline completion request for tests.
    fun makeInlineCompletionRequest(filePath: String, startOffset: Int, endOffset: Int): InlineCompletionRequest {
        val event = makeInlineCompletionEvent()
        val file = myFixture.configureByFile(filePath)
        val editor = myFixture.editor
        val document = myFixture.getDocument(file)

        return InlineCompletionRequest(event, file, editor, document, startOffset, endOffset)
    }

    fun testId() {
        val service = Service()

        assertEquals("completamente", service.id.id)
    }

    fun testIsEnabled() {
        val service = Service()

        assertTrue(service.isEnabled(makeInlineCompletionEvent()))
    }

    // This function is more about knowing I can write and run tests than about testing the service.
    fun testGetSuggestion() {
        val request = makeInlineCompletionRequest("text-file.txt", 0, 0)
        val service = Service()

        val suggestion: InlineCompletionSuggestion = runBlocking { service.getSuggestion(request) }
        val variants: List<InlineCompletionVariant> = runBlocking { suggestion.getVariants() }

        assertEquals(1, variants.size)

        assertEquals(1, runBlocking { variants.first().elements.count() })
        assertEquals("Hello World!", runBlocking { variants.first().elements.first().text })
    }
}
The tests are not currently testing much, but I'm getting acquainted with the IntelliJ API, and I need to nail the basics
before moving on.
The tests are currently passing. Progress.
Next
Keeping the llama.vim code to the side, I will incrementally reproduce the implementation approach in my plugin.
The next step will be connecting to an external HTTP completion API to obtain my first real completion.
Embracing bare metal
During the rewrite of version 4 of wp-browser, I've used the chance to remove old code that was either required to support older versions of PHP and Codeception, or to support deprecated or little-used features.
Among the "victims" of this cleaning spree was the Symlinker extension: a Codeception extension provided by wp-browser that would create symbolic links from a source to a destination before tests ran.
I was rarely using the extension, always had very little feedback about it (and no data since I've never collected user and usage information in any way), and had seen it rarely used in the wild, so I removed it.
Until recently, I've always dealt with the intricacies of the file and directory structure required by WordPress (e.g., plugins in wp-content/plugins, themes in wp-content/themes) by using containers.
The nature of container bind mounts makes it easy to have plugins and themes live anywhere and just bind them in place.
If a plugin lives in /home/lucatume/vendor/some-plugin on my machine, I can "bind it in place" using a bind mount in /var/www/html/wp-content/plugins/some-plugin and call it a day.
Support for that functionality and setup is not gone from the latest versions of wp-browser, but I've started using "bare metal" solutions more and more where allowed by the nature of the project.
Nginx/Apache on Docker? No, plain PHP built-in web-server with 5 workers.
Chrome in a container? No, Chrome or Chromium already installed on my machine.
MySQL or MariaDB from a container? No, SQLite from a local file, if I can manage it.
Turns out that CI support is pretty solid as well, and wp-browser CI setup itself is much simplified by just using what is available in most CI environments now
There are situations where all the complexities of more complicated, container-based, setups are required, but that is frequently not the case.
Along with the cleaning, I've reworked wp-browser setup template, the one used when running vendor/bin/codecept init wpbrowser, to use a PHP Built-in server, SQLite and Chromium stack by default, allowing plugin, theme and site developers to be up and running in no time.
![Bare metal setup][images/bare-metal-setup.png]
Placing things
In that setup, I'm symbolically linking the plugin or theme under development in the correct location in the WordPress directory.
I wanted to make sure that symbolic link location would work both in integration and end-to-end tests, the two types of tests scaffolded by default by the template, and could not think of a better way to do it than to bring it back the Symlinker extension.
The latest version of the setup makes it clear setting up the main Codeception configuration file, codeception.yml, like this:
namespace: Tests
support_namespace: Support
paths:
    tests: tests
    output: tests/_output
    data: tests/Support/Data
    support: tests/Support
    envs: tests/_envs
actor_suffix: Tester
params:
    - tests/.env
extensions:
    enabled:
        - Codeception\Extension\RunFailed
        - lucatume\WPBrowser\Extension\ChromeDriverController
        - lucatume\WPBrowser\Extension\BuiltInServerController
        - lucatume\WPBrowser\Extension\Symlinker
    config:
        lucatume\WPBrowser\Extension\ChromeDriverController:
            port: '%CHROMEDRIVER_PORT%'
        lucatume\WPBrowser\Extension\BuiltInServerController:
            workers: 5
            port: '%BUILTIN_SERVER_PORT%'
            docroot: '%WORDPRESS_ROOT_DIR%'
            env:
                DATABASE_TYPE: sqlite
                DB_ENGINE: sqlite
                DB_DIR: '%codecept_root_dir%/tests/Support/Data'
                DB_FILE: db.sqlite
        lucatume\WPBrowser\Extension\Symlinker:
            wpRootFolder: '%WORDPRESS_ROOT_DIR%'
            plugins:
                - .
            themes: []
    commands:
        - lucatume\WPBrowser\Command\RunOriginal
        - lucatume\WPBrowser\Command\RunAll
        - lucatume\WPBrowser\Command\GenerateWPUnit
        - lucatume\WPBrowser\Command\DbExport
        - lucatume\WPBrowser\Command\DbImport
        - lucatume\WPBrowser\Command\MonkeyCachePath
        - lucatume\WPBrowser\Command\MonkeyCacheClear
        - lucatume\WPBrowser\Command\DevStart
        - lucatume\WPBrowser\Command\DevStop
        - lucatume\WPBrowser\Command\DevInfo
        - lucatume\WPBrowser\Command\DevRestart
        - lucatume\WPBrowser\Command\ChromedriverUpdate
So, there and back again; the Symlinker extension is back along with an improved support for "metal" set ups and more to come in wp-browser future.
You can read more about wp-browser in its documentation page.
When I started working on the branch called version-4/minimum-compat-pass in May last year, I thought updating wp-browser to be compatible with Codeception version 5 in a minimal way would have been a matter of a few weeks.
The idea was to fix the most glaring issues of the WordPress testing framework and then move on to a more thorough refactoring of the codebase.
I was wrong.
The first pass took a year and a month and it's now available as a release candidate in the branch v4.
Not because of Codeception, but because of 9 years of code I had to Mary-Kondo through.
My love for the craft of code, which to this day is still raging, made it very difficult for me to overlook the many issues I found in the codebase and I ended up rewriting most of it.
My first commit was on June 16, 2014; I knew so little about PHP I believed all the following to be true:
- I cannot write code without PHPUnit tests or the plugin repository will reject my plugin.
- No company would work with a PHP developer that does not test her code.
- Every one uses XDebug.
There is no judgement here, I was just naive and I had no idea what I was doing.
Being a first pass, it's still not yet all the things I want it to be, but it's a good start and it is, above all, compatible with Codeception version 5, PHP 8.0, 8.1 and 8.2.
Where possible, I tried to keep back compatibility with existing tests: I'm an avid user of my own framework and I didn't want to have to rewrite all my tests to use the new version.
Some tests will need rewriting, though, and I'll try to document them as I go and find out.
Next steps are, in an order I wish I will respect but likely won't:
- Documentation update to reflect the changes in the new version.
- A new first setup experience leveraging containers for a no-hassle setup for theme, plugins and site projects.
- A new test case, provisionally called
SuperWordPressTestCase (no jokes) to leverage the new features of the framework.
I'm also planning to write a series of posts on the new features of the framework and what they bring to the table in terms of new possible use cases.
Previously
This post is part of a series of posts where I'm exploring how to use TLA+ to specify, check and then implement a PHP project that deals with concurrent processes; here are the links to the first post, the second, the third one, and the fourth one.
Fast-failure support
I'm using TLA+ to model a Loop that will be the core of a yet-to-be-implemented testing framework.
One of the features I find very useful is support for fast failure: as soon as a test fails, break out of the Loop, gracefully shut down the other running tests, and exit with an error code.
Since each test "job", whatever that will end up representing, could be running when the first failure comes is, the challenges are the graceful shutdown of the Loop and correct closing of the currently running jobs.
One of the assumptions I had coded in the specification before this step is that all worker processes would run, thus making the worker processes fair; in TLA+ terms, each process is "weakly fair".
Fast failure introduces a drastic change in that paradigm: a worker process could not run if the Loop never starts it because a previous worker's job failed.
This means I should update the worker process by removing the fair keyword from it: while it will run most of the time, it might not run at all if a previous worker job failed triggering the fast-failure handling.
After the update, though, the model checking will fail with Stuttering:
In the image above, without expanding the details of the states, this happened:
- The Loop started with two workers
- When the first worker completed the Loop started a new one (i.e., set the
_startedRegister[J3] value to TRUE).
- The Loop waits for updates from the workers.
- The last worker process started,
J3 stutters: it simply never executes because it is an "unfair" (i.e., not fair) process.
An unfair process simulates a process that might never run: it crashes or takes too much time to produce any noticeable side-effect.
This little experiment shows that making the worker processes not fair is not the right solution.
How should I translate the following from plain English to something that TLA+ would understand?
Beyond PlusCal
The language I've used to write and update the specification is called PlusCal. What I write in PlusCal is then translated into TLA+ specification language proper.
PlusCal is not the specification language; it's merely a comment when it comes to TLA+.
While PlusCal is powerful, it does not allow the kind of access I need to solve my problem: it's time to get my hands dirty.
Before applying my solution to the actual specification, I would like to experiment with a simpler and smaller specification with all the elements required by the real one, but in a more uncomplicated form.
There is a Loop process that will start worker processes, each process should run when activated, and there is the concept of the Loop completing before all worker processes have a chance to start.
Here is the heavily commented version of the PlusCal code, \* starts a comment:
----------------------------- MODULE test_goto -----------------------------
EXTENDS TLC, Integers, FiniteSets
CONSTANTS Loop, Workers, NULL

(*--algorithm test_goto
variables
    started = [x \in Workers |-> FALSE],
    startedCount = 0,
    workTally = 0;

define
NotStartedWorkers == {x \in Workers: started[x] = FALSE}
end define;

fair process loop = Loop
variables proc = NULL;
begin
    Loop_StartWorker:
        proc := CHOOSE x \in NotStartedWorkers: TRUE; \* Pick the first not started worker.
        startedCount := startedCount + 1;
        started[proc] := TRUE; \* Mark this process started, to power NotStartedWorkers.
        if startedCount /= 2 then \* Purposefully not starting the 3rd worker.
            goto Loop_StartWorker;
        end if;
    Loop_WaitForWorkDone:
        await workTally = 2; \* Two workers are done, the 3rd one wil never start.
end process;

fair process worker \in Workers begin \* If not blocked, workers should execute.
    Worker_AutostartGuard: \* Always blocked action: workers cannot start on their own.
        await FALSE = TRUE;
    Worker_Work: \* The Loop will move workers directly here to start them.
        workTally := workTally + 1;
end process;

end algorithm;*)
=============================================================================
The model I'm testing the specification with, after translation, is set up as follows:
Translating and running the model will result in a deadlock:
The Loop will start two workers out of 3; both of them blocked by a guard in the following form:
await FALSE = TRUE;
That await will permanently block the worker processes on the Worker_AutostartGuard action.
Instead of setting a flag in a register shared by Loop and workers to coordinate and stimulate the Loop starting the processes, the _startedRegister variable in the specification, I want the Loop to start the workers by moving them to the Worker_Work action directly.
Before I show the code, I would like to make a note about how PlusCal code is translated.
In the TLA+ translation, there is no concept of "processes"; there are simply states the system will transit to that, for convenience of writing, PlusCal will wrap in processes. The TLA+ specification will be one giant state machine, and the model checker will move from state to state, respecting the available nodes.
When translated from PlusCal to the TLA+ language, the translation will add a pc variable that will map each process to its next state; it can be seen in the image above, initially set to this:
<Initial Predicate>
    pc
        W1 -> Worker_AutostartGuard
        W2 -> Worker_AutostartGuard
        W3 -> Worker_AutostartGuard
        Loop -> Loop_StartWorker
My thinking is that I could move a worker to the Worker_Work phase by setting its entry in the pc variable to Worker_Work to make it look something like this:
<Initial Predicate>
    pc
        W1 -> Worker_Work
        W2 -> Worker_AutostartGuard
        W3 -> Worker_AutostartGuard
        Loop -> Loop_StartWorker
I've updated my PlusCal code to do that:
----------------------------- MODULE test_goto -----------------------------
EXTENDS TLC, Integers, FiniteSets
CONSTANTS Loop, Workers, NULL

(*--algorithm test_goto
variables
    started = [x \in Workers |-> FALSE],
    startedCount = 0,
    workTally = 0;

define
NotStartedWorkers == {x \in Workers: started[x] = FALSE}
end define;

fair process loop = Loop
variables proc = NULL;
begin
    Loop_StartWorker:
        proc := CHOOSE x \in NotStartedWorkers: TRUE; \* Pick the first not started worker.
        startedCount := startedCount + 1;
        started[proc] := TRUE; \* Mark this process started, to power NotStartedWorkers.
        pc[proc] := "Worker_Work"; \* Move the worker process to the "Worker_Work" action directly.
        if startedCount /= 2 then \* Purposefully not starting the 3rd worker.
            goto Loop_StartWorker;
        end if;
    Loop_WaitForWorkDone:
        await workTally = 2; \* Two workers are done, the 3rd one wil never start.
end process;


fair process worker \in Workers begin \* If not blocked, workers should execute.
    Worker_AutostartGuard: \* Always blocked action: workers cannot start on their own.
        await FALSE = TRUE;
    Worker_Work: \* The Loop will move workers directly here to start them.
        workTally := workTally + 1;
end process;

end algorithm;*)
=============================================================================
Except that is not allowed, and the translation will fail with the message:
Unrecoverable error:
-- Multiple assignments to pc
I've not done multiple assignments to pc, but the translation did.
Looking at the translated code, I can see the pc variable is modified in each state, its next value (indicated by pc') updated using EXCEPT.
As an example, this is the translation of the Worker_Work action:
Worker_Work(self) == /\ pc[self] = "Worker_Work"
                     /\ workTally' = workTally + 1
                     /\ pc' = [pc EXCEPT ![self] = "Done"]
                     /\ UNCHANGED << started, startedCount, proc >>
The syntax means "when the model checker will run the Worker_Work action, then the next state will be this."; what the model checker will do next is check all the available actions and pick one whose pre-conditions are met and execute it.
In plain English, the above means:
if the action I (a worker) should execute is the "Worker_Work" one
then the next value of workTally will be workTally + 1
and the next value of pc (the program counter) for myself will be Done
and started, startedCount and proc will not change.
Remember /\ is a logic AND, var' = <value> is an assignment applied to the next state, and self means the process itself, used as a key.
The string pc' = [pc EXCEPT ![self] = "Done"] means "the next state of pc is like pc except for the key self that will have a value of Done"; the syntax is a bit weird.
The words "action" and "state" should ring a bell from store-pattern implementations like Redux. It's an excellent concept to keep in mind and wrap my head around the fact that each PlusCal label (e.g., the Worker_Work one) will become an action (an operator, a function in TLA+ terms) that will take a state as an input and return the next state as an output.
Since each translation of a PlusCal label will update the next state of the pc variable, I cannot do that in the context of PlusCal.
Why not allow updates of the variables more than once? I would not know for sure, I did not write the TLA+ model checker, but I can guess to avoid the next state being a function of itself.
Messing with the translation
I've commented the problematic parts of the PlusCal code and translated it to get the bulk of it set up.
In the translation, I've commented the original code out and added the updated version right after it.
----------------------------- MODULE test_goto -----------------------------
EXTENDS TLC, Integers, FiniteSets
CONSTANTS Loop, Workers, NULL

(*--algorithm test_goto
variables
    started = [x \in Workers |-> FALSE],
    startedCount = 0,
    workTally = 0;

define
NotStartedWorkers == {x \in Workers: started[x] = FALSE}
end define;

fair process loop = Loop
variables proc = NULL;
begin
    Loop_StartWorker:
        proc := CHOOSE x \in NotStartedWorkers: TRUE; \* Pick the first not started worker.
        startedCount := startedCount + 1;
        started[proc] := TRUE; \* Mark this process started, to power NotStartedWorkers.
        \* pc[proc] := "Worker_Work"; >>> TODO IN THE TRANSLATION.
        if startedCount /= 2 then \* Purposefully not starting the 3rd worker.
            goto Loop_StartWorker;
        end if;
    Loop_WaitForWorkDone:
        await workTally = 2; \* Two workers are done, the 3rd one wil never start.
        \* pc := [x \in DOMAIN pc |-> "Done"] >>> TODO IN THE TRANSLATION.
end process;

fair process worker \in Workers begin \* If not blocked, workers should execute.
    Worker_AutostartGuard: \* Always blocked action: workers cannot start on their own.
        await FALSE = TRUE;
    Worker_Work: \* The Loop will move workers directly here to start them.
        workTally := workTally + 1;
end process;

end algorithm;*)
\* BEGIN TRANSLATION (chksum(pcal) \in STRING /\ chksum(tla) \in STRING)
VARIABLES started, startedCount, workTally, pc

(* define statement *)
NotStartedWorkers == {x \in Workers: started[x] = FALSE}

VARIABLE proc

vars == << started, startedCount, workTally, pc, proc >>

ProcSet == {Loop} \cup (Workers)

Init == (* Global variables *)
        /\ started = [x \in Workers |-> FALSE]
        /\ startedCount = 0
        /\ workTally = 0
        (* Process loop *)
        /\ proc = NULL
        /\ pc = [self \in ProcSet |-> CASE self = Loop -> "Loop_StartWorker"
                                        [] self \in Workers -> "Worker_AutostartGuard"]

Loop_StartWorker == /\ pc[Loop] = "Loop_StartWorker"
                    /\ proc' = (CHOOSE x \in NotStartedWorkers: TRUE)
                    /\ startedCount' = startedCount + 1
                    /\ started' = [started EXCEPT ![proc'] = TRUE]
                    /\ IF startedCount' /= 2
                        \*   THEN /\ pc' = [pc EXCEPT ![Loop] = "Loop_StartWorker"]
                        \*   ELSE /\ pc' = [pc EXCEPT ![Loop] = "Loop_WaitForWorkDone"]
                          THEN /\ pc' = [pc EXCEPT ![Loop] = "Loop_StartWorker", ![proc'] = "Worker_Work"]
                          ELSE /\ pc' = [pc EXCEPT ![Loop] = "Loop_WaitForWorkDone", ![proc'] = "Worker_Work"]
                    /\ UNCHANGED workTally

Loop_WaitForWorkDone == /\ pc[Loop] = "Loop_WaitForWorkDone"
                        /\ workTally = 2
                        \* /\ pc' = [pc EXCEPT ![Loop] = "Done"]
                        /\ pc' = [x \in DOMAIN pc |-> "Done"]
                        /\ UNCHANGED << started, startedCount, workTally, proc >>

loop == Loop_StartWorker \/ Loop_WaitForWorkDone

Worker_AutostartGuard(self) == /\ pc[self] = "Worker_AutostartGuard"
                               /\ FALSE = TRUE
                               /\ pc' = [pc EXCEPT ![self] = "Worker_Work"]
                               /\ UNCHANGED << started, startedCount,
                                               workTally, proc >>

Worker_Work(self) == /\ pc[self] = "Worker_Work"
                     /\ workTally' = workTally + 1
                     /\ pc' = [pc EXCEPT ![self] = "Done"]
                     /\ UNCHANGED << started, startedCount, proc >>

worker(self) == Worker_AutostartGuard(self) \/ Worker_Work(self)

(* Allow infinite stuttering to prevent deadlock on termination. *)
Terminating == /\ \A self \in ProcSet: pc[self] = "Done"
               /\ UNCHANGED vars

Next == loop
           \/ (\E self \in Workers: worker(self))
           \/ Terminating

Spec == /\ Init /\ [][Next]_vars
        /\ WF_vars(loop)
        /\ \A self \in Workers : WF_vars(worker(self))

Termination == <>(\A self \in ProcSet: pc[self] = "Done")

\* END TRANSLATION
=============================================================================
In the Loop_StartWorker and Loop_WaitForWorkDone actions, I'm updating more than one entry of the pc' map, modeling the idea that the Loop will "start" the worker processes correctly without using a register and avoiding unterminated worker processes by setting the next stage of any process to "Done" in the Loop_WaitForWorkDone phase.
Checking the model for Termination and Deadlock will pass this time:
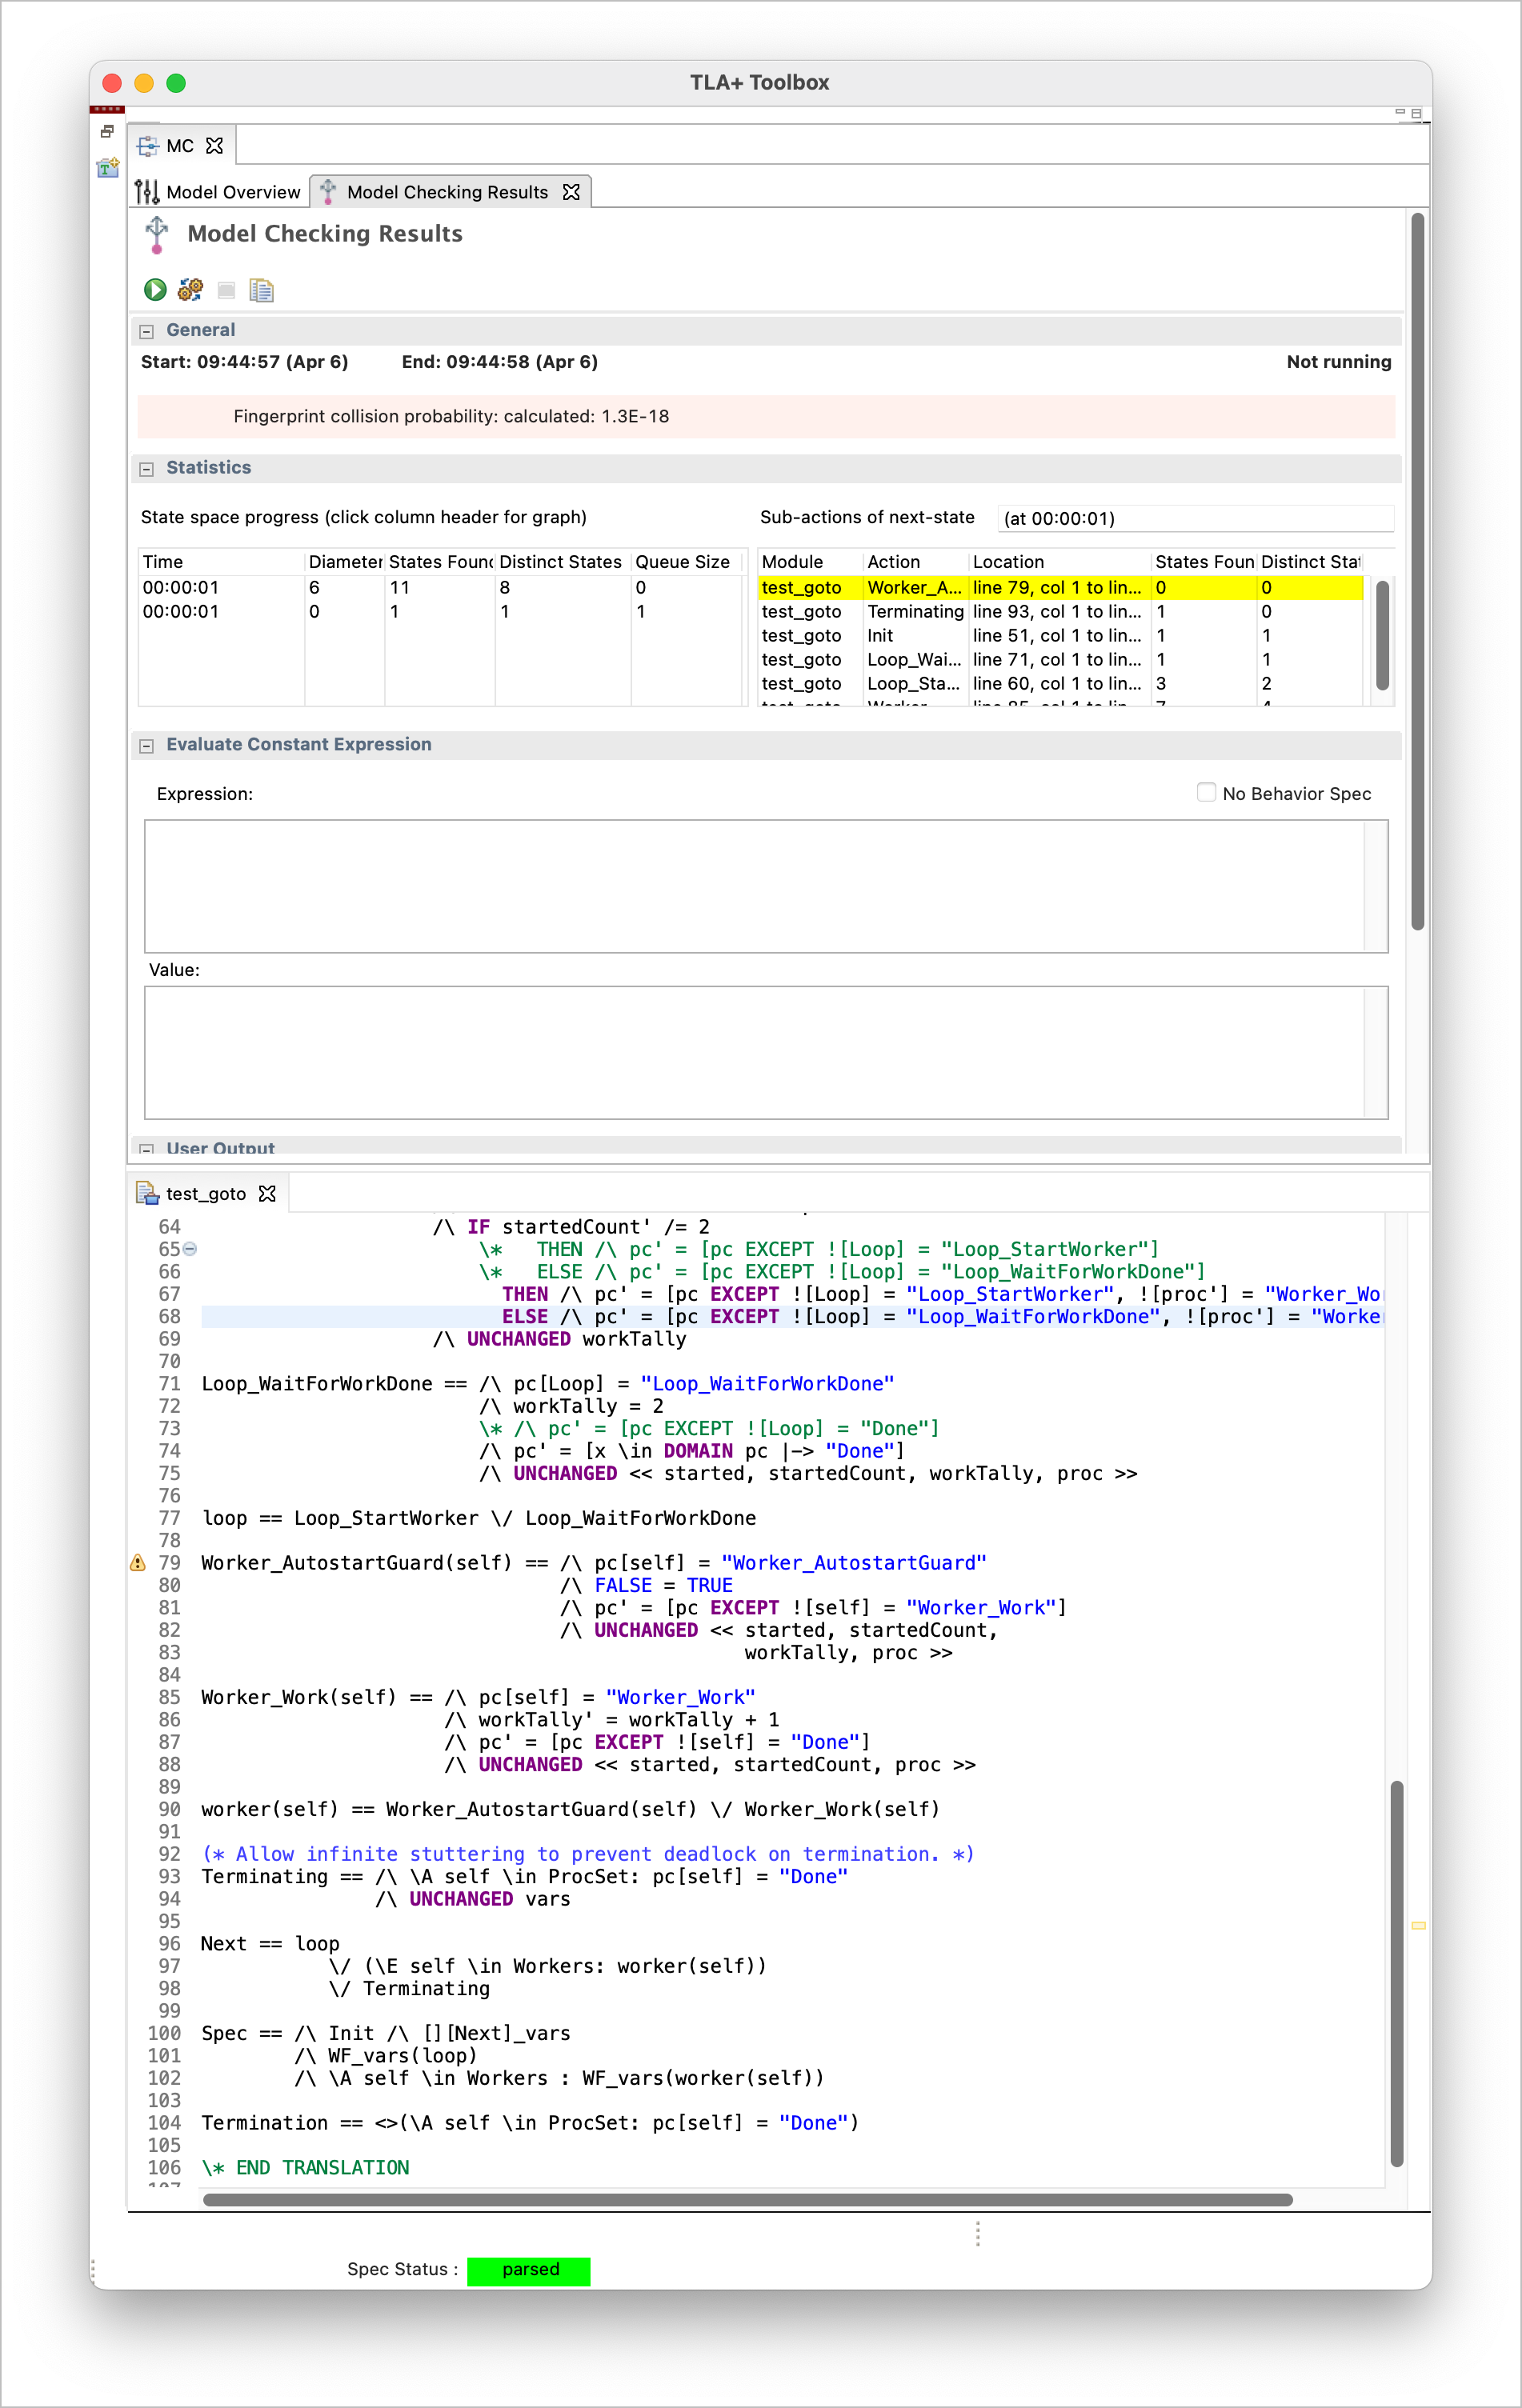
Next
In my next post, I will apply this newfound "tool" to the actual specification I care about and keep working on it to move it toward its final version.
Previously
This post is part of a series of posts where I'm exploring how to use TLA+ to specify, check and then implement a PHP project that deals with concurrent processes; here are the links to the first post, the second, and the third one.
Checking for output
In the previous post, I have completed a specification of the Loop that would pass model checking in different scenarios with more jobs than parallelism, more parallelism than jobs, and, finally, more of a "serial" case with a parallelism of 1.
I've added two more models to check:
- 3 jobs, parallelism 3
- 1 job, parallelism 1
The specification modified as outlined in the third post passes all model checks without any change.
There is something fundamental to the Loop correct execution that I'm currently not checking: the Loop should collect all the output emitted by the Workers.
In the specification, I've represented the output emitted by the workers as a * char appended to a sequence. I'm keeping that over-simplification in place and leveraging that by ensuring the amount of * chars collected by the Loop is the same emitted by the workers.
Since the workers use an Inter-process Communication pipe to share their output with the Loop, I want to make another assertion that all worker pipes are drained by the end of the Loop.
I've done the first update to the specification to support this new check:
----------------------------- MODULE spec_loop -----------------------------
EXTENDS TLC, Integers, FiniteSets, Sequences
CONSTANTS Loop, JobSet, Parallelism, NULL

(*--algorithm loop
variables
	jobsCount = Cardinality(JobSet),
	_startedRegister = [x \in JobSet |-> FALSE],
	_processStatusRegister = [x \in JobSet |-> NULL],
	_processPipesRegister = [x \in JobSet |-> <<>>],
	_emittedOutputLen = 0,
	_collectedOutputLen = 0;

define
	StartedCount == Cardinality({x \in DOMAIN _startedRegister: _startedRegister[x] = TRUE})
	NextNotStarted == CHOOSE x \in DOMAIN _startedRegister: _startedRegister[x] = FALSE
	CompletedCount == Cardinality({x \in JobSet: _processStatusRegister[x] /= NULL})
	Running == StartedCount - CompletedCount
	ParallelismRespected == Running <= Parallelism
	StreamSelectUpdates == {x \in JobSet: _processPipesRegister[x] /= <<>>}
end define;

fair process loop = Loop
variables
	streamSelectUpdates = {},
	updatedProcess = NULL,
	processStatus = NULL,
	processToOutputMap = [x \in JobSet |-> <<>>],
	processToExitStatusMap = [x \in JobSet |-> NULL];

	begin
		StartInitialBatch:
			while StartedCount < Parallelism /\ StartedCount < jobsCount do
				with p = NextNotStarted do
					_startedRegister[p] := TRUE;
				end with;
			end while;
		WaitForStreamUpdates:
			streamSelectUpdates := StreamSelectUpdates;
			await Cardinality(StreamSelectUpdates) > 0;
		HandleStreamUpdates:
			while Cardinality(streamSelectUpdates) > 0 do
				updatedProcess := CHOOSE x \in streamSelectUpdates: TRUE;
				streamSelectUpdates := streamSelectUpdates \ {updatedProcess};
				GetProcessOutput:
					with processOutput = _processPipesRegister[updatedProcess] do
						processToOutputMap[updatedProcess] := Append(processToOutputMap[updatedProcess], processOutput);
						_collectedOutputLen := _collectedOutputLen + Len(processOutput);
					end with;
					_processPipesRegister[updatedProcess] := <<>>;
				GetProcessStatus:
					processStatus := _processStatusRegister[updatedProcess];
				UpdateTrackedProcessPipes:
					if processStatus /= NULL then
						processToExitStatusMap[updatedProcess] := processStatus;
					end if;
				CheckLoopStatus:
					if processToExitStatusMap[updatedProcess] /= NULL then
						MaybeStartOneMore:
							if StartedCount < jobsCount /\ Running < Parallelism then
								with p = NextNotStarted do
								_startedRegister[p] := TRUE;
								end with;
								goto WaitForStreamUpdates;
							end if;
					end if;
					CheckAllDone:
						if Cardinality({x \in JobSet: processToExitStatusMap[x] /= NULL}) = jobsCount then
							assert(_collectedOutputLen = _emittedOutputLen);
							goto Done;
						else
							goto WaitForStreamUpdates;
						end if;
			end while;
end process

fair process worker \in JobSet
begin
	WaitToStart:
		await _startedRegister[self] = TRUE;
	Work:
		either
			_processPipesRegister[self] := Append(_processPipesRegister[self], "*");
			_emittedOutputLen := _emittedOutputLen + 1
		or
			skip;
		end either;
	ExitStatus:
		either
			_processPipesRegister[self] := Append(_processPipesRegister[self], "*");
			_emittedOutputLen := _emittedOutputLen + 1;
			_processStatusRegister[self] := 0;
			goto Done;
		or
			_processPipesRegister[self] := Append(_processPipesRegister[self], "*");
			_emittedOutputLen := _emittedOutputLen + 1;
			_processStatusRegister[self] := 1;
			goto Done;
		end either;
end process;

end algorithm;*)
\* BEGIN TRANSLATION
\* [...]
\* END TRANSLATION

OneWorkerPerJobStarted == <>[](StartedCount = Cardinality(JobSet))
AllWorkersCompleted == <>[](CompletedCount = Cardinality(JobSet))
=============================================================================
To note in the specification:
- I'm using the
_emittedOutputLen to store the length of the output generated by the workers; only the worker processes will update it.
- The
_collectedOutputLen global variable stores the length of the output collected by the Loop process.
- I've not added any Invariant Property to my model
The specification is failing when checked against a model:
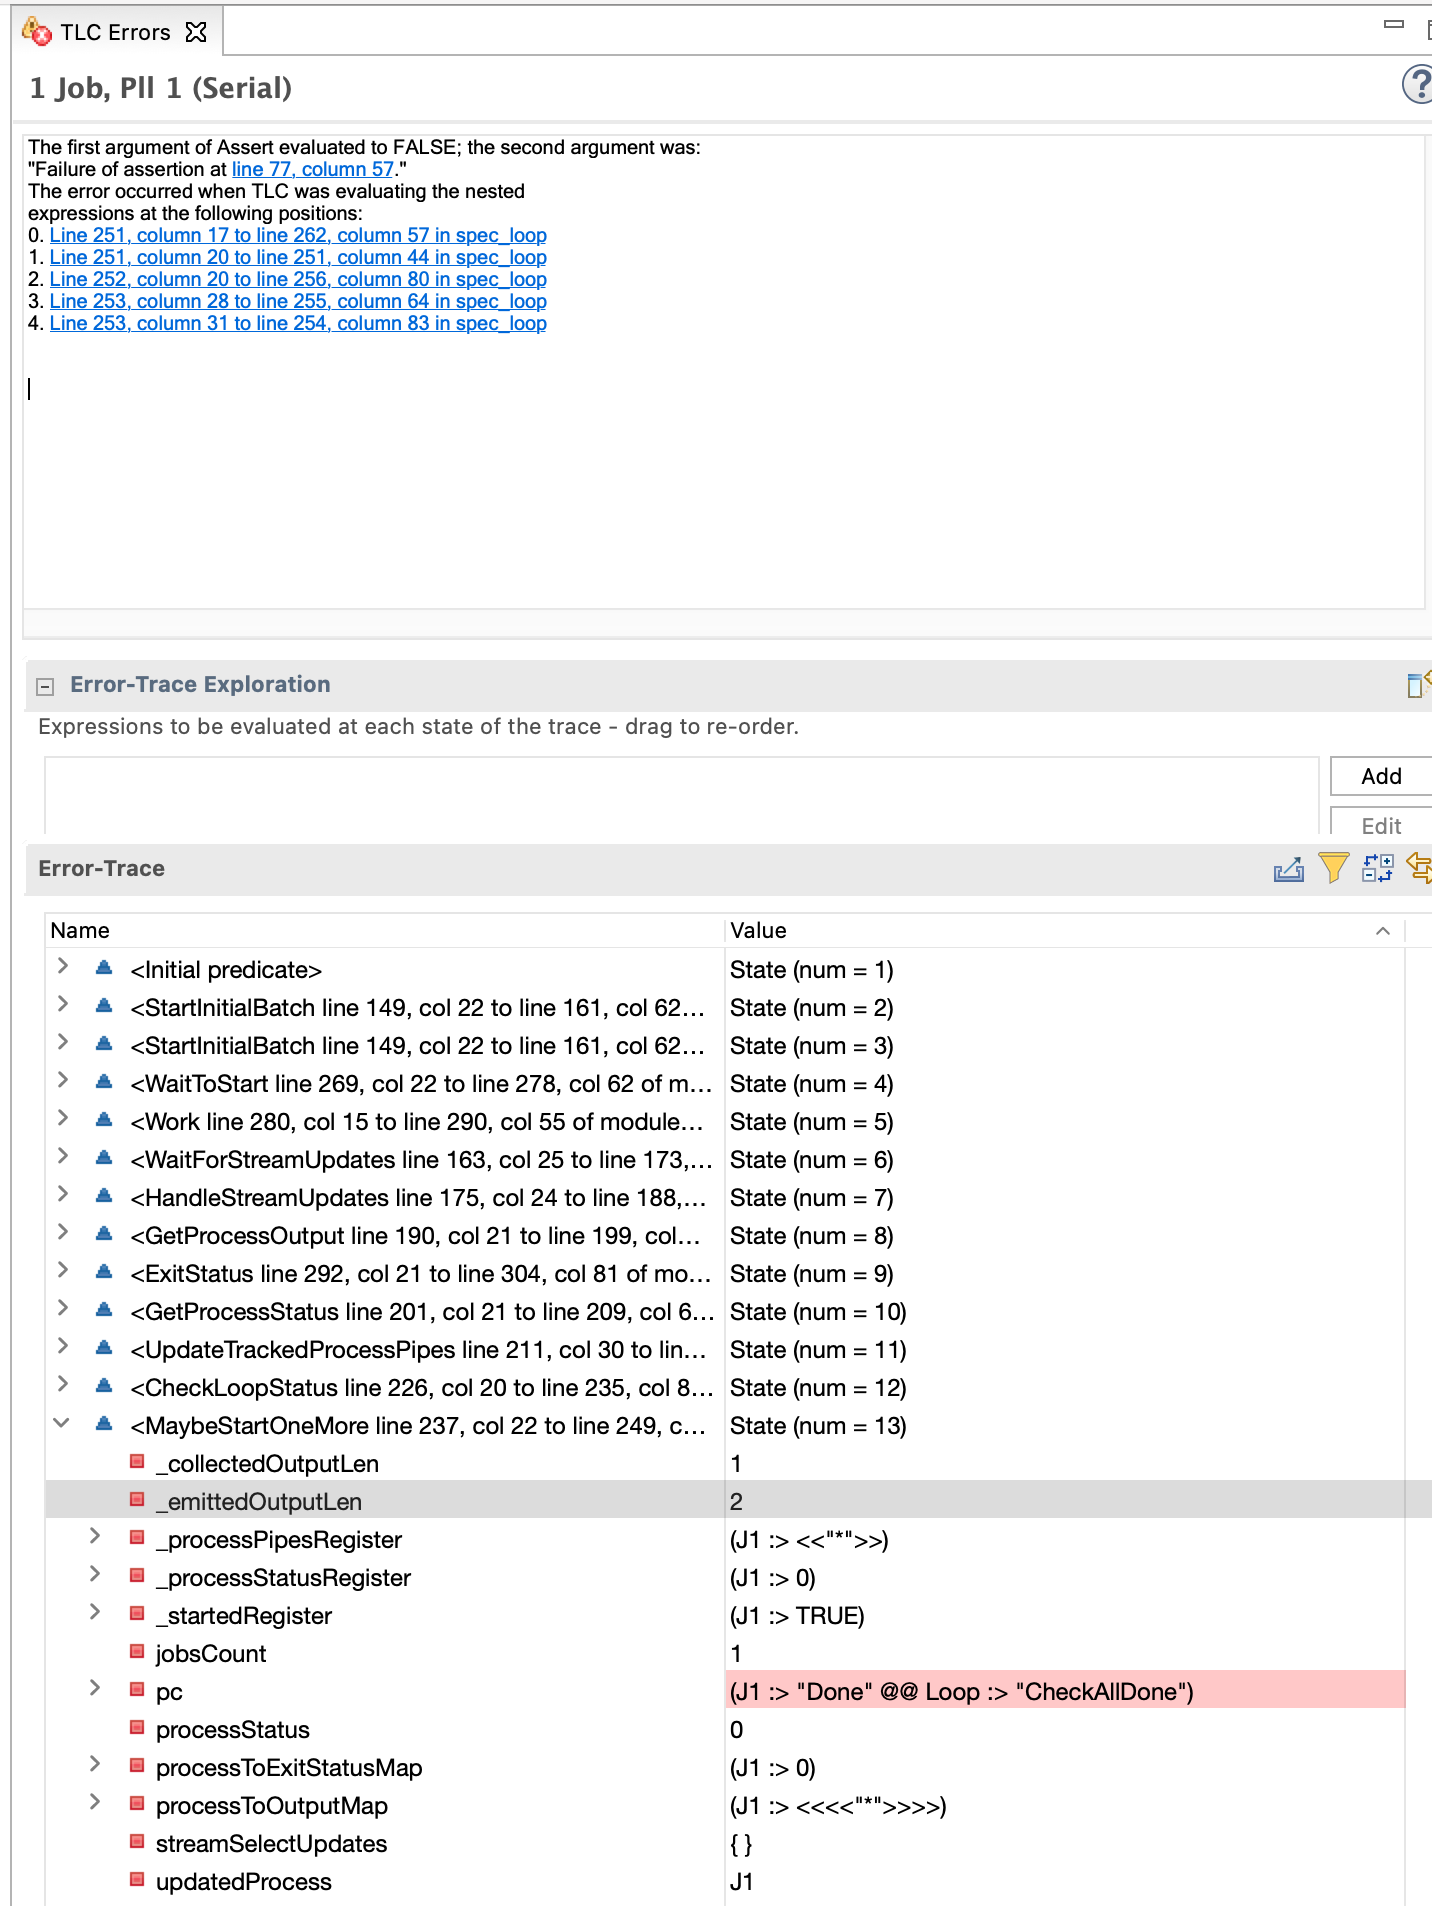
The error message reads as follows (I'm omitting the lines):
The first argument of Assert evaluated to FALSE; the second argument was:
"Failure of assertion at line 69, column 57."
The error occurred when TLC was evaluating the nested
expressions at the following positions: ...
The failing assertion is the one I've added in the Loop CheckAllDone phase; before moving to the Done phase of the Loop, I want to make sure the loop collected all the emitted output.
Instead of using a temporal property, I'm using an assertion. The reason for this approach is that a temporal property would be an "eventually, then always" one.
But the length of the emitted and collected output would be 0 at the start of the specification, and it would be invalidated now and then as the Loop and the workers alternate emitting and collecting it. Changing the temporal condition to just "eventually" would not guarantee me that is true at the end, when the Loop is completed.
And "when the loop is done" is precisely the only moment I want to make this check, so an assertion makes sense.
That assertion fails, telling me the current specification is not correctly collecting all the output emitted by the workers.
Another pass on the specification adds a step in the CheckLoopStatus phase to get the output the process might have emitted before exiting. This update will make the specification pass across all models:
"`tla
----------------------------- MODULE spec_loop -----------------------------
EXTENDS TLC, Integers, FiniteSets, Sequences
CONSTANTS Loop, JobSet, Parallelism, NULL
(*--algorithm loop
variables
jobsCount = Cardinality(JobSet),
_startedRegister = [x \in JobSet |-> FALSE],
_processStatusRegister = [x \in JobSet |-> NULL],
_processPipesRegister = [x \in JobSet |-> <<>>],
_emittedOutputLen = 0,
_collectedOutputLen = 0;
define
StartedCount == Cardinality({x \in DOMAIN _startedRegister: _startedRegister[x] = TRUE})
NextNotStarted == CHOOSE x \in DOMAIN _startedRegister: _startedRegister[x] = FALSE
CompletedCount == Cardinality({x \in JobSet: _processStatusRegister[x] /= NULL})
Running == StartedCount - CompletedCount
ParallelismRespected == Running <= Parallelism
StreamSelectUpdates == {x \in JobSet: _processPipesRegister[x] /= <<>>}
end define;
macro startProcess() begin
with p = NextNotStarted do
_startedRegister[NextNotStarted] := TRUE;
end with;
end macro;
macro collectProcessOutput(p, processToOutputMap) begin
with processOutput = _processPipesRegister[updatedProcess] do
processToOutputMap[updatedProcess] := Append(processToOutputMap[updatedProcess], processOutput);
_collectedOutputLen := _collectedOutputLen + Len(processOutput);
end with;
_processPipesRegister[updatedProcess] := <<>>;
end macro;
macro emitOutput(p, output) begin
_processPipesRegister[p] := Append(_processPipesRegister[p], output);
_emittedOutputLen := _emittedOutputLen + 1;
end macro;
macro exitWithStatus(p, status) begin
_processStatusRegister[p] := status;
end macro;
fair process loop = Loop
variables
streamSelectUpdates = {},
updatedProcess = NULL,
processStatus = NULL,
processToOutputMap = [x \in JobSet |-> <<>>],
processToExitStatusMap = [x \in JobSet |-> NULL];
begin
	StartInitialBatch:
		while StartedCount < Parallelism /\ StartedCount < jobsCount do
		    startProcess();
		end while;
	WaitForStreamUpdates:
		streamSelectUpdates := StreamSelectUpdates;
		await Cardinality(StreamSelectUpdates) > 0;
	HandleStreamUpdates:
		while Cardinality(streamSelectUpdates) > 0 do
			updatedProcess := CHOOSE x \in streamSelectUpdates: TRUE;
			streamSelectUpdates := streamSelectUpdates \ {updatedProcess};
			GetProcessOutput:
			    collectProcessOutput(updatedProcess, processToOutputMap);
			GetProcessStatus:
				processStatus := _processStatusRegister[updatedProcess];
			UpdateTrackedProcessPipes:
				if processStatus /= NULL then
					processToExitStatusMap[updatedProcess] := processStatus;
				end if;
			CheckLoopStatus:
				if processToExitStatusMap[updatedProcess] /= NULL then
					GetProcessExitOutput:
					    collectProcessOutput(updatedProcess, processToOutputMap);
					MaybeStartOneMore:
						if StartedCount < jobsCount /\ Running < Parallelism then
		                    startProcess();
							goto WaitForStreamUpdates;
						end if;
				end if;
				CheckAllDone:
					if Cardinality({x \in JobSet: processToExitStatusMap[x] /= NULL}) = jobsCount then
						assert(_collectedOutputLen = _emittedOutputLen);
						goto Done;
					else
						goto WaitForStreamUpdates;
					end if;
		end while;
end process
fair process worker \in JobSet
begin
WaitToStart:
await _startedRegister[self] = TRUE;
Work:
either
emitOutput(self, "");
or
skip;
end either;
ExitStatus:
either
emitOutput(self, "");
exitWithStatus(self, 0);
goto Done;
or
_processPipesRegister[self] := Append(_processPipesRegister[self], "*");
_emittedOutputLen := _emittedOutputLen + 1;
_processStatusRegister[self] := 1;
goto Done;
end either;
end process;
end algorithm;*)
* BEGIN TRANSLATION
* [...]
* END TRANSLATION
OneWorkerPerJobStarted == <>[](StartedCount = Cardinality(JobSet))
AllWorkersCompleted == <>[](CompletedCount = Cardinality(JobSet))
Besides putting in place the fix to make sure the specification will pass all models check, I've also refactored the code to extract duplicated code into `macro's: `startProcess`, `collectProcessOutput`, `emitOutput`, and `exitWithStatus`.
What each of them does is pretty easy to understand, and macros work like functions. For the most: the one exception is macros will only be able to change the value of variables that are either local to the macro (but this is pretty common in any programming language) or that are passed to the macros. Once this is taken care of, macros help reduce the verbosity and duplication of the code a bit.

### PHP translation
There are more features I want my Loop-based code to support, but it's worth trying to translate that into PHP code before I move on and find myself having to write too complicated code.

```php
<?php

class Loop
{
    private $jobs;
    private $jobsCount;
    protected $parallelism;
    private $procs = [];
    private $startedCount = 0;
    private $runningCount = 0;
    private $readStdoutStreams = [];
    private $readStderrStreams = [];
    private $jobToExitStatusMap = [];
    private $jobToStdoutContents = [];
    private $jobToStderrContents = [];

    public function __construct($jobs, $parallelism)
    {
        $this->jobs = $jobs;
        $this->jobsCount = count($jobs);
        $this->parallelism = $parallelism;
        reset($this->jobs);
    }

    private function collectProcessOutput(stdClass $proc)
    {
        if (!isset($this->jobToStdoutContents[$proc->job])) {
            $this->jobToStdoutContents[$proc->job] = '';
        }
        if (!isset($this->jobToStderrContents[$proc->job])) {
            $this->jobToStderrContents[$proc->job] = '';
        }
        $this->jobToStdoutContents[$proc->job] .= stream_get_contents($proc->stdoutStream);
        $this->jobToStderrContents[$proc->job] .= stream_get_contents($proc->stderrStream);
    }

    private function startWorker()
    {
        $job = current($this->jobs);
        next($this->jobs);
        $command = sprintf("%s %s %s", PHP_BINARY, escapeshellarg(__FILE__), $job);
        $desc = [
            0 => ['pipe', 'r'], // Proc STDIN.
            1 => ['pipe', 'w'], // Proc STDOUT.
            2 => ['pipe', 'w'], // Proc STDERR.
        ];
        $procHandle = proc_open($command, $desc, $pipes, null, null, ['bypass_shell']);
        $procStdout = $pipes[1];
        $procStderr = $pipes[2];
        $this->procs[] = (object) [
            'procHandle' => $procHandle, 'stdoutStream' => $procStdout, 'stderrStream' => $procStderr, 'job' => $job
        ];
        $this->startedCount++;
        $this->runningCount++;
        $this->readStdoutStreams[] = $procStdout;
        $this->readStderrStreams[] = $procStderr;
    }

    private function getProcFromStream($stream)
    {
        foreach ($this->procs as $key => $proc) {
            if ($proc->stdoutStream === $stream || $proc->stderrStream === $stream) {
                return $proc;
            }
        }

        return null;
    }

    public function run()
    {
        // StartInitialBatch
        while ($this->startedCount < $this->parallelism && $this->startedCount < $this->jobsCount) {
            $this->startWorker();
        }

        while (true) {
            //WaitForStreamUpdates

            // Reset this on each run to make sure we only wait for updates from active process streams.
            $readStreams = array_merge($this->readStdoutStreams, $this->readStderrStreams);
            $read = $readStreams;
            $write = [];
            $except = [];
            $streamUpdates = stream_select($read, $write, $except, 10);

            if (!$streamUpdates) {
                continue;
            }

            // HandleStreamUpdates
            $skipRead = [];
            foreach ($read as $index => $stream) {
                if (isset($skipRead[$index])) {
                    // This stream was coupled with an already read one, it's been read already.
                    continue;
                }

                // GetProcessOutput
                $proc = $this->getProcFromStream($stream);
                $this->collectProcessOutput($proc);
                // GetProcessStatus
                $procStatus = proc_get_status($proc->procHandle);
                if (!$procStatus['running']) {
                    $this->jobToExitStatusMap[$proc->job] = $procStatus['exitcode'];

                    // UpdateTrackedProcessPipes
                    // We'll empty the other stream now, skip that.
                    $otherStreamIndex = in_array($proc->stdoutStream, $this->readStdoutStreams, true) ?
                        array_search($proc->stderrStream, $readStreams, true)
                        : array_search($proc->stdoutStream, $readStreams, true);
                    $skipRead[$otherStreamIndex] = true;
                    --$this->runningCount;
                    $this->readStdoutStreams = array_diff($this->readStdoutStreams, [$proc->stdoutStream]);
                    $this->readStderrStreams = array_diff($this->readStderrStreams, [$proc->stderrStream]);

                    // GetProcessExitOutput
                    $this->collectProcessOutput($proc);
                    // MaybeStartOneMore
                    if ($this->startedCount < $this->jobsCount && $this->runningCount < $this->parallelism) {
                        $this->startWorker();
                    }
                }
                //CheckAllDone
                if (count($this->jobToExitStatusMap) === $this->jobsCount) {
                    break 2;
                }
            }
        }

        return array_map(function ($job) {
            return [
                'job' => $job,
                'stdout' => $this->jobToStdoutContents[$job],
                'sterr' => $this->jobToStderrContents[$job],
                'exitStatus' => $this->jobToExitStatusMap[$job]
            ];
        }, $this->jobs);
    }
}

function worker()
{
    do {
        $stdoutOrStderr = mt_rand(0, 1);
        if ($stdoutOrStderr === 0) {
            fwrite(STDOUT, "*", 1);
        } else {
            fwrite(STDERR, "*", 1);
        }
        $action = mt_rand(0, 3);
    } while ($action > 0);

    $exitStatus = mt_rand(0, 1);
    exit($exitStatus);
}

if (!isset($argv[1])) {
    // Start the loop.
    $loop = new Loop(range(1, 5), 2);
    echo json_encode($loop->run(), JSON_PRETTY_PRINT);
} else {
    // Handle a worker request.
    worker();
}
I've tried to port over, as comment blocks, the labels that would be in the specification.
Running the script will print output similar to this on the screen:
» php test-loop-02.php
[
    {
        "job": 1,
        "stdout": "**",
        "sterr": "******",
        "exitStatus": 1
    },
    {
        "job": 2,
        "stdout": "",
        "sterr": "*",
        "exitStatus": 1
    },
    {
        "job": 3,
        "stdout": "***",
        "sterr": "*****",
        "exitStatus": 1
    },
    {
        "job": 4,
        "stdout": "**",
        "sterr": "",
        "exitStatus": 0
    },
    {
        "job": 5,
        "stdout": "*",
        "sterr": "***",
        "exitStatus": 0
    }
Nothing to be too excited about, but enough to demonstrate the Loop component works as intended.
I've gone for clarity and verbosity over cleverness; it could be polished further; I'm not doing that now as there are more features I want to add to the specification that will need at least a further iteration over the code.
The most significant differences between the PHP code and the specification are:
- In PHP, `resource's cannot be used as keys to arrays, so I've added some indirect maps to deal with that.
- Again, in PHP, processes will emit output on the
STDOUT and the STDERR streams. To account for that, the Loop will read from both streams. I've taken some additional care to avoid calling proc_get_status twice on a terminated process, as the second call will return a -1 and not the actual exit code.
Besides the implementation differences, the structure is the same.
I've not gone as far as to use goto in the PHP code, though, and relied on regular loops.
The code lacks several security features like error handling and closing of the streams; it conveys the idea good enough as it is.
Next
In the next post, I will be adding fast-failure support to the Loop and start on a shared resources lock sharing system.
Previously
In the first post of the series, I've introduced the project I'm trying to complete using TLA+ and its specification verification power.
In the second post, I've started moving on with the specification first and the PHP implementation second.
This prior art contains insight into my thinking process and flow and provides a longer description of what I'm trying to build.
Pipes
My last iteration on the specification and implementation did nail the part where the main PHP thread, the Loop, dispatches the processing of each test block (whatever that will end up being) to separate PHP processes.
The issue with the last implementation was CPU-locking, all the possible mitigations of it (see the first post), and the lack of communication between the Loop thread and the worker threads.
Both issues can be solved using PHP stream_select function: the function, when provided a set of streams to observe, will block the execution of the PHP script until at least one of them is updated.
Why is this important? Because translating TLC's await keyword into PHP code that will actually wait, not poll on a CPU-locked cycle, cannot be achieved with many functions in PHP.
Furthermore, the stream_select function will deal with the problem of the Inter-Process Communication (IPC from now on), allowing the Loop to get "push updates" from the workers.
Pipes specification
I've modeled this new approach in the specification below:
----------------------------- MODULE spec_loop -----------------------------
EXTENDS TLC, Integers, FiniteSets, Sequences
CONSTANTS Loop, JobSet, Parallelism, NULL

(*--algorithm loop
variables
	jobsCount = Cardinality(JobSet),
	_startedRegister = [x \in JobSet |-> FALSE],
	_processStatusRegister = [x \in JobSet |-> NULL],
	_processPipesRegister = [x \in JobSet |-> <<>>];

define
	StartedCount == Cardinality({x \in DOMAIN _startedRegister: _startedRegister[x] = TRUE})
	NextNotStarted == CHOOSE x \in DOMAIN _startedRegister: _startedRegister[x] = FALSE
	CompletedCount == Cardinality({x \in JobSet: _processStatusRegister[x] /= NULL})
	Running == StartedCount - CompletedCount
	ParallelismRespected == Running <= Parallelism
	StreamSelectUpdates == {x \in JobSet: _processPipesRegister[x] /= <<>>}
end define;

fair process loop = Loop
variables
	streamSelectUpdates = {},
	updatedProcess = NULL,
	processStatus = NULL,
	processToOutputMap = [x \in JobSet |-> <<>>],
	processToExitStatusMap = [x \in JobSet |-> NULL];

	begin
		StartInitialBatch:
			while StartedCount < Parallelism do
				with p = NextNotStarted do
					_startedRegister[p] := TRUE;
				end with;
			end while;

		WaitForStreamUpdates:
			\* Collect the live value into a copy.
			streamSelectUpdates := StreamSelectUpdates;
			await Cardinality(StreamSelectUpdates) > 0;

		HandleStreamUpdates:
			while Cardinality(streamSelectUpdates) > 0 do
				\* A hack to pop the Jobs from the updates one by one.
				updatedProcess := CHOOSE x \in streamSelectUpdates: 1 > 0;
				streamSelectUpdates := streamSelectUpdates \ {updatedProcess};

				GetProcessOutput:
					with processOutput = _processPipesRegister[updatedProcess] do
						processToOutputMap[updatedProcess] := Append(processToOutputMap[updatedProcess], processOutput);
					end with;
					_processPipesRegister[updatedProcess] := <<>>;

				GetProcessStatus:
					processStatus := _processStatusRegister[updatedProcess];

				UpdateTrackedProcessPipes:
					if processStatus /= NULL then
						processToExitStatusMap[updatedProcess] := processStatus;
					end if;

				CheckLoopStatus:

					if processToExitStatusMap[updatedProcess] /= NULL then

						MaybeStartOneMore:
							if StartedCount < jobsCount then
								with p = NextNotStarted do
								_startedRegister[p] := TRUE;
								end with;
								goto WaitForStreamUpdates;
							end if;

					end if;

				CheckAllDone:
					if Cardinality({x \in JobSet: processToExitStatusMap[x] /= NULL}) = jobsCount then
						goto Done;
					else
						goto WaitForStreamUpdates;
				end if;
			end while;
end process

fair process worker \in JobSet
begin
	WaitToStart:
		await _startedRegister[self] = TRUE;

	Work:
		either
			_processPipesRegister[self] := Append(_processPipesRegister[self], "*");
		or
			skip;
		end either;

	ExitStatus: \* Either exit 0 or 1, a process MUST produce output.
		either
			_processPipesRegister[self] := Append(_processPipesRegister[self], "*");
			_processStatusRegister[self] := 0;
			goto Done;
		or
			_processPipesRegister[self] := Append(_processPipesRegister[self], "*");
			_processStatusRegister[self] := 1;
			goto Done;
		end either;
end process;

end algorithm;*)
\* BEGIN TRANSLATION
\* [...]
\* END TRANSLATION

OneWorkerPerJobStarted == <>[](StartedCount = Cardinality(JobSet))
AllWorkersCompleted == <>[](CompletedCount = Cardinality(JobSet))
=============================================================================
Before unpacking the code, a successful run with the following settings:
What to check? - Temporal formulaDeadlock - checkedProperties - something that should eventually be true.
* `Termination` - all processes will always eventually terminate.
* `OneWorkerPerJobStarted` - each job will, eventually, have a worker assigned to it.
* `AllWorkersCompleted` - all workers should eventually complete.
Invariants - citing the IDE "Formulas true in every reachable state".
* `ParallelismRespected` - There should never be a state with more workers than parallelism would allow.
The constants are set up as follows:
JobSet <- [ model value ] {J1, J2, J3}Parallelism <- 2
Registers
The registers, prefixed with a _, are artifacts of the specification that will not make it into code: they represent, utilizing a global variable, the inter-process communication between the Loop and the workers.
To "start" the processes, I'm using the same approach used in the previous post: a _startedRegister variable that maps Jobs to their having a Worker started for them.
This specification global variable is the equivalent of the proc_open PHP function.
Where the proc_open function returns a process resource handle of the resource type, the specification will set the flag indicating a worker started for a job in the _startedRegister variable to TRUE.
The _processPipesRegister variable keeps track of the output emitted by the workers on the write end of the IPC pipe assigned to them.
The proc_open function will create, contextually with starting the process in a separate thread, "pipes" for inter-process communication. Typically one to communicate with the process, the STDIN one, and two to get output from the process: the STDOUT and STDERR ones. For the sake of the specification, I conflated the two pipes into one, and the IPC is represented by the worker process writing the _processPipesRegister global variable, and the Loop process reading from it.
The last register is the _processStatusRegister and represents what a call to the proc_get_status function would return in PHP: the exit status of the worker processes.
More cases mean more models
The specification passes when I use 3 jobs and parallelism of 2, but what about other cases?
I found out a "data-provider-like" approach to TLA+ is not how I should use the tools. To test different cases, I should create a new model. Better: clone the one I used so far and change the value of the constants.
The first alternate model is to test if the Loop specification works in "serial" mode: jobs are executed one after the other, with a parallelism of 1.
Nothing changes from previous checks, if not the constants:
JobSet <- [ model value ] {J1, J2, J3}Parallelism <- 1

And it fails, the ParallelismRespected invariant violated at some point.
To debug the specification failure, I find it extremely useful getting, first, a view of the run, using the UI control to collapse all I can get an idea of where the violation happened (the MaybeStartOneMore phase of the Loop process) and what sequence led the run to that.
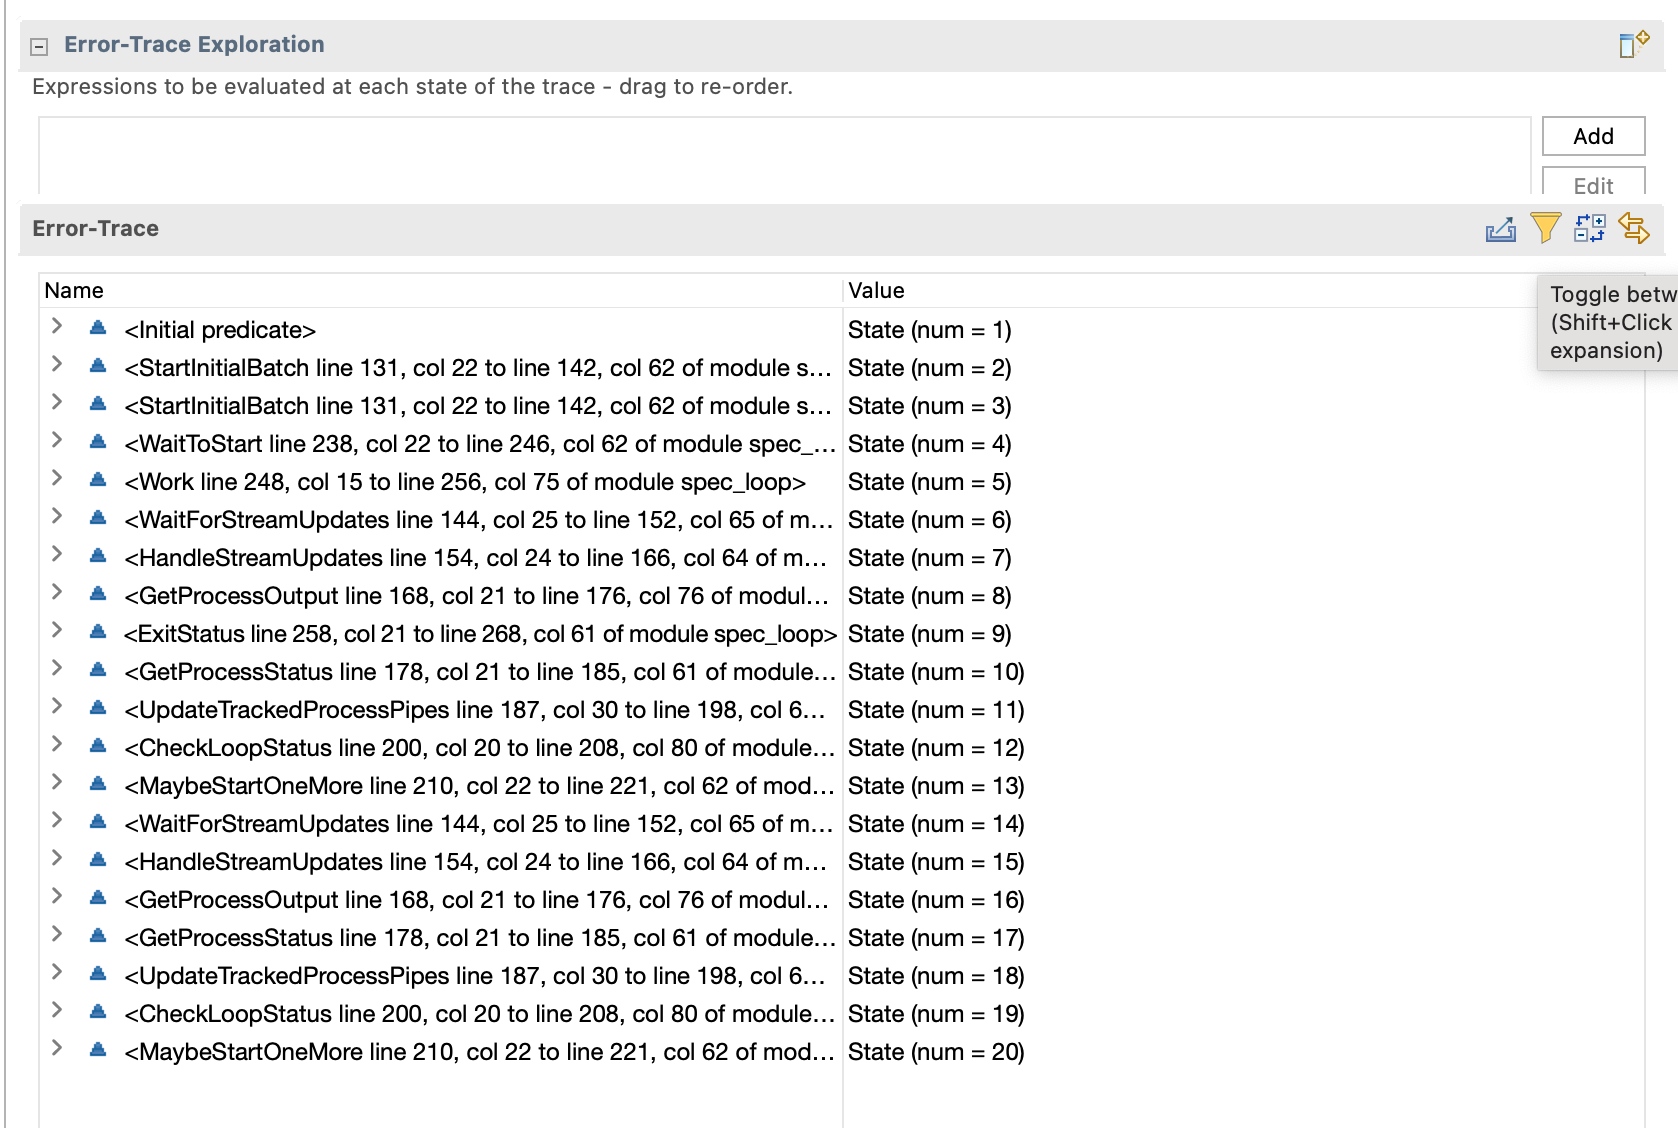
The first guiding light to find the cause of the model checking failure is that values changed by the state are highlighted in red; the second is that invariants and (temporal) properties will run after the state has changed the values.
After the MaybeStartOneMore state ran, the ParallelismRespected property is checked and will find 3 started processes in the _startedRegister variable, only 1 of which had its exit status collected and thus was deemed as completed. So, at this stage, there are 2 processes running which is more than the allowed parallelism of 1.
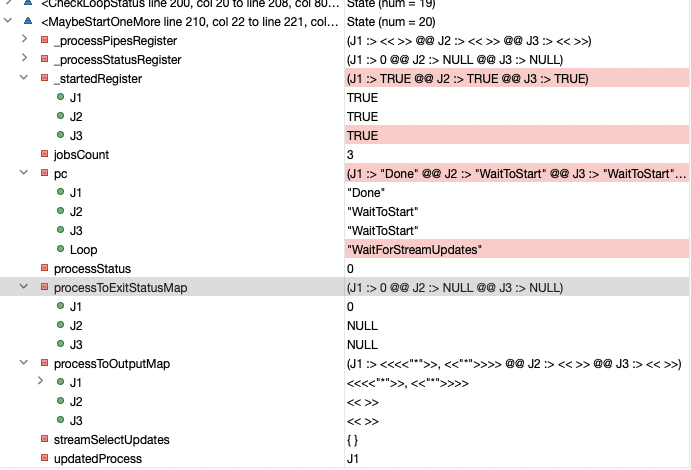
The fix is easy enough: in the MaybeStartOneMore phase, I have to check two conditions:
- There are still jobs that do not have workers assigned; the specification was already checking this.
- And the number of running workers is less than, or equal to, the parallelism; this check is the missing one.
Translated in PlusCal, the MaybeStartOneMore phase will change as follows:
MaybeStartOneMore:
-	if StartedCount < jobsCount then
+	if StartedCount < jobsCount /\ Running < Parallelism then
		with p = NextNotStarted do
		_startedRegister[p] := TRUE;
		end with;
		goto WaitForStreamUpdates;
	end if;
Now both models will pass.
More parallelism than jobs
The last model I want to check against the specification is the one where the parallelism is more than the number of jobs.
Clone another model and set:
JobSet <- [ model value ] {J1, J2}Parallelism <- 3
And this one fails again; this time, it's a TLC syntax violation.
The message:
TLC threw an unexpected exception.
This was probably caused by an error in the spec or model.
See the User Output or TLC Console for clues to what happened.
The exception was a java.lang.RuntimeException
: Attempted to compute the value of an expression of form
CHOOSE x \in S: P, but no element of S satisfied P.
line 102, col 19 to line 102, col 83 of module spec_loop
The error occurred when TLC was evaluating the nested
expressions at the following positions:
0. Line 131, column 22 to line 142, column 62 in spec_loop
1. Line 131, column 25 to line 131, column 54 in spec_loop
2. Line 132, column 25 to line 137, column 61 in spec_loop
3. Line 133, column 33 to line 135, column 82 in spec_loop
4. Line 133, column 36 to line 134, column 94 in spec_loop
5. Line 134, column 38 to line 134, column 94 in spec_loop
6. Line 134, column 58 to line 134, column 94 in spec_loop
7. Line 134, column 85 to line 134, column 85 in spec_loop
8. Line 133, column 45 to line 133, column 58 in spec_loop
9. Line 102, column 19 to line 102, column 83 in spec_loop
Three things to note:
- The line and columns number refer to the translation, not the PlusCal code. So, better learn to read that.
- The message is pretty clear about the failure but will use symbols.
- TLA+ does not handle the concept of returning anything.
When I say that the error report will use symbols, I mean that I did not write CHOOSE x \in S: P, but no element of S satisfied P anywhere in my PlusCal code, and that is nowhere to be found in the translation.
That error is about this line of the PlusCal code:
NextNotStarted == CHOOSE x \in DOMAIN _startedRegister: _startedRegister[x] = FALSE
And when I say that TLA+ does not handle returning anything, I mean that it does not work as PHP would.
If I had to write the same code in PHP I would translate the code above into the following:
$_startedRegister = ['J1' => true, 'J2' => true];
$nextNotStarted = array_filter($_startedRegister, function($started){ return !$started; });
Next
In the next post, I will make the specification more robust adding more invariants and properties to, finally, move into the PHP translation of it.
Previously
The previous post on the subject introduced the project I'm working on and why I've decided to use TLA+.
This post will take off from the end of that to complicate my specification to include something closer to what I need to implement.
Atomic labels
Closing the first post, I've said that a "step" in TLA+ is marked by a "label" and is "atomic".
In the context of a process block, a label is anything that looks like This: (alpha and then a :). A label has a body of statements that happen inside it that will occur atomically, in the order they appear.
The best way I can explain it is with an example:
----------------------------- MODULE spec_loop -----------------------------
EXTENDS TLC, Integers

(*--algorithm loop
variables
	accumulator = 0; \* Start with a value of 0.

define
	AccumlatorLessThanEqualOne == accumulator <= 1 \* We'll use this as invariant.
end define;

fair process p \in {1,2} \* 2 processes will run at the same time.
	begin
		Increase_Accumulator:
			accumulator := accumulator + 1;
		Decrease_Accumulator:
			accumulator := accumulator - 1;
end process

end algorithm;*)
=============================================================================
I've omitted the translation of the PlusCal code to TLC as it's machine-generated and not that interesting.
I've set up my model to this:
What to check? - Temporal formulaDeadlock - checkedProperties - something that should eventually be true.
* `Termination`, both processes should terminate.
Invariants - citing the IDE "Formulas true in every reachable state".
* `AccumlatorLessThanEqualOne` - the value of the `accumulator` variable should be <= 1
The last part, the one where I set the AccumlatorLessThanEqualOne invariant, is the one that will make the model fail.
The model will fail because there is at least one state where the value of accumulator is not <= 1.
The TLA+ will report on such state:
The UI requires highlights in red what changed between a step and the next:
- At the
Initial predicate, the start of the model checking, the accumulator value is 0, both processes will execute the Increase_Accumulator step next, the AccumlatorLessThanEqualOne invariant is not violated.
- The model checking picks process 2 to execute its
Increase_Accumulator step: that will increase accumulator by 1. All fine and dandy.
- The model checking will, then, pick process 1 to execute, and that too will complete the
Increase_Accumulator step, adding 1 to the accumulator and violating, thus, the AccumlatorLessThanEqualOne invariant.
The model checker output reads Invariant AccumlatorLessThanEqualOne is violated..
There is, indeed, a flow in which one process executes both steps, the Increase_Accumulator and Decrease_Accumulator ones, in sequence, and accumulator is never > 1.
But the model checker just verified that our logic will not hold under the pressure of concurrency.
There is a fix for this: before increasing the accumulator value, wait for it to be precisely 0:
----------------------------- MODULE spec_loop -----------------------------
EXTENDS TLC, Integers
CONSTANTS Loop, NULL

(*--algorithm loop
variables
	accumulator = 0;

define
	AccumlatorLessThanEqualOne == accumulator <= 1
end define;

fair process p \in {1,2}
	begin
		Increase_Accumulator:
			await accumulator = 0; \* If the accumulator value is not 0, wait.
			accumulator := accumulator + 1;
		Decrease_Accumulator:
			accumulator := accumulator - 1;
end process

end algorithm;*)
=============================================================================
This solution passes, and it shows the use of a powerful feature of TLA+: the await keyword.
The keyword will stop executing that process step until the condition after await is met.
Atomic PHP
My purpose in using TLA+ is to develop good specifications for ideas that I will then have to translate into code.
That code happens to be PHP, and I need to understand what "atomic" means in the context of PHP.
I wrote a small script to test out what atomic execution means in PHP:
<?php
$isWorker = isset($argv[1]);

if($isWorker){
		$id = $argv[1];
		foreach(range(1,200) as $k){
				echo $id; // Print the process name.
		}
		exit(0);
}

foreach(range(1,2) as $n){
		$command = PHP_BINARY . ' ' . escapeshellarg(__FILE__) . ' ' . $n;
		$specs = [STDIN, STDOUT, STDERR];
		proc_open($command, $specs, $pipes);
}

sleep(1); // Dumb wait for all processes to be done.
echo "\n";
exit(0);
Running the script will yield a variation of this output:
22222222222222222111111111111111111112111212221212121212121212121212121212121212
12121212121212121212121212121212121212121212121212121212121212121212121212121212
12121212121212121212121212121212121212121212121212121212121212121212121212121212
12121212121212121212121212121212121212121212121212121212121212121212121212121212
12121212121212121212121212121212121212121212121212121212121212121212121212121222
Note: I've used proc_open as it's a "fire and forget" function that will not block the execution of the main script waiting for the processes to finish. Using passthru, as an example would stop the main script to wait for the started script to complete.
The processes get their turn to print in a non-deterministic order.
A note: using smaller numbers will incur in some execution caching that will unwrap the execute the foreach a first time and will then store and just print a string; that is why there is a 200 max in there.
The processes will print when they are allocated CPU time; the allocation of that CPU time cannot be known before the execution, which means the atomicity of PHP is a single instruction.
The takeaway is: after each PHP instruction, the CPU might be allocated to another PHP thread.
There is no guarantee another PHP thread will not get the CPU and do something between two adjacent PHP instructions, like an echo following another in the example code.
This information will come in handy later when it is time to translate the specification to code.
A first Loop specification
After exploring some key concepts, it's time to get back to the Loop specification.
The first version of the specification leaves much to be desired but is helpful to illustrate more logic and TLA+ constructs I will use.
----------------------------- MODULE spec_loop -----------------------------
EXTENDS TLC, Integers, FiniteSets
CONSTANTS Loop, NULL

(*--algorithm loop
variables
	jobsCount = 5,
	maxParallelism = 2,
	_startedRegister = [x \in 1..jobsCount |-> FALSE];

define
	StartedCount == Cardinality({x \in DOMAIN _startedRegister: _startedRegister[x] = TRUE})
	NextNotStarted == CHOOSE x \in DOMAIN _startedRegister: _startedRegister[x] = FALSE
end define;

fair process loop = Loop
	begin
		StartInitialBatch:
			while StartedCount < maxParallelism do
				with p = NextNotStarted do
					_startedRegister[p] := TRUE;
				end with;
			end while;
end process

fair process worker \in 1..5
begin
	WaitToStart:
		await _startedRegister[self] = TRUE;
	Work:
		goto Done;
end process;

end algorithm;*)
=============================================================================
I've imported the FiniteSets module into my specification. This module contains functions, like the Cardinality one, that allows me to operate on sets.
Sets are lists of elements of the same type: {1, 2, 3} is a set of integers with a cardinality of 3, 1..3 is a quick way of defining the set {1, 2, 3}.
This version of the specification defines two types of processes: one is the Loop, the other is the worker.
There will be one Loop and 0 or more workers at any given moment.
The first construct I'm introducing is the _startedRegister variable.
I'm sure someone with more experience would develop a better solution, but I'm stuck with my knowledge of the subject.
Any _variableName prefixed with _ indicates a "technical" variable that I've defined in the specification, but that will most likely not be translated to PHP code.
To understand the purpose of the _startedRegister variable, look at the worker process: the process worker will start in the WaitToStart phase and will move to the next phase, the Work one, only when it is started from the Loop.
The definition of the _startedRegister variable is _startedRegister = [x \in 1..jobsCount |-> FALSE] and it can be read like "a map from jobs to the boolean false value". It's better understood in PHP array terms:
$_startedRegister = [1 => false, 2 => false, 3 => false, 4 => false, 5 => false];
So, when the Loop sets the flag for process 2 to TRUE, the await condition of worker 2 will be satisfied, and it will start.
The StartedCount and NextNotStarted definitions are operators. They are like user-defined functions in PHP.
It's worth reiterating TLA+ is not an implementation language but a specification one; it expresses operations, for the most, using mathematical definitions and logic operations.
StartedCount == Cardinality({x \in DOMAIN _startedRegister: _startedRegister[x] = TRUE}) means "StartedCount is the number of keys of _startedRegister for which the value for that key is true".
Translate that to PHP:
global $_startedRegister;

function StartedCount(){
	return array_count(array_filter($_startedRegister));
}
On the same note, NextNotStarted picks the key first element in _startedRegister the value of which is false; DOMAIN _startedRegister is like array_keys($_startedRegister.
To end the syntax tour, with is used to define a local variable.
Read more about TLA+ syntax through Leslie Lamport's video course, on the Learn TLA+ site and from Hillel Wayne's book.
Running the specification now, checking for Deadlock and Termination will fail due to a deadlock.
I've defined five workers to run, but only 2 will be started in the StartInitialBatch phase of the Loop; TLA+ is telling me 3 workers are deadlocked: they will await forever for something that will never happen.
Maybe start all the processes?
After some work, I came up with a second iteration of the specification that is starting all the processes:
----------------------------- MODULE spec_loop -----------------------------
EXTENDS TLC, Integers, FiniteSets, Sequences
CONSTANTS Loop, JobSet, Parallelism, NULL

(*--algorithm loop
variables
	jobsCount = Cardinality(JobSet),
	_startedRegister = [x \in JobSet |-> FALSE],
	_exitStatusRegister = <<>>,
	exitStati = <<>>;

define
	StartedCount == Cardinality({x \in DOMAIN _startedRegister: _startedRegister[x] = TRUE})
	NextNotStarted == CHOOSE x \in DOMAIN _startedRegister: _startedRegister[x] = FALSE
	Running == StartedCount - Len(exitStati)
	ParallelismRespected == Running <= Parallelism
	CompletedCount == Len(exitStati)
end define;

fair process loop = Loop
	begin
		StartInitialBatch:
			while StartedCount < Parallelism do
				with p = NextNotStarted do
					_startedRegister[p] := TRUE;
				end with;
			end while;
		CheckExits:
			if Len(_exitStatusRegister) > 0 then
				CollectExitStatus:
					with status = Head(_exitStatusRegister) do
						exitStati := Append(exitStati, status);
					end with;
					_exitStatusRegister := Tail(_exitStatusRegister);
				CheckExitedCount:
					if Len(exitStati) = jobsCount then
						goto Done;
					end if;
				MaybeStartOneMore:
					if StartedCount < jobsCount then
						with p = NextNotStarted do
							_startedRegister[p] := TRUE;
						end with;
					end if;
					goto CheckExits;
			else
				goto CheckExits;
			end if;
end process

fair process worker \in JobSet
begin
	WaitToStart:
		await _startedRegister[self] = TRUE;
	Work:
		skip;
	Exit:
		_exitStatusRegister := Append(_exitStatusRegister, 0);
end process;

end algorithm;*)
\* BEGIN TRANSLATION
\* [...]
\* END TRANSLATION

OneWorderPerJobStarted == <>[](StartedCount = Cardinality(JobSet))
AllWorkersCompleted == <>[](CompletedCount = Cardinality(JobSet))
=============================================================================
I will not go through the specification line by line and concentrate on important parts.
At the bottom, after the translation, I've defined a temporal formula: it looks like an operator between parentheses and temporal "symbols" before it.
Specifically:
<> means "Eventually"; there is at least one state where the condition between the parentheses is true.[] means "Always"; what is between the parentheses is always true.
"Eventually always" means "When it happens for the first time, then it should keep being true".
Eventually, a flower pot will fall and break apart; it will then always be broken. If someone came and put the pot back together, then it would violate the "always" part, and the model verification would fail.
The rest of the code is operators to make the code more readable.
I've added one more technical variable, the _exitStatusRegister one. This is a sequence, denoted with <<>>. In sequences, order matters; in sets, type matters.
That represents a worker process ending and returning its exit status to the Loop process.
This specification is not doing all I need it to do, but will pass verification with the following settings:
What to check? - Temporal formulaDeadlock - checkedProperties
* `Termination`
* `OneWorderPerJobStarted`
* `AllWorkersCompleted`
* `ParallelismRespected`
* `JobSet <- [ model value ] {J1, J2, J3, J4, J5}`
* `Parallelism <- 2`
Five jobs and a parallelism of two.
This is good enough to try and translate it into code.
Translating the specification
<?php

function worker()
{
    exit(0); // Just exit, like skip.
}

function startWorker($key)
{
    $command = sprintf("%s %s %s", PHP_BINARY, escapeshellarg(__FILE__), $key);
    return proc_open($command, [STDIN, STDOUT, STDERR], $pipes);
}

function loop(array $jobSet, $parallelism)
{
    $batchSize = min(count($jobSet), $parallelism);
    $started = [];
    $exitStati = [];

    foreach (range(1, $batchSize) as $k) {
        $started[] = startWorker($k);
    }

    while (true) {
        $procKeysToRemove = [];
        foreach ($started as $process) {
            $procStatus = proc_get_status($process);

            if ($procStatus['running']) {
                continue;
            }

            $exitStati[] = $procStatus['exitcode'];
            $procKeysToRemove[] = array_search($process, $started, true);

            if (count($exitStati) === count($jobSet)) {
                break 2;
            }

            if (count($started) < count($jobSet)) {
                $started[] = startWorker(++$k);
            }
        }

        // Reduce the checked set as they complete.
        foreach ($procKeysToRemove as $key) {
            unset($started[$key]);
            $started = array_values($started);
        }
    }

    return $exitStati;
}

if (!isset($argv[1])) {
    $exitStati = loop(range(1, 5), 2);
    echo "\n", print_r($exitStati, true);
} else {
    worker();
}
The code should work on any machine, should one want to try it out.
Just one note: calling proc_get_status a second time on an already exited process will yield an exit value of -1. To cope with that and to get a smaller optimization to the loop logic, I remove the processes from the $started array when done.
The non-technical variables from the specification are all there, and the loop works, but with two significant issues:
- That
while( true ) is a CPU-locking loop. If the workers were running long enough, it would hoard CPU time running continuously, bringing the CPU load to 100% with wasted energy consumption: most of those cycles would not update a state.
- The workers do something, but what? There is no communication from them back to the loop. Did they fail? Did they explode?
As pipes for the workers, I'm setting the STD ones, but that is just to make the code shorter. Letting the workers print to the same output stream as the loop is a bad idea as it does not allow to control the print order, and thus formatting, and does not allow the Loop to get any information beyond an exit status.
Next
In my next post, I will add pipes and Inter-Process Communication (IPC) to the mix to see how the specification and the PHP code will evolve.
What is TLA+?
In my personal understanding of it: a specification language that helps me explore fallacies in my PHP software architecture and test that architecture under the pressure of concurring threads.
To better explain what TLA+ is, one should refer to the site of Leslie Lamport, the mind behind TLA+.
I've found Hillel Wayne's site and book to be the best way for me to learn the basics.
The pitch for this latest exploration of mine was Wayne's video "Tackling Concurrency Bugs with TLA+": it struck a chord. The concurrency part especially. Then I found out there was testing involved and could not let go of the thought.
What am I using TLA+ for?
Given enough hot metal under it, TLA+ could really be used to model any concurring process my mind could think of, from high-level distributed systems to low-level algorithms.
Yet I hate answers that sound like a variation of the "it depends on your situation and context", and I will avoid that by providing the particular context I'm applying TLA+ to.
I'm using TLA+ to model parts of a process-based PHP testing framework I'm writing.
I'm still pretty foggy about how this testing framework will fit in the grand scheme of things, but I've spent some time working with Jest and found it to be really delightful.
I'm writing something from scratch and, without the pressure of having to ship a product, I can take my time to do it right and in a way that satisfies me.
Let's start from an example file, a "spec files" in Jest jargon, this imaginary test framework would consume:
<?php
/**
 * @env WordPress
 */

describe('get_foos_function', function () {
    // Create the test users.
    $admin      = wp_insert_user(['user_login' => 'a', 'user_pass' => 'a', 'role' => 'administrator']);
    $subscriber = wp_insert_user(['user_login' => 's', 'user_pass' => 's', 'role' => 'editor']);
    // Create the test foos: one public, one draft.
    foo_create(['status' => 'publish']);
    foo_create(['status' => 'draft']);

    describe('Admin context', function () use ($admin, $subscriber) {
        // Simulate Admin context.
        define('WP_ADMIN', true);

        it('should return all foos to admin user', function () use ($admin) {
            wp_set_current_user($admin);
            $foos = get_foos();
            expect(count($foos))->toBe(2);
        });

        it('should return only public foos to non-admin', function () use ($subscriber) {
            wp_set_current_user($subscriber);
            $foos = get_foos();
            expect(count($foos))->toBe(1);
        });
    });

    describe('Front-end context', function () use ($admin) {
        it('should return public foos to admin user', function () use ($admin) {
            wp_set_current_user($admin);
            $foos = get_foos();
            expect(count($foos))->toBe(1);
        });

        it('should return public foos to non-admin', function () {
            wp_set_current_user(0); // Visitor.
            $foos = get_foos();
            expect(count($foos))->toBe(1);
        });
    });

    describe('REST context', function () use ($admin) {
        // Simulate a REST request.
        define('REST_REQUEST', true);

        it('should return all foos to REST admin user', function () use ($admin) {
            wp_set_current_user($admin);
            $foos = get_foos();
            expect(count($foos))->toBe(2);
        });

        it('should show no foos in REST to visitors', function () {
            wp_set_current_user(0); // Visitor.
            $foos = get_foos();
            expect(count($foos))->toBe(0);
        });
    });
});
To note in the above code example:
- The
@env WordPress annotation will tell the (again: still hypothetical) testing framework that WordPress should be loaded before the tests. This will allow the following code to call WordPress functions.
- The block at the top creating the users and the "foos" would be the equivalent of Jest
beforeAll function, or PHPUnit setUpBeforeClass method call: it will do something once, before any test runs.
- In the inner
describe blocks, I'm defining constants like WP_ADMIN and REST_REQUEST to simulate, respectively, the admin and the REST request contexts.
- Was this code to run sequentially, the second
describe block, the Front-end context one, would inherit a defined WP_ADMIN constant that would make it fail.
- Being "smart" about the order of the
describe blocks here, then, would not change much as at least one describe block would end up inheriting the constant defined by one of the describe blocks that ran before.
The "simple" solution is to run each describe block in isolation in a dedicated, separate PHP process.
Let's say I'm willing to do it: there will be a main tread in charge of starting, and managing the state of, multiple dedicated PHP processes running the describe blocks.
Loop concerns
A loop waiting on processes to be done is a pretty well-explored pattern.
Yet there are challenges deriving from the specific application and PHP limits.
A quick list:
- Processes might succeed or fail and will need to communicate that back to the main PHP process for it to be able to orderly print the output: this means Inter-Process Communication (IPC) is required.
- On Windows, one of the possible environments where this testing framework might run, IPC is not that easy given the many IPC pipes and streams inconsistencies.
- A loop should not be implemented with a logic that sounds like, "Every now and then check on the started processes, sleep a bit, repeat". Checking more often would make the Loop more responsive but hoard CPU cycles. Checking less often would reduce resource consumption, making the Loop less responsive.
Some prototypes later, I concluded I should use the stream_select function to "watch" the pool of running processes from the main PHP thread, get prompt updates, and avoid a CPU lock.
When used on blocking streams, the function will wait for some streams part of the pool (a stream could be opened over a file or an IPC pipe) to update to move on.
All of this long and winded introduction to get to the first TLA+ model.
CLI and TLA Toolbox
To verify my specification, I'm using the TLA+ toolbox; I'm not fond of the IDE part, though, and prefer using vim and Hillel Wayne's vim plugin to write my specifications.
With that out of the way, let's start with my model.
I would like to reiterate I'm not a TLA+ expert. I am sharing my discovery process and findings. Go back to the first section of this article to find the references and literature to provide expert insight into it.
I will be dealing, to model the Loop and ancillary PHP processes, with two types of process:
- The Loop, the PHP process the user starts that will, in turn, start and manage one PHP process per
describe block.
- The Worker, a PHP process started by the Loop to handle a
describe block.
I've created a new spec_loop specification in the TLA+ Toolbox application and wrote the first version of my specification, just to check if things work.
----------------------------- MODULE spec_loop -----------------------------
EXTENDS TLC
CONSTANTS Parallelism, Jobs, Loop, NULL

(*--algorithm loop

process loop = Loop
	begin
		StartInitialBatch:
			goto Done;

end process

end algorithm;*)
=============================================================================
The TLA+ Toolbox supports two languages:
- TLC - the somewhat difficult to read and write specification language initially used for TLA+.
- PlusCal - the higher-level language that will transpile to TLC.
PlusCal is what I put between (*--algorithm loop and end algorithm;*).
When I save the file and click "Translate PlusCal Algorithm", I get the following output:
----------------------------- MODULE spec_loop -----------------------------
EXTENDS TLC
CONSTANTS Loop, NULL

(*--algorithm loop

process loop = Loop \* There is process called Loop
	begin
		StartInitialBatch: \* That process starts...
			goto Done; \* ...and directly goes to Done, a state that means it's terminated.

end process

end algorithm;*)
\* BEGIN TRANSLATION (chksum(pcal) = "f8a984b0" /\ chksum(tla) = "83520898")
VARIABLE pc

vars == << pc >>

ProcSet == {Loop}

Init == /\ pc = [self \in ProcSet |-> "StartInitialBatch"]

StartInitialBatch == /\ pc[Loop] = "StartInitialBatch"
                     /\ pc' = [pc EXCEPT ![Loop] = "Done"]

loop == StartInitialBatch

(* Allow infinite stuttering to prevent deadlock on termination. *)
Terminating == /\ \A self \in ProcSet: pc[self] = "Done"
               /\ UNCHANGED vars

Next == loop
           \/ Terminating

Spec == Init /\ [][Next]_vars

Termination == <>(\A self \in ProcSet: pc[self] = "Done")

\* END TRANSLATION

=============================================================================
\* Modification History
\* Last modified Wed Mar 16 10:46:22 CET 2022 by lucatume
\* Created Mon Mar 14 08:40:43 CET 2022 by lucatume
The \* BEGIN TRANSLATION and \* END TRANSLATION comments fence the translation operated by the IDE.
In the following code examples, I will not report the translation as that is a direct output of the PlusCal algorithm and not that interesting to this post.
After \*, you see comments in PlusCal and TLC syntax.
Notes:
EXTENDS is like import in node: import one or more modules I will need.CONSTANTS defines the inputs my specification will have. They are the parametric part of my specification, the values Models will use to customize a check.
The specification is easy enough, I create a Model called "MC" in TLA+ Toolbox and set it up like this:
What is the behavior spec? -- Temporal formula.What to check?
* `Deadlock`
* `Properties`
	* `Termination`
* `NULL <- [ model value ]`
* `Loop <- [ model value ]`
Here's a screenshot of the settings in the TLA+ toolbox:
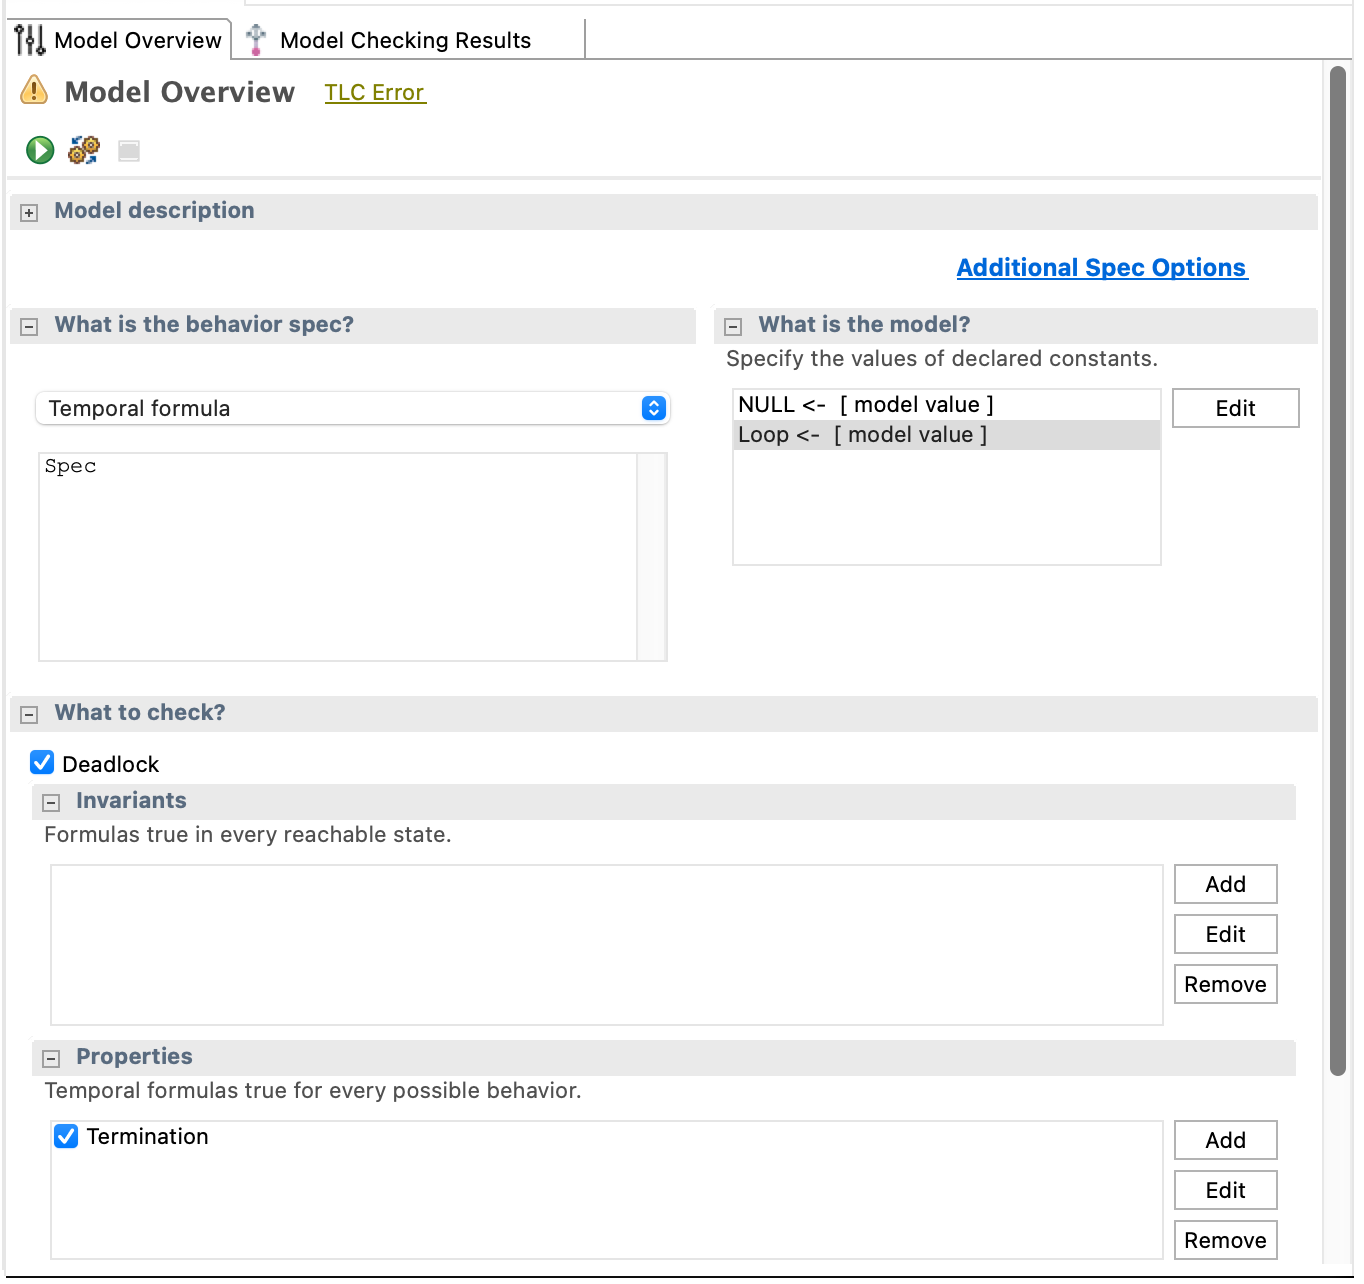
What does all this mean?
Temporal formula means I want to check if my specification works over time. More on that later.
Deadlock means I want to check if there's any state, a combination of execution steps, that would put the model in a deadlock.
Termination means I want to check that, in any state, all the processes will get to the Done phase, the last one.
NULL and Loop are custom types I will use in my specification.
I run the model and... it fails: Temporal properties were violated., Stuttering.
That means the one temporal property I've set, the one where all processes should eventually terminate, is violated.
Here comes the first great power of TLA+: it will model states where some, or all, processes will not run.
If the Loop process never runs, it will not terminate. As such, the Termination temporal property is violated.
I'm not interested in modeling the case where the Loop does not run. That means the PHP code never got there, which implies some error happened before, the user is shown some exception or message: I do not need a specification for that.
Please, run the Loop process
How do I tell the model checker I'm not interested in a state where the Loop process does not run?
I tell it the process is fair. It means any state where the Loop process does not run should not be part of the model check.
I update the specification to make the Loop process a fair one:
----------------------------- MODULE spec_loop -----------------------------
EXTENDS TLC
CONSTANTS Loop, NULL

(*--algorithm loop

fair process loop = Loop
	begin
		StartInitialBatch:
			goto Done;

end process

end algorithm;*)
=============================================================================
After re-compiling the code and rerunning it, the model check passes: the Loop process has only one step: the StartInitialBatch one, which will immediately go to the Done one.
A "step" in TLA+:
- Is indicated by a
Label:
- Is atomic.
This is enough for one post.
Check out the second post.
This post is the second in a series of posts where I will document my building of the WordPress testing framework I would have liked to find when I started working with WordPress.
The name of this framework in-fieri is ork, and you can read more about it in the first post dedicated to it.
Getting the whole testing setup up and running
In my previous post, I've set up some basic tests that got some of the job done. Still, I would like to come back to those to set them up once, while the involved logic is straightforward for me to follow, addressing Continuous Integration and IDE integration to start on the right foot.
For CI, I've picked GitHub Actions: it comes included in my plan and is fast enough and reliable enough for my current needs.
Being the lover or make I am, I've set up the project Makefile to allow me to build and run the tests by sticking to the trusted pattern of make build && make test:
name: CLI App CI
on: [push]
jobs:
  bdd:
    runs-on: ubuntu-latest
    steps:
      - uses: actions/checkout@v2
        with:
          ref: 'main'
      - run: cd app && make build && make test
Not much to see here.
To avoid the back and forth of testing GitHub Actions through pushing and waiting for the worker to run, I'm using nektos/act. The one-file binary will run any workflow in the project .github directory using a container image that is the same as the one used by GitHub actions workers for most intents and purposes.
I have configured my machine ~/.actrc file to correctly alias the ubuntu machines.
-P ubuntu-latest=nektos/act-environments-ubuntu:18.04
-P ubuntu-18.04=nektos/act-environments-ubuntu:18.04
After confirming the tests are passing locally, I've been rewarded with a green light on GitHub Actions too.
Just a note: act will simulate the GitHub Actions environment almost perfectly, but the GITHUB_TOKEN environment variable that GitHub Actions will set up by default will be missing.
Since I'm working in a private repository, I've created a token dedicated to nektos/act in the ~/.github-token file that I export at run time to allow act to pull and test private dependencies the same way GitHub Actions would access them:
GITHUB_TOKEN="$(<${HOME}/.github-token)" act
This token definition is all it takes for act to work correctly.
Laying out the first steps
I made a habit of starting my development work from the end.
This approach helps me thinking of the "what" before thinking about the "how".
The project requirements will, roughly, be:
- Download
ork for your current operating system somewhere the terminal can execute it from your terminal emulator of choice.
- Use whatever local development webserver solution you want to host your development WordPress server.
- Navigate to the directory where your testing project will live.
- Run
ork and start testing.
Point 2 above, especially, is something I care about.
One of the things the wp-browser project taught me is I should not make assumptions about what operating system, or development stack, different developers will use to create, maintain and test WordPress projects.
There are many solutions available for WordPress developers, ranging from PHP built-in server to Mamp and other host-based solutions to complex Docker-based stacks or virtual machines.
Each one has its complications from the perspective of a testing framework: some are running "on the metal" (e.g., PHP built-in server, Mamp or valet), some are using containers (e.g., Devilbox or the previous version of Local by Flywheel) and some others are using virtual machines (e.g., the VVV project).
Understanding where the PHP server serving the development WordPress server is, in respect to the machine that is executing the tests, is where several users get lost and give up.
Say I have set up Codeception tests with wp-browser on my host machine. I've installed WordPress, locally, at /Users/lucatume/Sites/wp, but I am running my tests from within a Docker container. The path to the WordPress installation will probably be /var/www/html as that is the path to the WordPress installation in the default WordPress Docker image.
The point is: there are plenty configurations and local development server solutions out there that work for those using them.
I want ork to remove the friction of dealing with each and "just work" as long as one can visit the WordPress site using a browser.
Can you go to https://wordpress.local? Fine, ork should work.
Do you have your site served with PHP built-in server at http://localhost:8888? This setup, too, is fine, ork should work with it.
Have you set up WordPress with docker-compose where Docker runs into a Linux VM running, in turn, on your Windows machine? If you can visit the WordPress site from your browser, then ork should work.
All the different setups above have in common that the user can visit the development site URL. The ork binary will have to rely, at least initially, only on that piece of information to work.
The first step, then, assuming points 1 to 3 are taken care of by the user, is to model the following scenario:
» mkdir ork-tests
» cd ork-tests
» ork

What is the URL of the site you would like to test? ork.local

Checking site URL ... ok
Creating the first spec ... ok
Running specs ...

  Homepage
    √ it works (410ms)

  1 passing (422ms)
Those familiar with JS testing should recognize mocha BDD output.
Since I'm currently using it to power my tests, I've just used the inspiration to draft this imaginary CLI output.
There's a bit to get done before getting to the actual running of tests, in any case, so I better get to it.
Testing a binary and the command line
The first test I would like to write, in Gherkin syntax, would read out like this:
Given I have changed the directory to one that does not contain an `ork` configuration file
When I run `ork`
Then I should be asked to provide the URL of the site I would like to run tests for
And I should see an `ork.config.json` file created containing the URL I provided
This seems a simple enough test to translate into a mocha test.
It turned out not to be that simple for me, though.
Being, in essence, a novice when it comes to NodeJs development, it took me some time to come to terms with how
the loop of execution is structured and how my code will execute.
Starting from the end here is the first test I wrote that is, currently, passing:
// test/FirstSetup.js

const { existsSync } = require('fs')

// I've created a test support library of functions to allow me to write tests the way I want.
const { invokeOrk, mkTmpDir, forFile, toReadFile } = require('./_support.js')

// I'm using `chai` to write assertions in spec/BDD format.
const expect = require('chai').expect

describe('First setup', function () {
  it('should prompt the user to create config file if not found', async function () {
    // As a first step, create a test directory in the test/_output directory. Yes, Codeception habit.
    const tmpDir = mkTmpDir()

    // This is where the configuration file should be, if everything goes according to plan.
    const configFilePath = tmpDir + '/ork.json'

    // To begin with, the file should not exist.
    expect(existsSync(configFilePath)).to.be.false

    // More on this later, I invoke the compiled binary in the test directory.
    let event = await invokeOrk([], { cwd: tmpDir })

    // The first event should be output coming from the binary, asking the site URL.
    expect(event.type).to.equal('stdout')
    expect(event.data).to.match(/url.*site/i)

    // Reply to the request with `ork.local`.
    event.proc.stdin.write('ork.local\n')

    // Wait up to 5s for the configuration file to appear.
    const exists = await forFile(configFilePath, 5000)
    expect(exists).to.be.true

    // Read the configuration file contents and make sure they are correct.
    const configFileContents = await toReadFile(configFilePath, 'utf-8')
    const config = JSON.parse(configFileContents)
    expect(config.url).to.equal('http://ork.local')
  })
})
There are some "gotchas" I collected along the way.
They might be obvious to more experienced Node developers, but this is all pretty new to me:
- Due to Node single-thread nature, blocking that only thread on one operation cannot be done. The single thread nature of Node is not that different from PHP, what makes it
very different is that thread is also the one in charge of handling the user input, and blocking it would mean freezing any UI; there is no UI in PHP. The issue is not that pressing in a CLI application, but most Node primitives are not synchronous, and they will yield control immediately. Appreciating and understanding this required some adjustment on my side.
- All this async code can be made sync-ish using
async\await; "ish" as what will happen is that Node will move to another task at the same scope level.
- Most existing primitives can be "promisified" to make them return promises when they would, instead, fire callbacks when something happens.
Grasping all the above did take me some time, but I'm pretty satisfied with two solutions in particular in thetest/_support.js file.
The first is the one that allows me to run the sub-process that is running the ork binary in "events".
Possible events are stdout, error, stderr and exit.
Each event will return a Promise to get the next event, and this is what allows me to write event-by-event
tests in my first spec and writing the test above in a way that closely resembles the interaction the user
would have with the CLI:
// Build a Promise for the process next event.
function processPromise (proc) {
   return new Promise(function (resolve, reject) {
      for (let eventName of ['error', 'data', 'exit']) {
         for (listener of proc.listeners(eventName)) {
            proc.off(eventName, listener)
         }
      }

      proc.on('error', function (error) {
         reject(error)
      })

      proc.stdout.on('data', function (chunk) {
         resolve({ type: 'stdout', data: chunk, proc: proc, next: processPromise(proc) })
      })

      proc.stderr.on('data', function (chunk) {
         resolve({ type: 'stderr', data: chunk, proc: proc, next: processPromise(proc) })
      })

      proc.on('exit', function (code) {
         resolve({ type: 'exit', data: code, proc: proc, next: processPromise(proc) })
      })
   })
}

async function invokeOrk (args = [], options = {}) {
   const mergedOptions = {
      ...{
         env: { ...process.env, ...{ NODE_OPTIONS: '' } },
         stdio: ['pipe', 'pipe', 'pipe'],
      }, ...options
   }

   // Spawn the process, an async task, and set up some defaults.
   const proc = spawn(locateBin(), args, mergedOptions)
   proc.stdout.setEncoding('utf8')
   proc.stderr.setEncoding('utf8')

   // Return the Promise that will yield the process first event; probably output or an error.
   return processPromise(proc)
}
The next piece of code I'm proud of is the one that allows me to wait for the file to come into existence.
In the tests, I use it to wait for the configuration file to appear, but I'm sure it will come in handy again:
// The name is to follow its most likely use of `await forFile`.
async function forFile (file, timeout = 5000) {
   return new Promise(function (resolve, reject) {
      const basename = file.replace(dirname(file) + '/', '')

      if (fs.existsSync(file)) {
         // If the file already exists when we start, resolve now.
         resolve(true)
      }

      // Set a timeout: either the files appears before it runs out, or fail.
      const timeoutRef = setTimeout(() => {
         watcher.close()
         resolve(false)
      }, timeout)

      // Start watching the directory that should contain the file.
      const watcher = fs.watch(dirname(file), async (eventType, filename) => {
         if (eventType === 'rename' && filename === basename) {
            if (fs.existsSync(file)) {
               // The file came into existence, block the timer and resolve.
               watcher.close()
               timeoutRef.unref()
               resolve(true)
            }
         }
      })
   })
}
Finally, the test output at the end of all the tribulation:
» make test


  First setup
    ✓ should prompt the user to create a config file if not found (354ms)


  1 passing (360ms)

» tree -L 3 test/_output
test/_output
└── dirs
    └── KJvSkAw4Nj
        └── ork.json

2 directories, 1 file
» cat test/_output/dirs/KJvSkAw4Nj/ork.json
{
  "url": "http://ork.local"
}
Next
Getting to this first test to pass took some effort, but I'm glad I did it.
Next time I will get the CLI output, right now pretty spartan, into shape and extend the functionalities using BDD.
The backstory or "The part you skip because you do not care about it"
What's a good introduction without a backstory?
When I started working with PHP and WordPress about eight years ago, my first line of PHP was a PHPUnit test.
I only wrote code using TDD in my previous career, and really thought one could not write PHP code without testing it.
I look back at that time smiling: there are, indeed, people out there somewhere that do write code without writing tests for it.
As I spent time working on more WordPress projects and with more teams, I appreciated some factors that have not
changed but softened my stance on testing.
First, writing automated tests for WordPress is not that widely documented, and the wider community is not that
"into it". I've seen some talks at WordCamps about testing, but not that many. Mind: there are developers that do that, just not so many to tip the scale of the typical WordPress conversation; if you're doing it, you've got all
my appreciation.
Second, there are tools and frameworks out there that will make testing WordPress easier; wp-browser objective is precisely that. Still, there are wide cracks in how they allow different types of testing to be covered,
and if a developer's need falls in one of those cracks, then that developer will have to do a lot of research and problem solving to get anything done. When one masters the instrument, then the payoff will be immense, but that's a steep price to pay to start.
Third: most testing tools will work well on new projects and either impose a "refactoring tax" on the existing
code to provide any meaningful return or outright not allow it.
With a touch of gatekeeping and elitism, all of the above pushes well-intentioned, but inexpert, people away from
adopting tests far too often by conflating adoption and maintenance price into, simply, too high a price to
pay to "just test code".
One test is better than none
When consulting with companies trying to adopt testing approaches, my first step is usually to demystify testing.
Sure, 100% coverage would be excellent; automated builds and flawless documentation of all the possible features and scenarios would be great to have, and blazing fast regression coverage would be even better.
But a developer, or a team of developers, has built something that does solve people problems; how can this be
so bad?
Would we be having this conversation if we could run a command like magic-test-all-my-code without any further input, with complete test coverage and checks? Probably not, in most cases.
Ease of setup, adoption, and use, I think, is fundamental to frame this kind of conversations; if I could write
magic testing frameworks, I would. I cannot, sadly.
So, in short, the ork project is my attempt at creating the testing solution I would have liked to find when I first
got into PHP and WordPress development.
The first PHP and WordPress code I wrote was a messy blob in the theme functions.php file; it took me some time
to be able to run tests for it. Like most, the first code they write will not be "new" code but will rely on differing
levels of legacy code.
And I've run into a lot of that in the WordPress universe.
What is ork then?
This post is not by chance titled "Building ork": I have not built it yet.
Not all of it, at least.
How would ork compare to wp-browser and Codeception?
That much is clear: ork is not a power tool.
Its objective is not to cover all the possible testing requirements but to allow someone that "just wants to start
testing" to do that with as little knowledge required as possible.
It's my take on the idea of getting more (testing) bang for the buck.
And then I'm building it from scratch. In Node. Cross-compiling binaries for different operating systems. And it
will support PHP and JS syntax to write tests.
What could go wrong?
Getting down to business
All this boring introduction to get to the first line of code.
The first decision I took, as anticipated above, is to ship ork as a cross-compiled executable for Windows, Linux, and Mac.
This decision comes from my experience in maintaining wp-browser and from the pain caused by keeping compatibility with a sizable matrix including different PHP, WordPress, Codeception, and Composer versions. I love the project, but I would like to avoid this particular pain.
After some research, I've settled on using Node and pkg to write once and compile something that should work on all operating systems.
I forgot what using something that is just one file feels like in years of package management with PHP and JS.
After some project scaffolding, here is the src/bin.ts file that will act as the entry point of my application; a
very humble "Hello World" type of message:
console.log('Hello ork!');
I've decided to use Typescript to develop the project to leverage its compile-time type-checking.
As it's been the norm for my development projects for some time now, I've set up a Docker image
to create a portable development system.
This is the Dockerfile of the node image I will be using over and over to run and compile the code:
## Use LTS version of node.
ARG NODE_VERSION="14.16.1"
FROM node:${NODE_VERSION}
## Make npm cache, the node modules and /usr/bin/lib accessible by all.
RUN mkdir /.npm \
    && mkdir -p /usr/local/lib/node_modules \
    && chown -R 501:0 /.npm \
    && chmod -R 0777 /usr/local/
## Change the user to my user to avoid file mode issues.
ARG UID=0
ARG GID=0
USER ${UID}:${GID}
## Install the required build dependencies.
ARG NODE_PKG_CACHE_PATH
RUN npm install -g typescript pkg dts-gen prettier
## pkg will require caching to not take forever.
ENV PKG_CACHE_PATH="${NODE_PKG_CACHE_PATH}"
## No default entrypoint or command, overwrite the default ones.
ENTRYPOINT [""]
CMD [""]
## Expose debugging port.
EXPOSE 9229
To streamline the build process as much as I can, I've set up a Makefile to be used with the make binary,
with a collection of solutions I've accumulated over time:
## Use bash as shell.
SHELL := /bin/bash
## If you see pwd_unknown showing up, this is why. Re-calibrate your system.
PWD ?= pwd_unknown
## PROJECT_NAME defaults to name of the current directory.
PROJECT_NAME = $(notdir $(PWD))
## Suppress `make` own output.
.SILENT:
## Make `build` the default target to make sure it will display when make is called without a target.
.DEFAULT_GOAL := build test
## Create a script to support command line arguments for targets.
## The specified targets will be callable like this `make target_w_args_1 -- foo bar 23`.
## In the target, use the `$(TARGET_ARGS)` var to get the arguments.
## To get the nth argument, use `export TARGET_ARG_2="$(word 2,$(TARGET_ARGS))";`.
SUPPORTED_COMMANDS := node_machine node npm
SUPPORTS_MAKE_ARGS := $(findstring $(firstword $(MAKECMDGOALS)), $(SUPPORTED_COMMANDS))
ifneq "$(SUPPORTS_MAKE_ARGS)" ""
  TARGET_ARGS := $(wordlist 2,$(words $(MAKECMDGOALS)),$(MAKECMDGOALS))
  $(eval $(TARGET_ARGS):;@:)
endif
## Set up some defaults.
NODE_VERSION = 14.16.1
## Any target commented with `## <description>` will show on `make help`.
help: ## Show this help message.
   @grep -E '^[a-zA-Z0-9\._-]+:.*?## .*$$' $(MAKEFILE_LIST) \
      | sort \
      | awk 'BEGIN {FS = ":.*?## "}; {printf "\033[36m%-30s\033[0m %s\n", $$1, $$2}'
.PHONY: help

build: ts pkg ## Builds the ork application.

pkg: ## Packages the application.
   docker run --volume "$(PWD):$(PWD)" -w "$(PWD)" ork-app/node pkg package.json

_docker/node/uuid: _docker/node/Dockerfile
   [ -d "$(PWD)/.cache/pkg" ] || mkdir -p "$(PWD)/.cache/pkg"
   docker build \
      --build-arg NODE_VERSION="$(NODE_VERSION)" \
      --build-arg UID="$${UID}" \
      --build-arg GID="$${GID}" \
      --build-arg NODE_PKG_CACHE_PATH="$(PWD)/.cache/pkg" \
      --tag ork-app/node:latest \
      --iidfile _docker/node/uuid \
      _docker/node

### Build the node image, if not built already.
ts: _docker/node/uuid
   docker run --volume "$(PWD):$(PWD)" -w "$(PWD)" ork-app/node tsc
.PHONY: ts

node_machine: _docker/node/uuid ## Runs a generic command in the node container.
   docker run --volume "$(PWD):$(PWD)" -w "$(PWD)" ork-app/node $(TARGET_ARGS)

node: _docker/node/uuid ## Runs a node command, e.g. `make node -- <command>`.
   docker run --volume "$(PWD):$(PWD)" -w "$(PWD)" ork-app/node node $(TARGET_ARGS)

npm: _docker/node/uuid ## Runs a npm command, e.g. `make npm -- <command>`.
   docker run --volume "$(PWD):$(PWD)" -w "$(PWD)" ork-app/node npm "$(TARGET_ARGS)"
Whit these files in place, building the cross-system application is as easy as running make build.
» make build
> pkg@5.1.0
Following the configuration in the package.json file, the executables for Windows, Linux, and macOS
have been created in the dist directory.
Running the command on macOS and Linux, I will get the following output:
» ./dist/ork-macos
Hello ork
The same will happen in the Windows terminal:
C:\Users\lucatume\Desktop>.\ork-win.exe
Hello ork
This might not look like much, but it lays the foundation for the flow I would like to adopt to develop the application.
Adding tests
There is almost nothing in the current CLI application that will warrant testing.
That is precisely why adding tests at this stage will be so cheap and convenient.
The tests I'm setting up for the CLI application, let's call it "acceptance" testing or
"end-to-end" testing for the sake of analogy of what I would do while developing a Web application, are
tests that will run the compiled ork binary in a sub-process and check its output and side effects.
For that, I've chosen to use the command-line-test package and the mocha testing framework.
To keep with the portability and reproducibility theme, I've set up two additional make targets to
execute the tests in the node container with, and without, remote Node debugger support:
test_debug: _docker/node/uuid ## Runs the tests in debug mode, port
   docker run -i --volume "$(PWD):$(PWD)" -w "$(PWD)" -p "9229:9229" ork-app/node node --inspect-brk=0.0.0.0 \
      node_modules/mocha/bin/mocha \ --timeout 0 --ui bdd
.PHONY: test_debug

test: _docker/node/uuid ## Runs the tests.
   docker run -i --volume "$(PWD):$(PWD)" -w "$(PWD)" ork-app/node node \
      node_modules/mocha/bin/mocha --timeout 0 --ui bdd
.PHONY: test
I wrote a first test just to confirm the setup works correctly:
const {orkBin} = require('./_support.js');
const CliTest = require('command-line-test');
const assert = require('assert');

describe('hello ork', function () {
    it('should display hello ork', async function () {
        const cliTest = new CliTest();
        const {error, stdout, stderr} = await cliTest.spawn(orkBin);

        assert(error === null, error);
        assert(stdout !== null);
        assert(stdout === 'Hello ork\n', stdout);
    });
});
In case you're wondering, the _support.js file will only provide me with a portable solution to find the compiled
ork binary depending on the system the tests are running on:
const os = require('os');
const osName = require('os-name')(os.platform(), os.release()).substr(0, 3);
const locateBin = function () {
    let binPostfix;
    switch (osName) {
        case 'mac':
            binPostfix = 'macos';
            break;
        case 'win':
            binPostfix = 'win.exe';
            break;
        default:
            binPostfix = 'linux';
            break;
    }

    return __dirname + `/../dist/ork-${binPostfix}`;
};

module.exports = {
    orkBin: locateBin()
};
I'm closing this first post on the passing test output:
» make test


  hello ork
    ✓ should display hello ork (408ms)


  1 passing (414ms)
Next
In my next post, I will start working on the actual code laying out the pieces of my application one
by one as I develop the application concept.
Making two great solutions work together.
In my last post, I've ˙praised the uncelebrated power of the WP-CLI shell command.
WP-CLI maintainer Alain Schlesser provided a further tip to make the WP-CLI shell even better through the schlessera/wp-cli-psysh package.
I strongly suggest you try that out.
Another tool I use for my daily work is the Tinkerwell application.
Tintkerwell is a step up from an interactive PHP shell to an elementary code editor.
Tinkerwell UI does not replace a proper PHP IDE, but it provides a UI with some neat features (vim mode, for one) with a clean and straightforward approach.
I've found this article and videos by Ross Wintle enjoyable and easy to follow and suggest you give it a read and look.
I could set up Tinkerwell to work on my local WordPress site in little time, and you will be able to do the same if your WordPress application is served on localhost.
Should that not be the case, e.g., if you're using Local by Flywheel or some other "containerized" solution, then setting Tinkerwell up might require either its remote connection function to do some modification to the WordPress installation configuration file.
Setting up a Local site for Tinkerwell
Since the SSH-based approach seems overkill and too complicated for the simple needs of tinkering on a local site, I prefer the second approach and consistently update my Local by Flywheel websites wp-config.php file to correctly handle requests coming from the Tinkerwell application.
First of all, set the Tinkerwell working directory to the app/public directory of your Local by Flywheel WordPress site:
Second, modify the site wp-config.php file to detect an incoming request from the Tinkerwell application and connect to the WordPress database via the correct database host:
/** MySQL hostname */
if ( isset( $_SERVER['SCRIPT_NAME'] )
	&& false !== stripos( $_SERVER['SCRIPT_NAME'], 'tinkerwell' ) ) {
	// Host from the Local > Database > "Remote Host" field.
	$db_host = '192.168.95.100';
	// Port from the Local > Database > "Remote Port" field, omit if there's no port.
	$db_port = ':4026';
	define( 'DB_HOST', "{$db_host}{$db_port}" );
} else {
	define( 'DB_HOST', 'localhost' );
}
I use the previous version of Local, the Docker-based one, but the snippet will work with the new, MAMP-like version.
If everything is correct, you should be able to start tinkering with your WordPress site using Tinkerwell.
If you're using more elaborate solutions, e.g, a Docker stack, then just set the $db_host and $db_port variables to the database container IP address and port.
Chances are, if you've got no idea what this means, then you're probably not using a container-based solution and the snippet and example above should be fine.